 openspp.org
Submit and manage relief requests
Contents
Submit and manage relief requests#
Applies to: DRIMS
This feature is available in OpenSPP deployments with the DRIMS module installed.
This guide is for field officers who submit requests for relief supplies and coordinators who allocate and dispatch those requests.
What you'll do#
Create a request for relief supplies, submit it for approval, and track it through allocation and dispatch to delivery.
Before you start#
Field officers need Field Officer or Officer access to create requests
Approvers need the DRIMS Approver role
Coordinators need DRIMS Coordinator or Manager access to allocate and dispatch
A hazard incident must exist before you can submit a request — see Hazards and incidents
Know which incident you're responding to and the destination area
An implementer must configure approval workflows before requests can be routed. See Approval workflows overview
Understanding request states#
A request moves through two parallel tracks:
Approval state — tracks whether the request has been reviewed:
Approval state |
Meaning |
|---|---|
Draft |
Being written, not yet submitted |
Pending |
Submitted, waiting for a reviewer to act |
Revision |
Reviewer asked for changes |
Approved |
Approved and ready for logistics |
Rejected |
Declined |
Fulfillment state — tracks logistics progress after approval:
Fulfillment state |
Meaning |
|---|---|
Ready for Allocation |
Approved, waiting for a coordinator to assign warehouse stock |
Ready for Dispatch |
Stock allocated, waiting for warehouse to ship |
Dispatched |
All lines have been dispatched |
Delivered |
Confirmed received at destination |
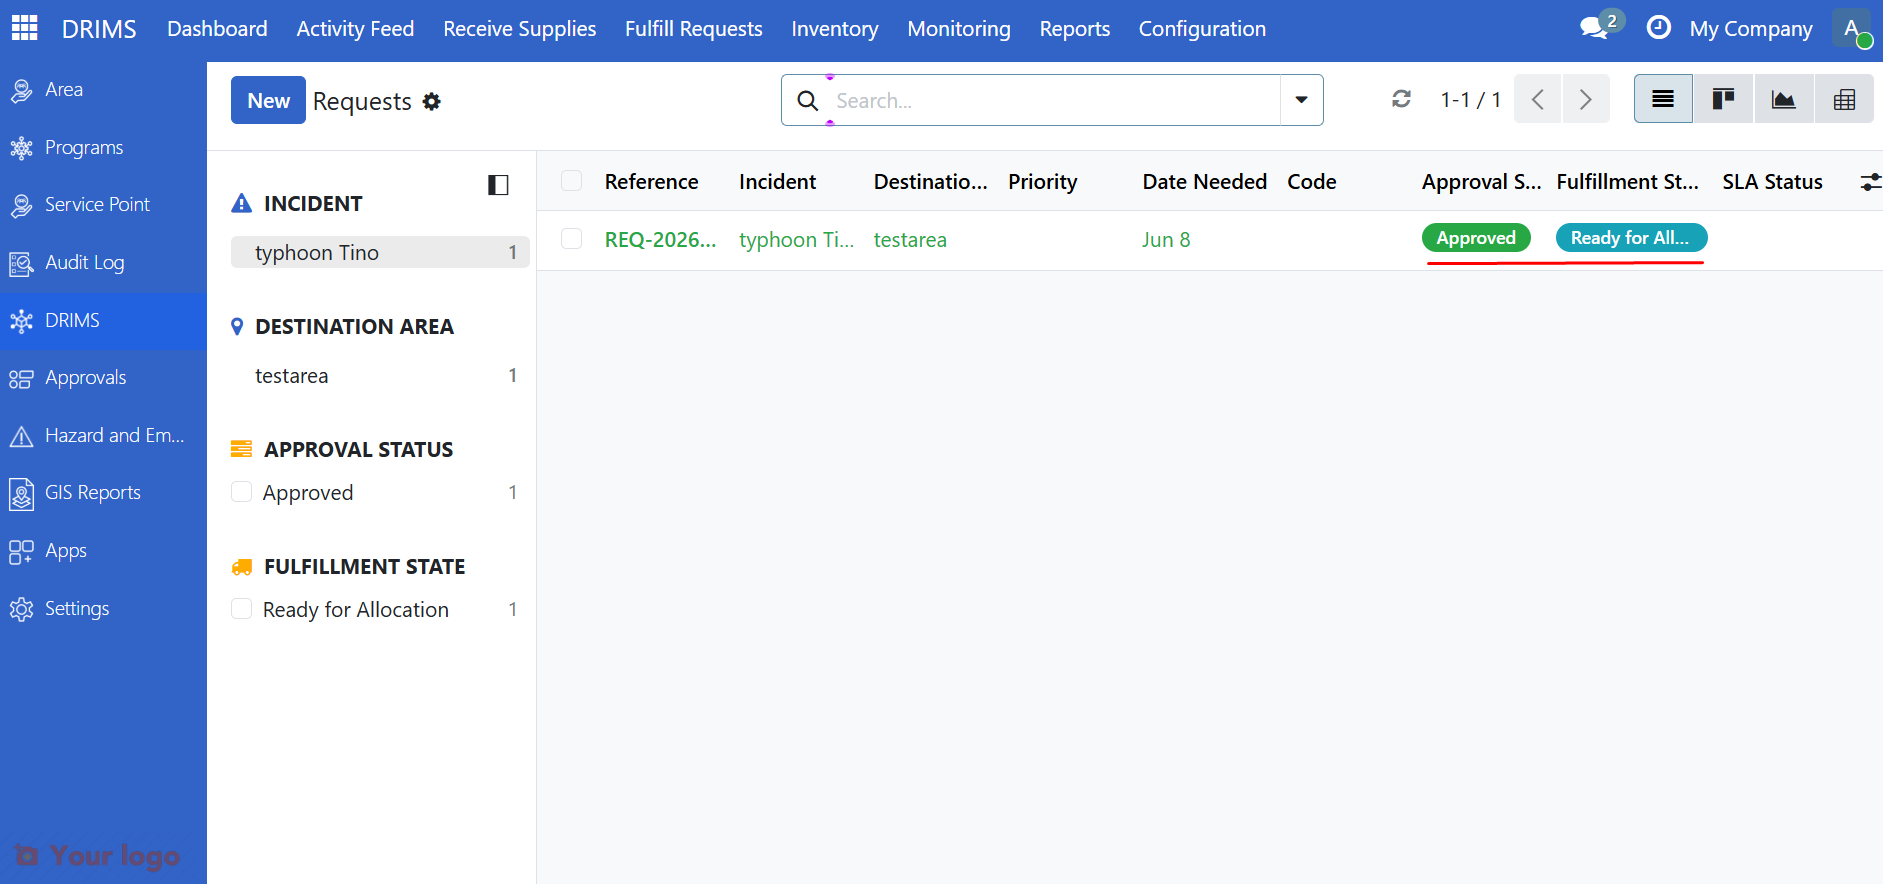
Both states are shown in the requests list. Use the Ready for Allocation and Ready for Dispatch quick filters to find requests that need action.
For field officers: submit a request#
3. Fill in the request details#
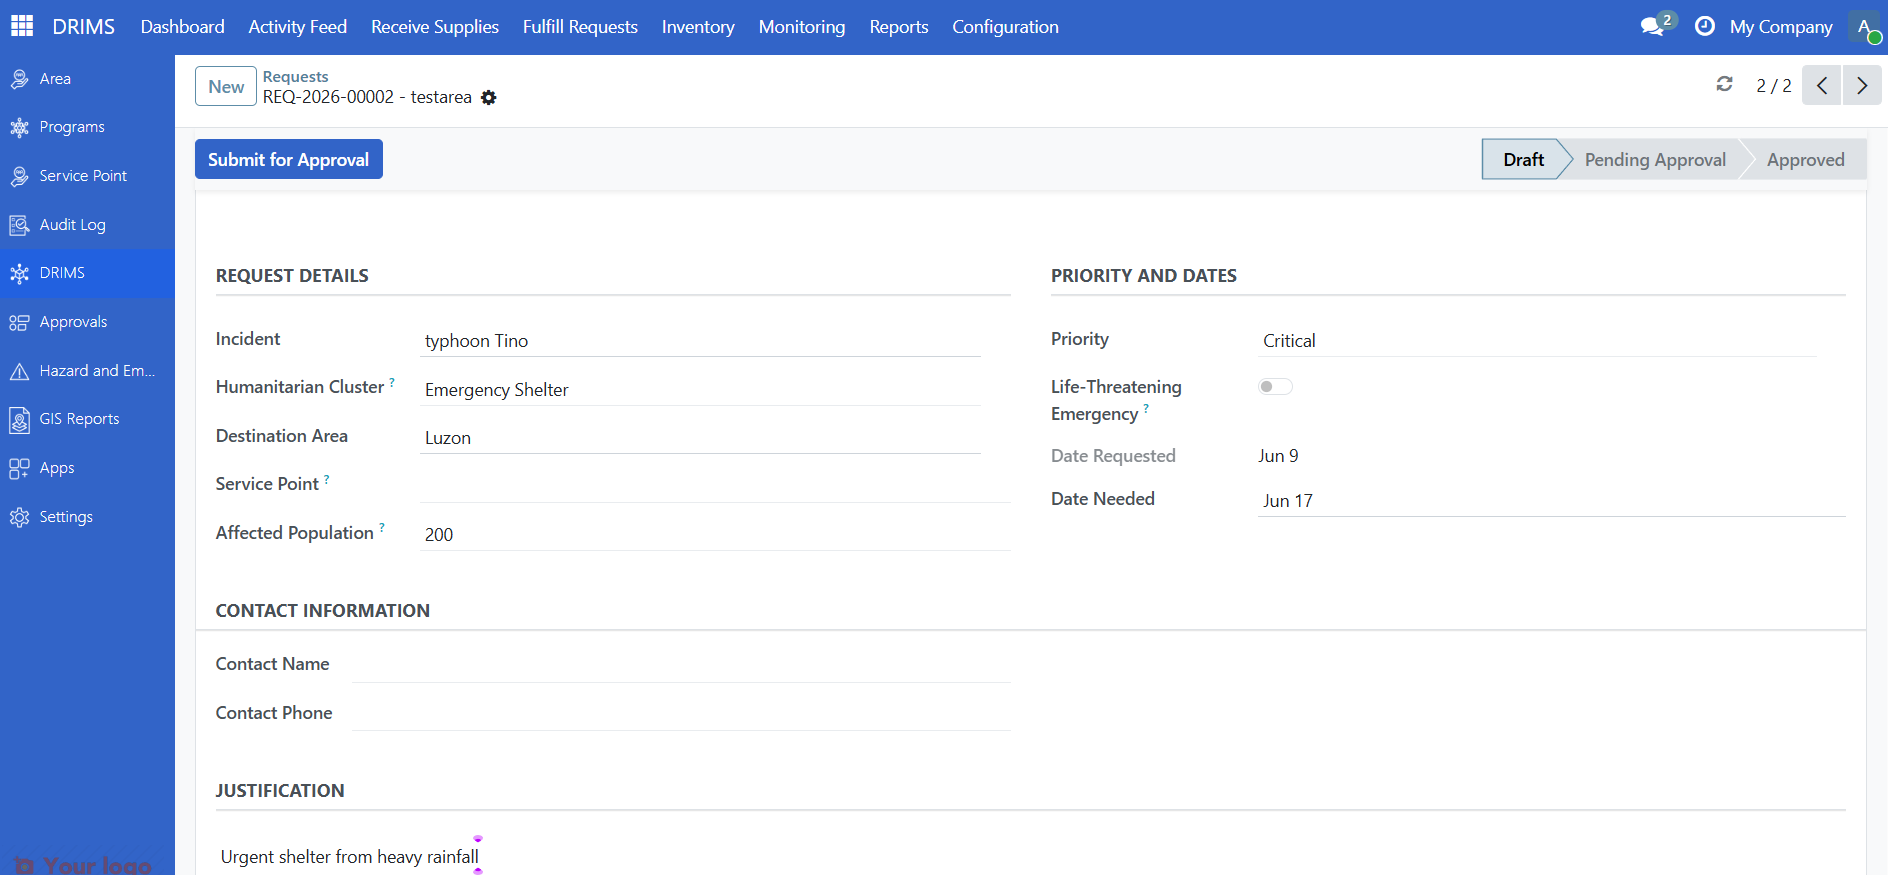
Complete the following fields:
Field |
Instructions |
|---|---|
Incident |
The disaster you're responding to (e.g., "Flood 2025 — Western Region") |
Destination Area |
The geographic area where supplies are needed |
Priority |
How urgent the request is — see Priority levels below |
Humanitarian Cluster |
Humanitarian cluster, if your organization uses them (optional) |
Date needed |
When supplies must arrive — be realistic |
Justification |
Why the supplies are needed; be specific about the situation and number of people affected |
Affected population |
Number of people who will benefit |
4. Add requested items#
In the Requested items section, click Add a line.
For each item:
Field |
What to enter |
|---|---|
Product |
The item needed (e.g., "Emergency Blankets", "Water Purification Tablets") |
Quantity |
How many units are required |
Unit |
Unit of measure (pieces, boxes, liters, etc.) |
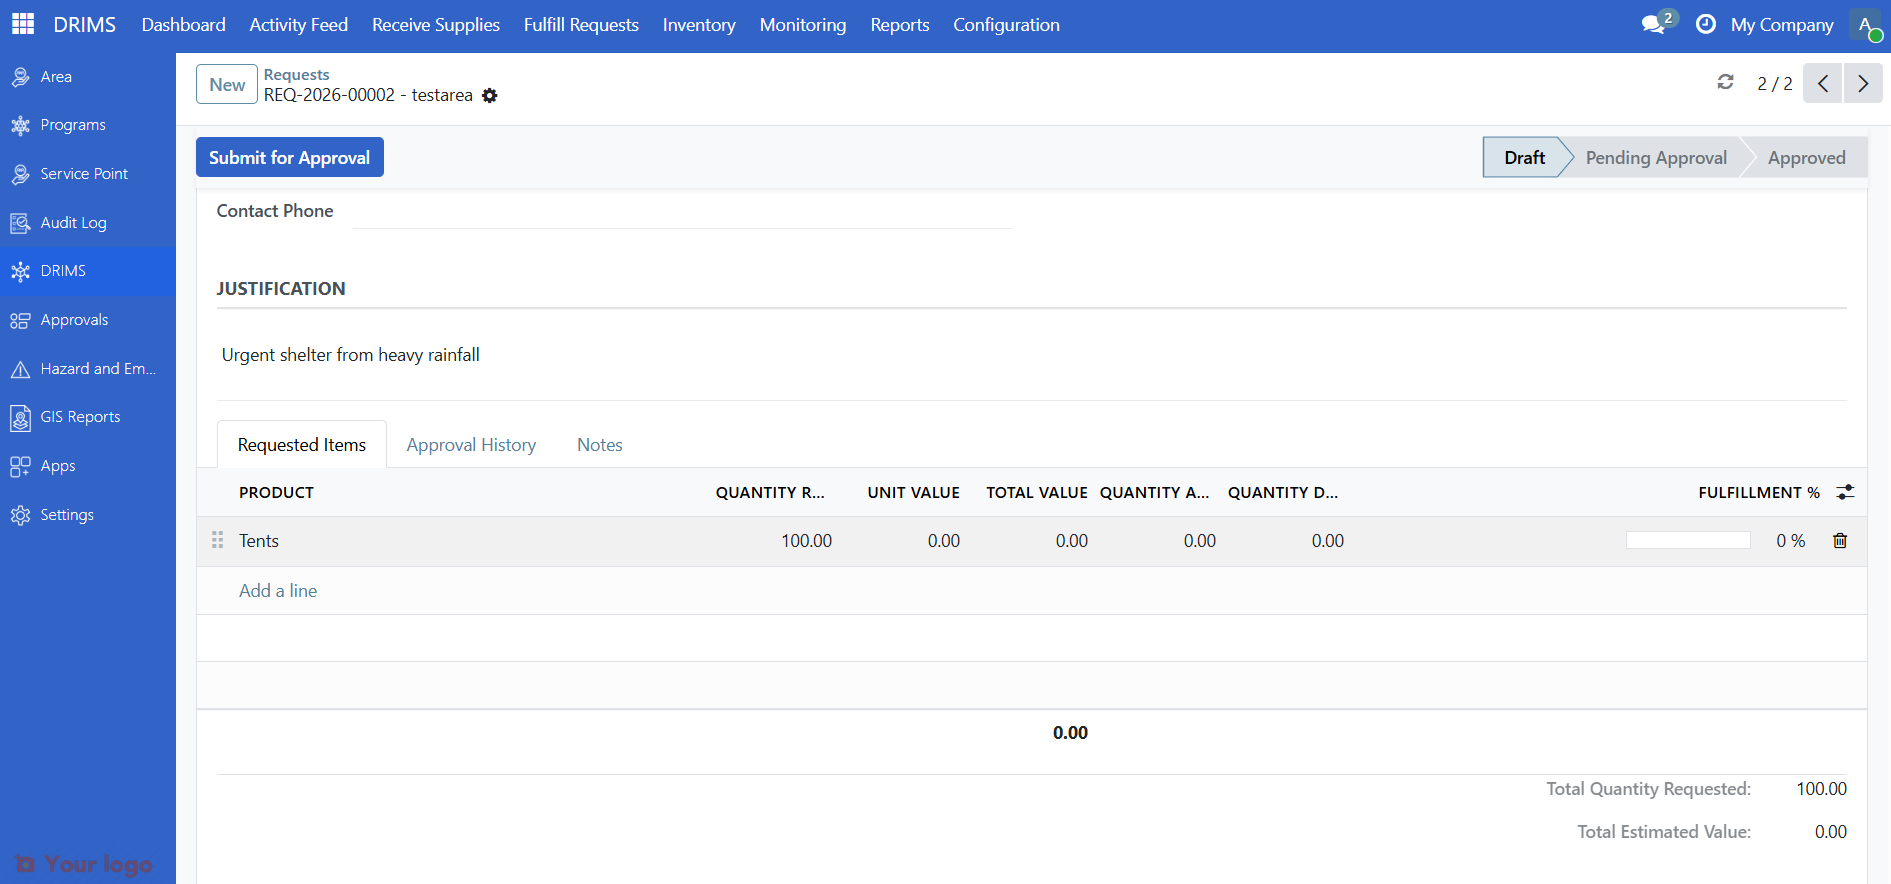
Repeat for each type of supply needed.
5. Mark as life-threatening (if needed)#
If this request involves a genuine life-threatening emergency, check the Life-Threatening Emergency box.
Important
Only use this for genuine emergencies where delays could result in loss of life. Misuse delays critical help for people in real emergencies.
6. Save and submit#
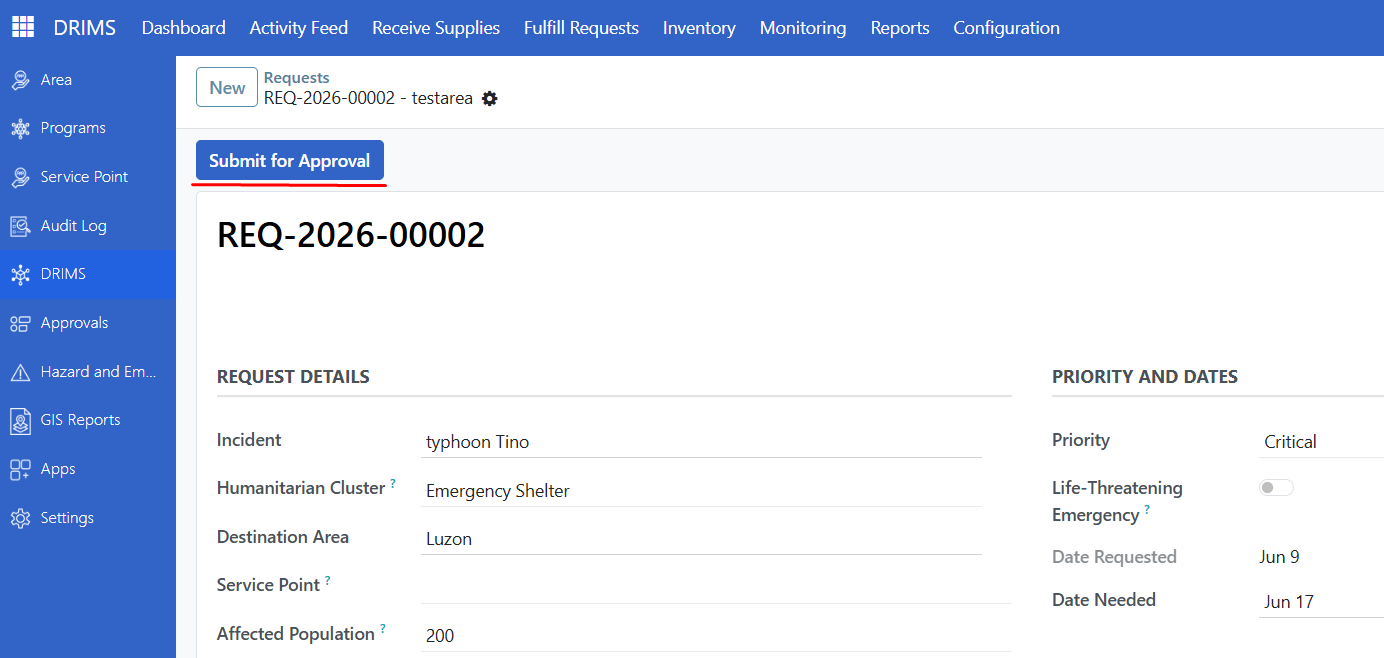
Click Save to save as a draft. You can come back and edit it.
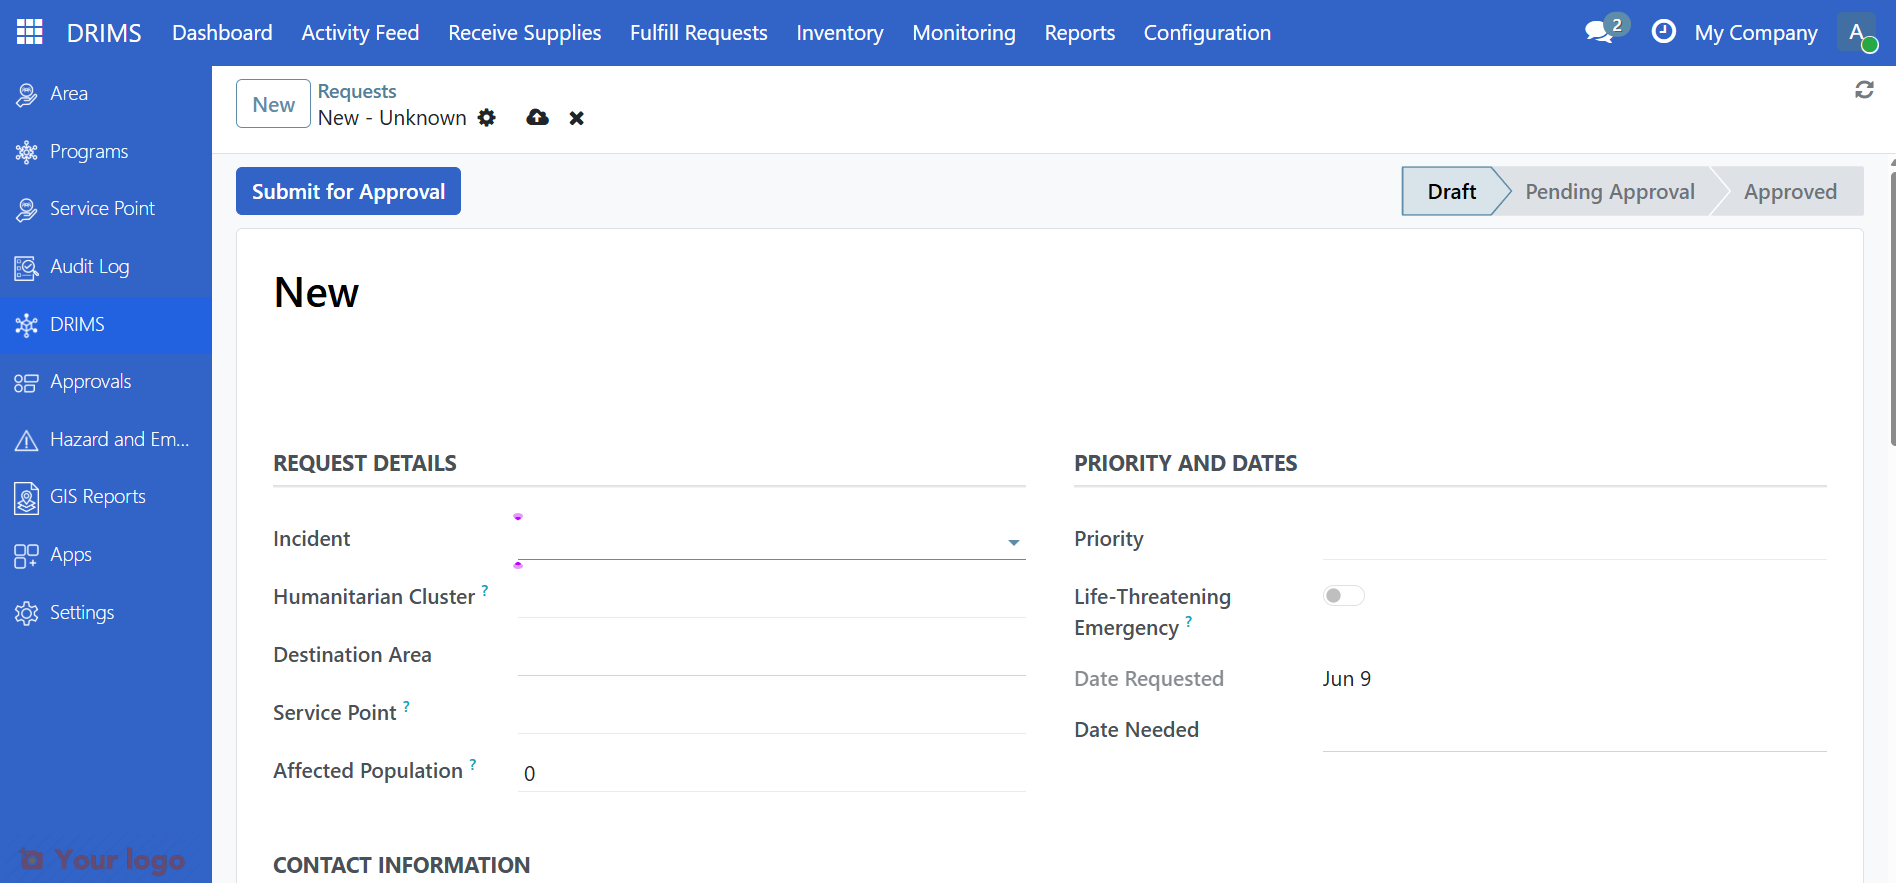
When ready, click Submit for Approval. The approval state changes to Pending and the request goes to your designated reviewer.
What happens after you submit#
Stage |
Who acts |
What they do |
|---|---|---|
Pending |
Approver |
Reviews the request and approves, requests changes, or rejects |
Revision |
You |
Make the requested changes and click Resubmit for Approval |
Ready for Allocation |
Coordinator |
Allocates warehouse stock |
Ready for Dispatch |
Warehouse staff |
Picks and ships the items |
Delivered |
Field officer |
Confirms receipt |
You can track the current state at any time by opening the request from the list.
For approvers: approve or return a request#
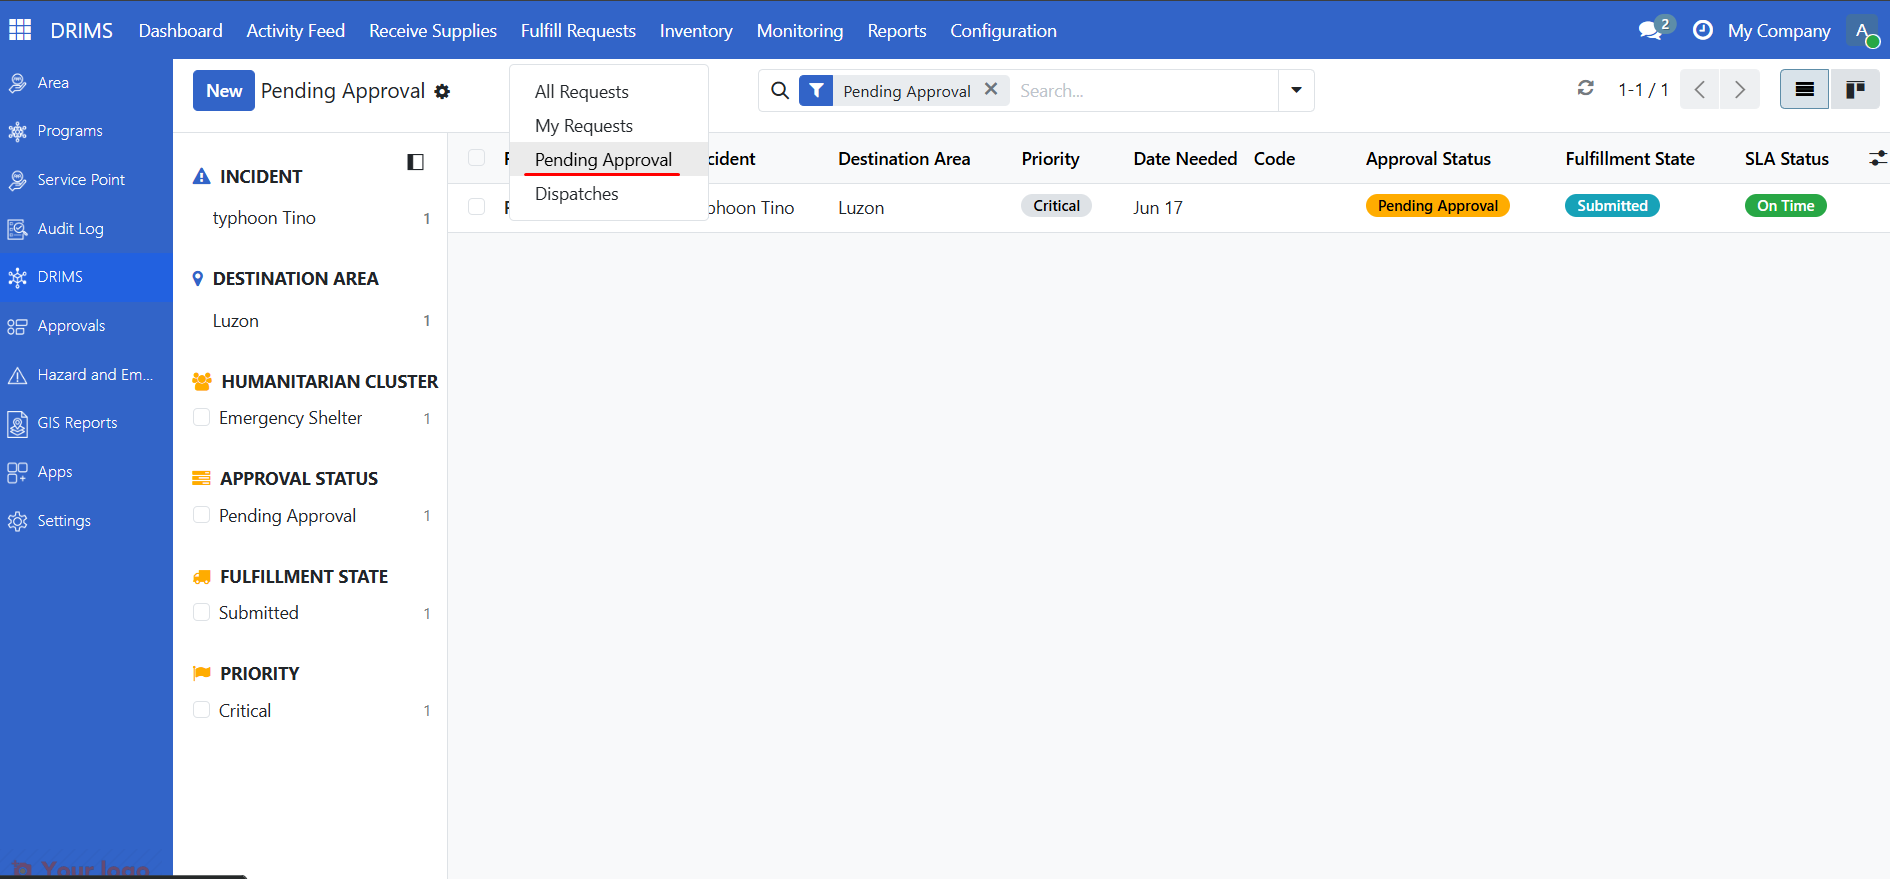
Find requests to review#
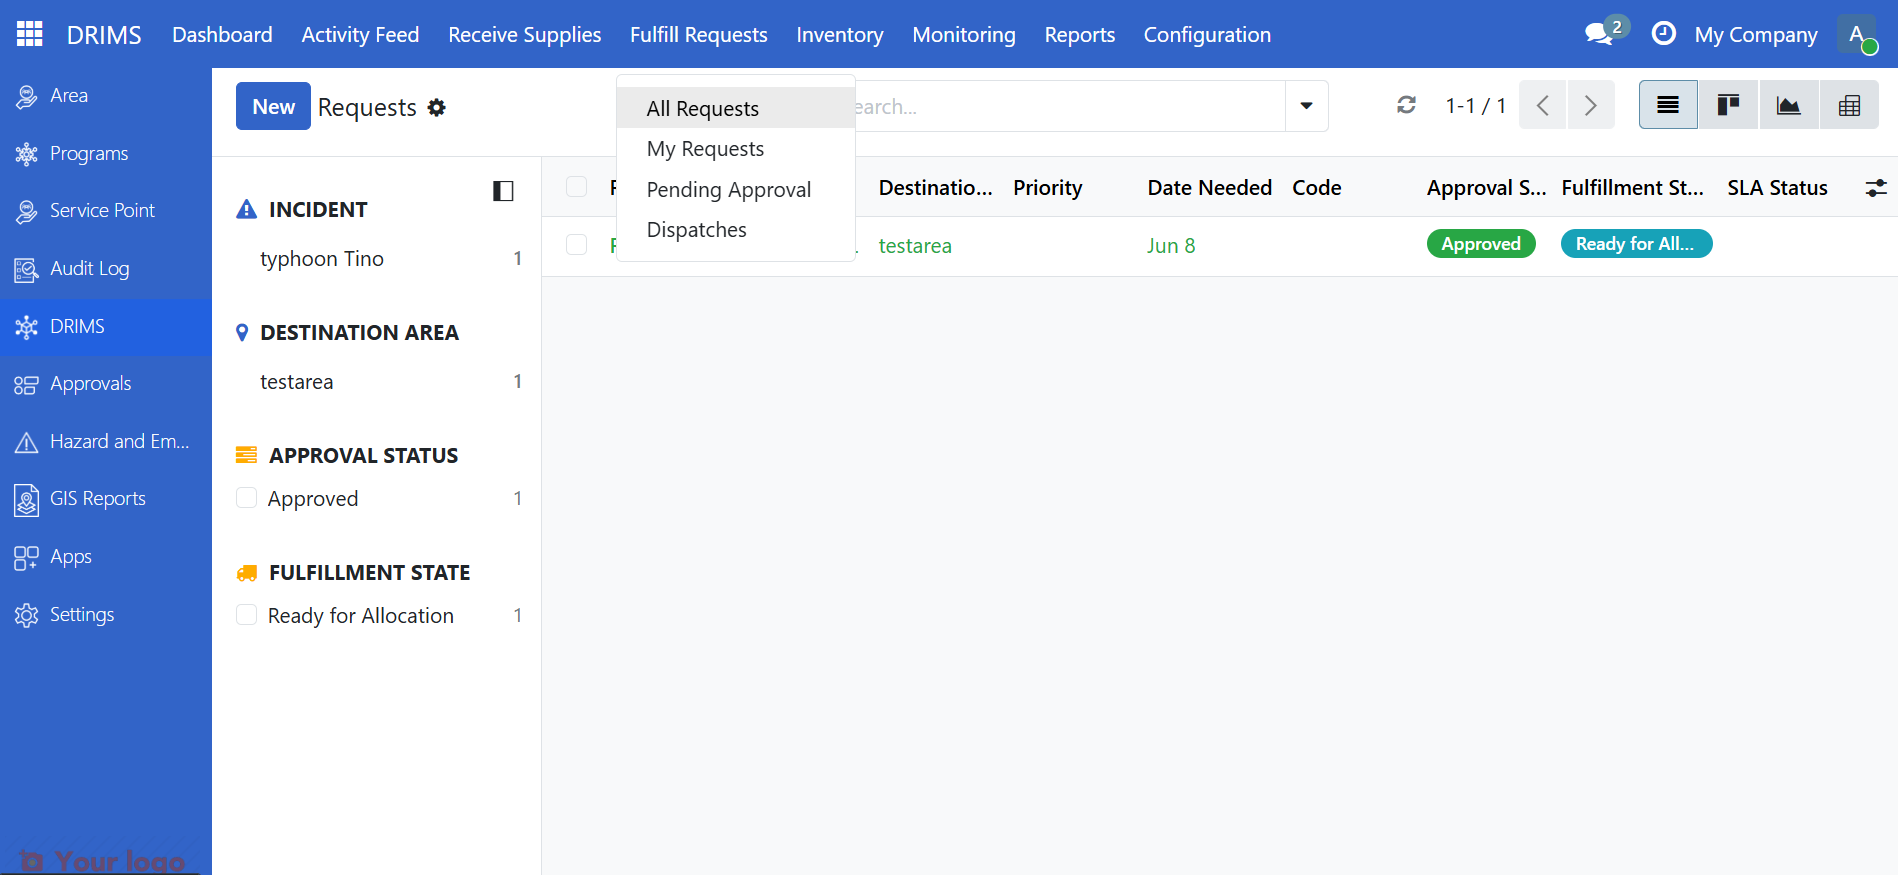
Use the Pending Approval filter on the requests list to find requests waiting for your decision.
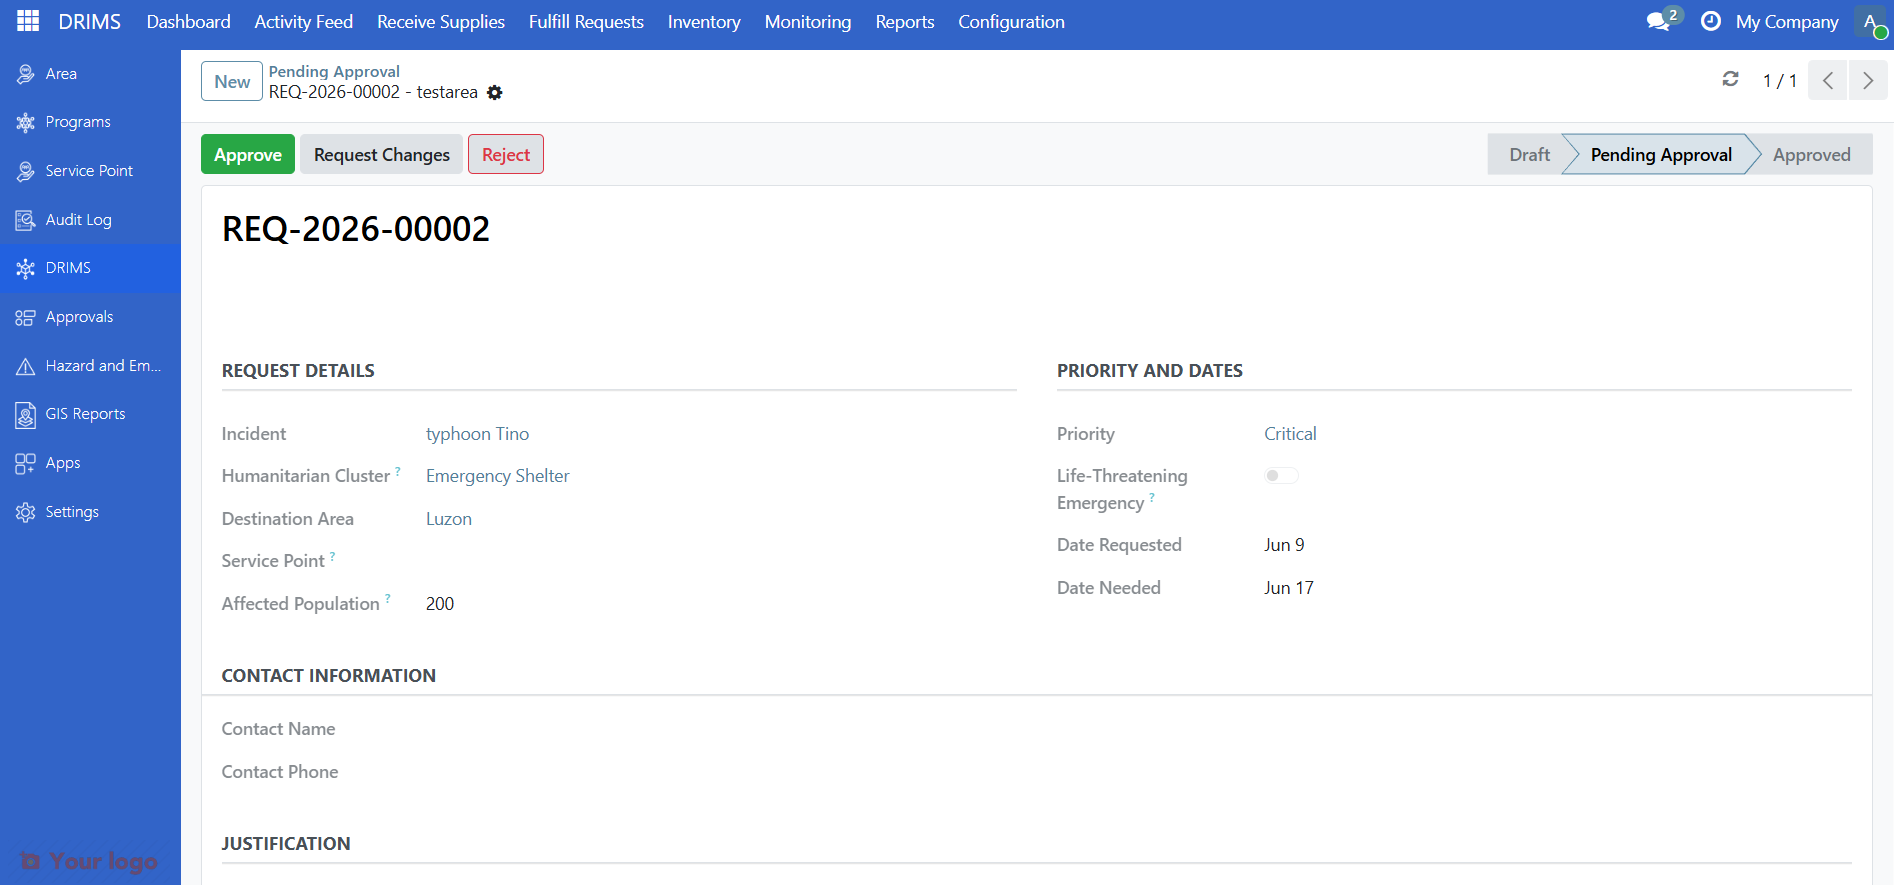
Open a request, review the details, and choose:
Button |
What it does |
|---|---|
Approve |
Moves to Ready for Allocation |
Request Changes |
Returns to the requester with notes |
Reject |
Declines the request (requires a reason) |
For coordinators: allocate stock#
After a request is approved, a coordinator assigns warehouse stock to it.
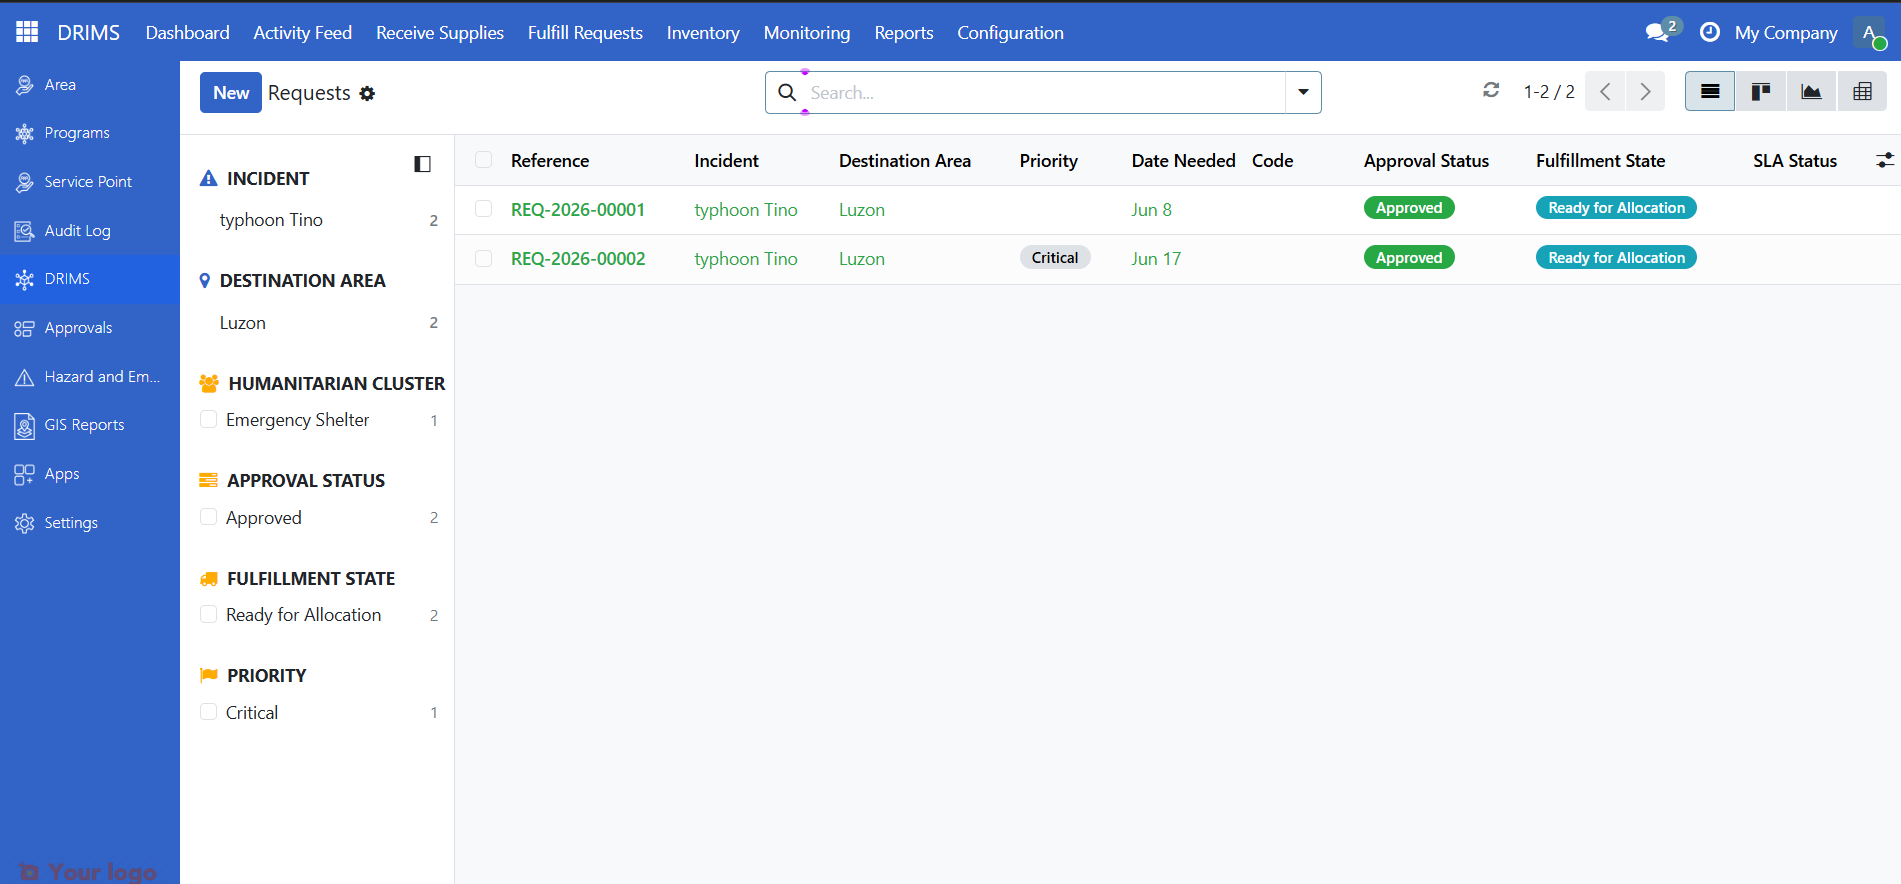
1. Find requests ready for allocation#
Use the Ready for Allocation quick filter on the requests list.
2. Open the request and allocate#
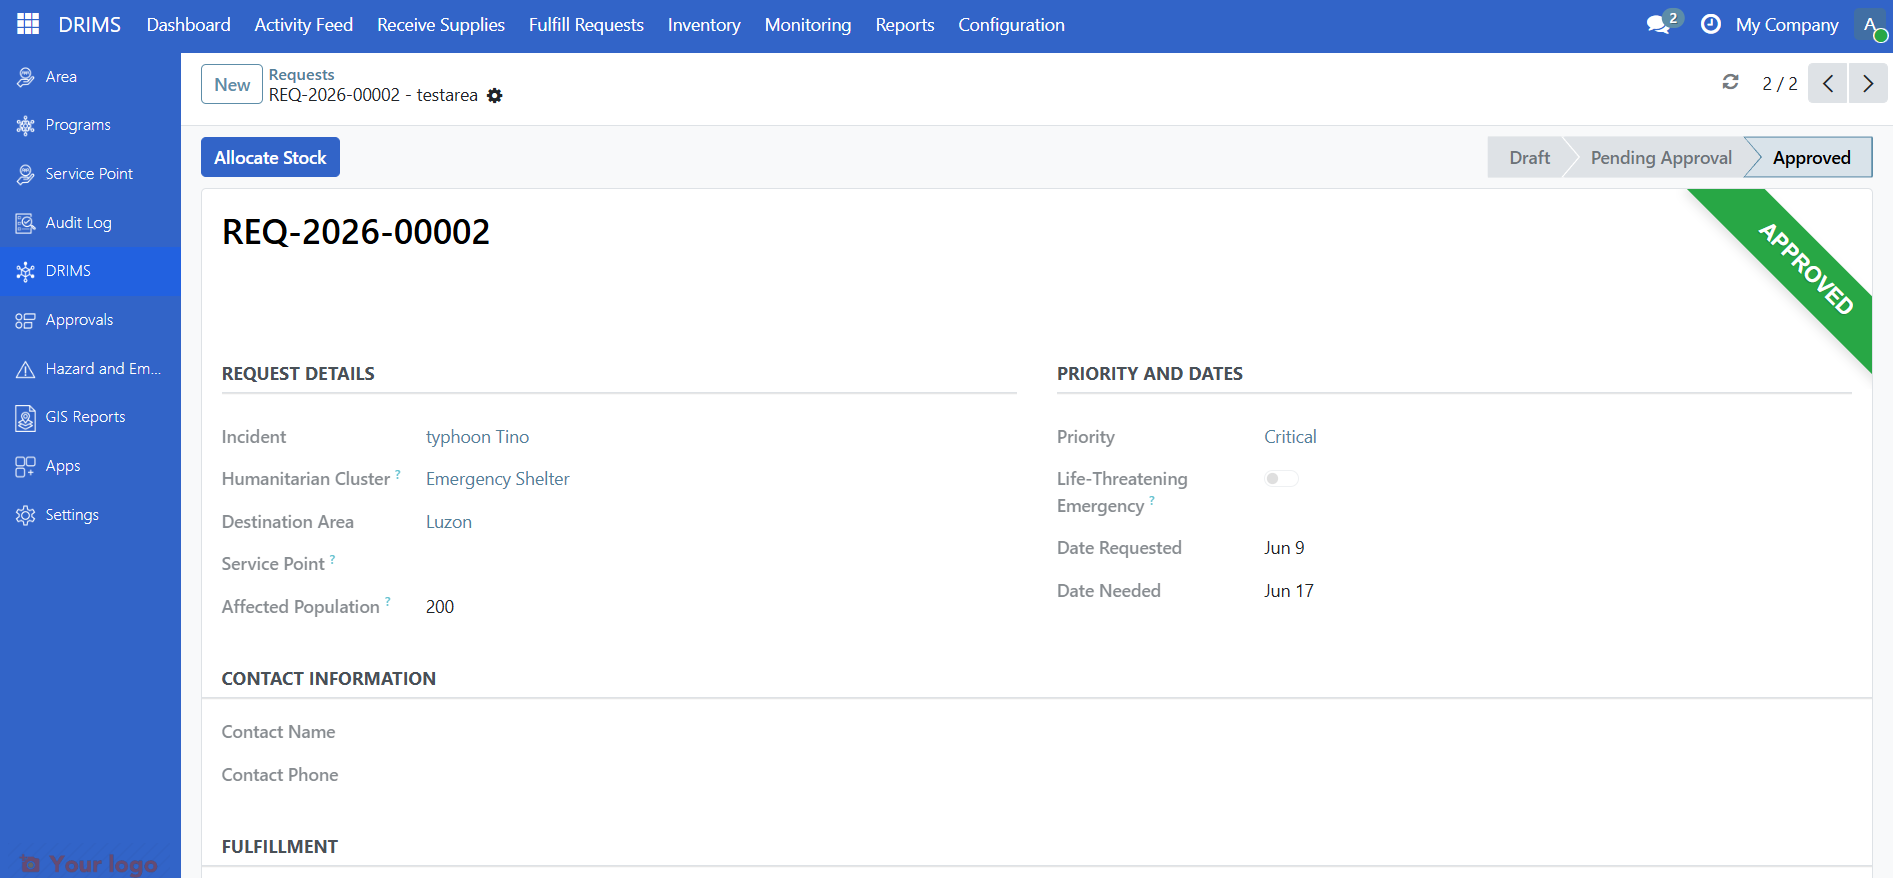
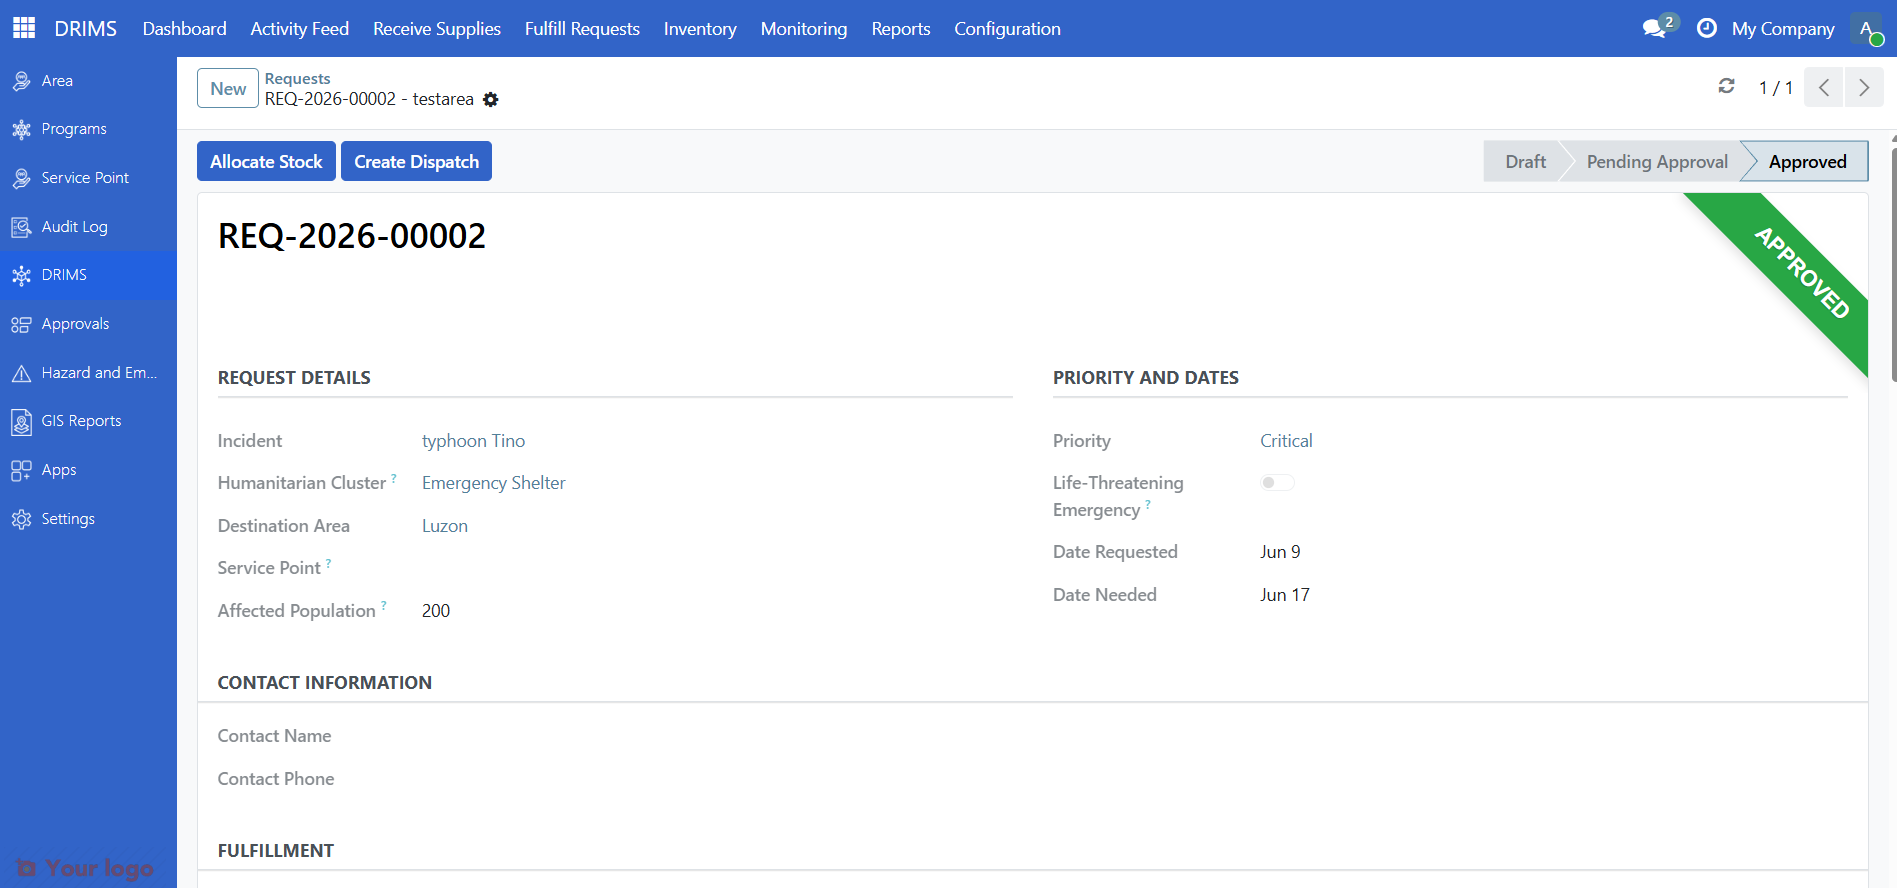
Open the request. You'll see an Approved stamp in the top-right corner and the Allocate Stock button in the header.
Before clicking Allocate Stock, scroll to the Fulfillment section and select a Source Warehouse. This field is required — the button will show a "Missing required fields" error if it's empty.
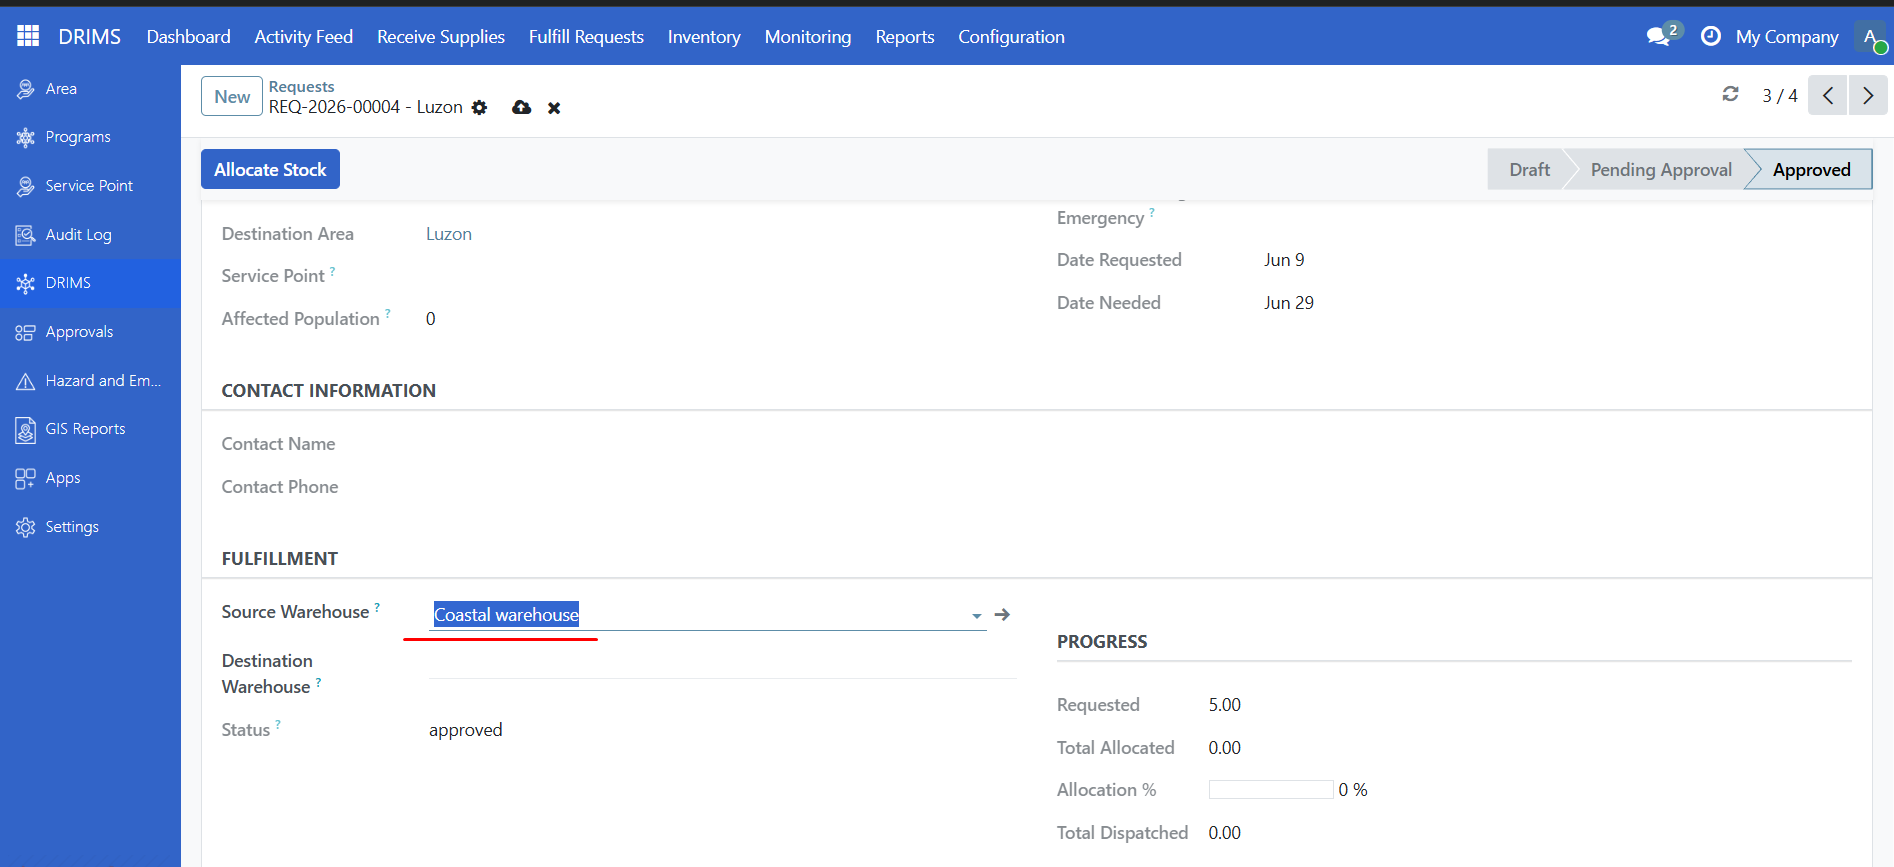
Once a warehouse is selected, click Allocate Stock to open the allocation preview.
The allocation wizard shows available stock for each requested item, including quantities already reserved by other requests.
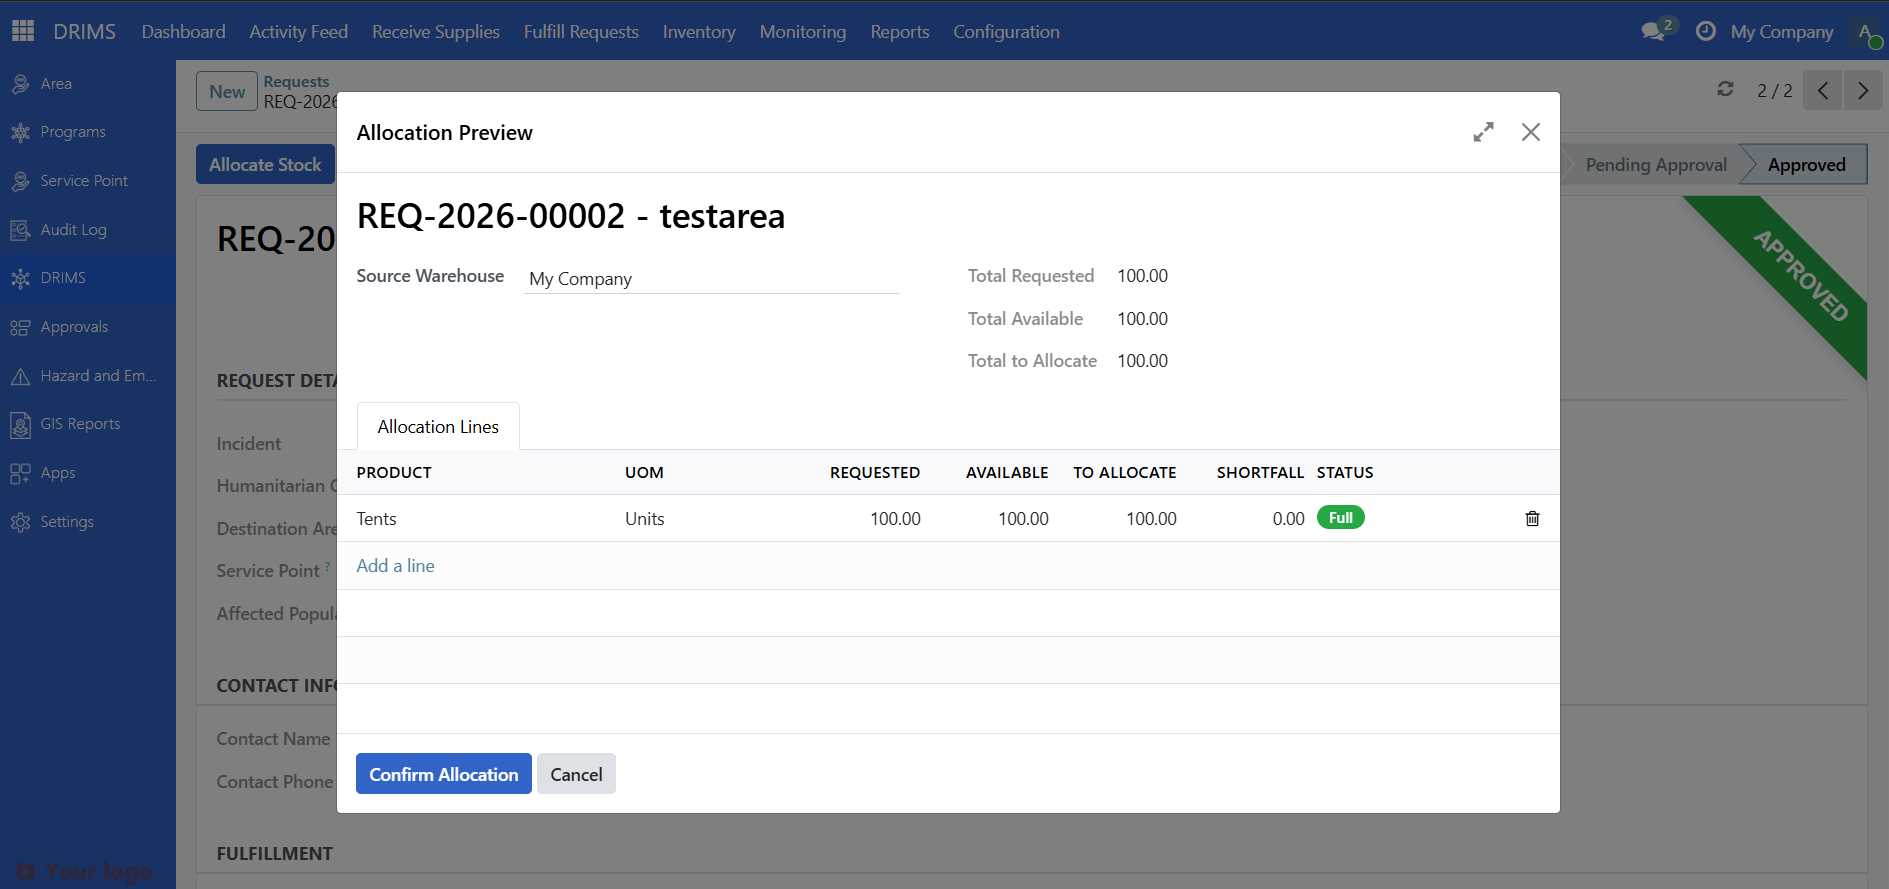
Review the available quantities. If stock is insufficient, you can allocate what's available and create a partial dispatch — see Partial dispatches below.
When ready, click Confirm Allocation.
Once confirmed, the fulfillment state changes to Ready for Dispatch and the Create Dispatch button appears.
3. Create a dispatch#
Click Create Dispatch to generate the dispatch picking for warehouse staff to process.
See Process a dispatch for how warehouse staff process the dispatch.
Partial dispatches#
You can dispatch a request in multiple shipments — for example, if not all items are currently in stock:
Allocate the available stock and click Create Dispatch for what's available
The request stays in Ready for Dispatch state while some quantity remains outstanding
When new stock arrives (from a new donation), return to the request, click Allocate Stock again for the remaining balance, then click Create Dispatch
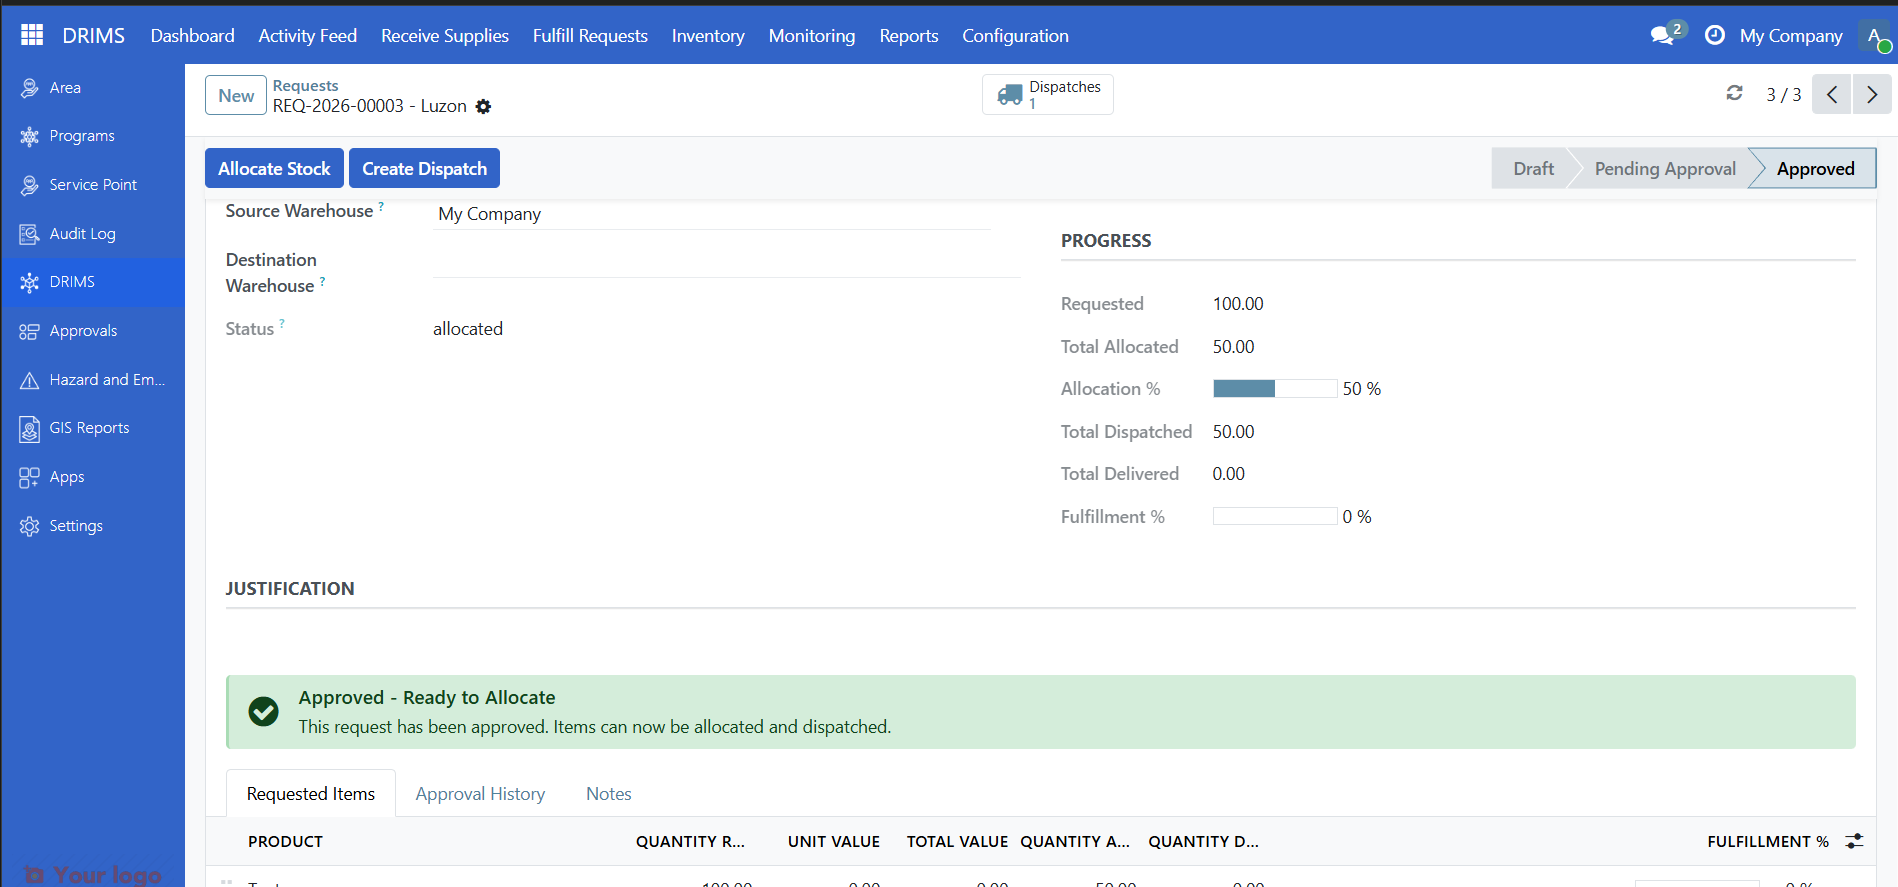
The request only advances to Dispatched once all lines have been fully dispatched.
Priority levels#
Choose the right priority for your request:
Priority |
When to use |
Expected response |
|---|---|---|
Critical |
Immediate threat to life, injuries, imminent danger |
Within hours |
Urgent |
Pressing needs, situation deteriorating or people at risk |
Within 24 hours |
Routine |
Standard relief needs, stable situation, supplementary supplies |
When resources allow |
Example — Critical: "50 people trapped in flooded area, rescue equipment and medical supplies needed immediately."
Example — Urgent: "Evacuation center has 200 people but food from yesterday is nearly exhausted."
Example — Routine: "Community center housing 80 families needs additional blankets and cooking supplies."
Are you stuck?#
Can't find the incident in the dropdown?
The incident may not exist yet. See Manage hazard incidents to create one, or ask your supervisor or DRIMS administrator to create it.
Submit button is grayed out?
All required fields must be filled: Incident, Destination Area, Priority, Date Needed, and at least one requested item.
Request stuck in Pending for days?
Contact your approver — they may not have seen the notification. You can see who the approver is in the Followers section at the bottom of the form.
Request returned for revision?
Open the request, check the notes in the message thread at the bottom, make the requested changes, and click Resubmit for Approval.
Allocate Stock button is blocked with an error?
Make sure a Source Warehouse is selected on the request form. The allocation cannot proceed without a warehouse.
Nothing in stock to allocate?
You have two options: wait for a new donation to be stocked, or allocate a partial quantity now and create another dispatch later when stock arrives.
Need to cancel a submitted request?
You can't cancel a pending request yourself. Ask your approver to reject it, or contact your DRIMS coordinator.
Next steps#
Process a dispatch - How warehouse staff process the dispatch
Handle returns - How to handle items returned from the field
Understand the Dashboard - Monitor request status and alerts