Custom Fields (Registry Field Builder)
Contents
Custom Fields (Registry Field Builder)#
This guide is for implementers adding custom fields to the registry. You should be comfortable with form builders like KoBoToolbox, but you don't need programming knowledge.
What are custom fields?#
The Custom Fields tool (also known as Registry Field Builder) lets you add custom fields to Individual and Group registries without developer help. Place fields in pre-defined sections of the registry forms.
When to use Registry Field Builder#
Use this tool when you need to track information that isn't in the standard OpenSPP registry:
Use Case |
Example Field |
|---|---|
Country-specific IDs |
"Pantawid ID" for Philippines |
Disability information |
"Disability Type" dropdown |
Program-specific data |
"Vulnerability Score" number |
Custom contact info |
"WhatsApp Number" text field |
Housing conditions |
"Housing Material" selection |
Mental model#
Think of the registry as a form with pre-defined tabs and sections. Individual and Group registries have separate placement zones:
Individual Registry:
Tab |
Sections |
What Goes Here |
|---|---|---|
Profile |
Demographics, Contact, Financial |
Personal info, age, gender, phone, income |
Identity |
IDs, Relationships |
National ID, program IDs, family connections |
Participation |
(single zone) |
Program enrollments, survey data |
Group Registry:
Tab |
Sections |
What Goes Here |
|---|---|---|
Profile |
Contact, Financial |
Group address, phone, bank details |
Identity |
IDs, Relationships |
Group IDs, member connections |
Participation |
(single zone) |
Program enrollments, events |
You can add fields to any section that matches your target registry type.
Before you start#
Prerequisites#
Studio Editor or Studio Manager permissions
Understanding of what data you need to collect
Clear field names and labels planned
Planning your field#
Before creating a field, decide:
Label: What users will see (e.g., "Disability Type")
Field type: Text, number, date, dropdown, etc.
Target registry: Individual or Group
Placement zone: Which tab and section
Options: Required? Searchable?
Help text: Tooltip to help users understand the field
Creating a custom field#
Custom fields are created directly in an inline editing list. You can configure all field properties in a single row.
Step 1: Open custom fields#
Click Studio in the main menu
Click Custom Fields card on the dashboard
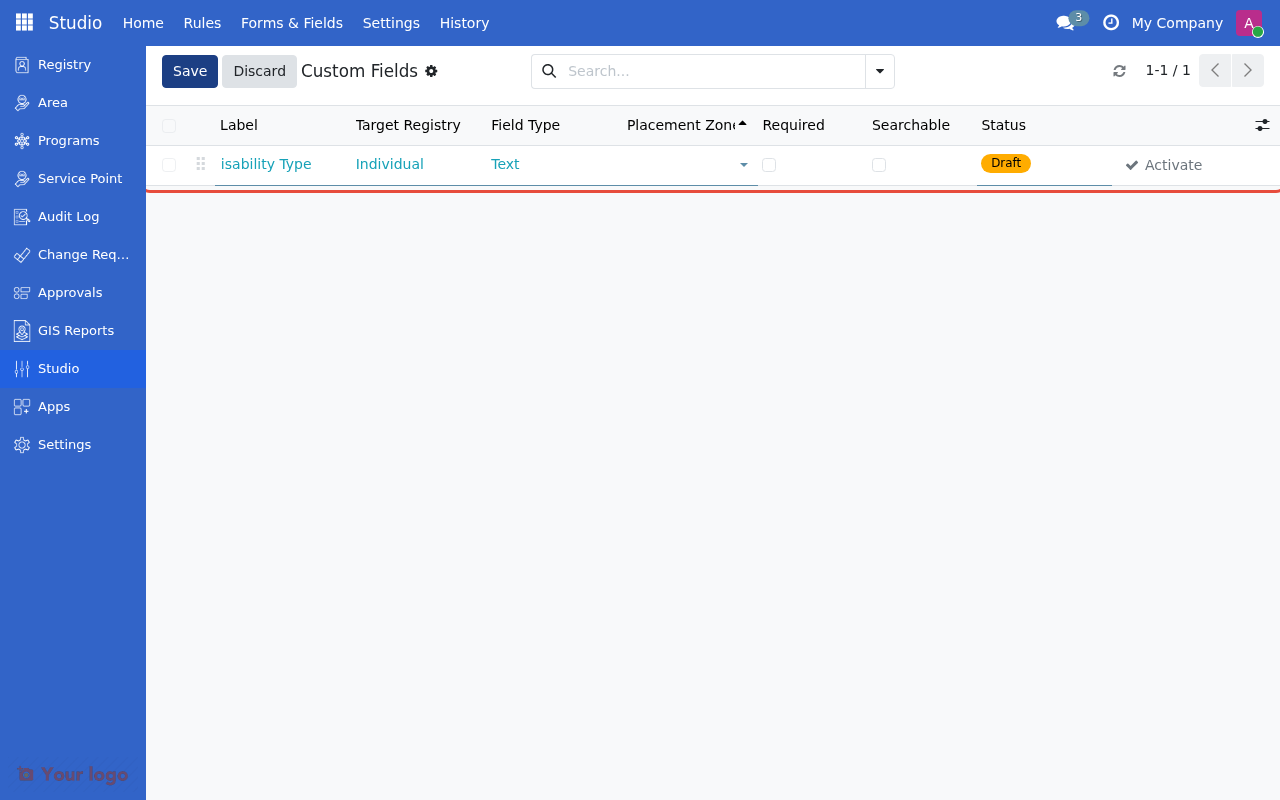
Click New to create a new field

Click New to create a new custom field.#
Step 2: Enter field details#
When you click New, a new row appears for inline editing. Fill in the field details:
Column |
What to Enter |
Example |
|---|---|---|
Label |
What users see |
"Disability Type" |
Target Registry |
Individual or Group |
Individual |
Field Type |
Type of data to collect |
Text |
Placement Zone |
Where field appears |
Individual - Demographics |
Required |
Must users fill this? |
☐ (unchecked) |
Searchable |
Include in search filters? |
☐ (unchecked) |
Enter the field label and select the target registry.#
Target registry options#
Option |
Use When |
|---|---|
Individual |
Field applies to people (e.g., "Disability Type") |
Group |
Field applies to households/groups (e.g., "Housing Material") |
Step 3: Select field type#
Click on the Field Type column to see available options:
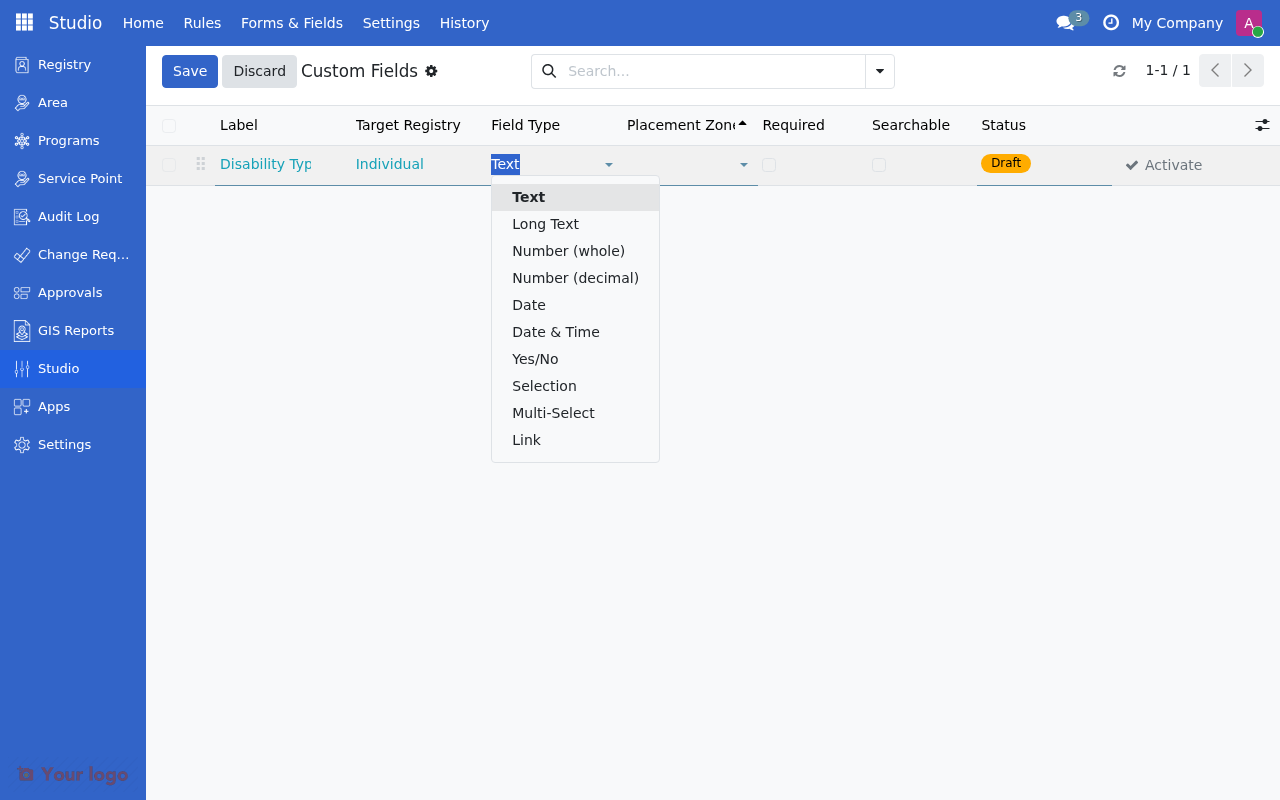
Select the field type from the dropdown.#
Field type options#
Type |
Use For |
Example |
|---|---|---|
Text |
Short text up to 256 characters |
"Pantawid ID", "WhatsApp Number" |
Long Text |
Multi-line notes or descriptions |
"Special Needs Notes" |
Whole Number |
Counting numbers |
"Number of Dependents" |
Decimal Number |
Amounts with decimals |
"Vulnerability Score" |
Date |
Calendar dates |
"Last Assessment Date" |
Date & Time |
Date with time |
"Appointment DateTime" |
Yes/No |
Checkbox for true/false |
"Has Disability" |
Selection |
Single choice from list |
"Disability Type", "Housing Material" |
Multi-Select |
Choose multiple options |
"Languages Spoken" |
Link |
Link to another record |
"Link to Area", "Link to Language" |
Step 4: Select placement zone#
Click on the Placement Zone column and search for the appropriate zone:
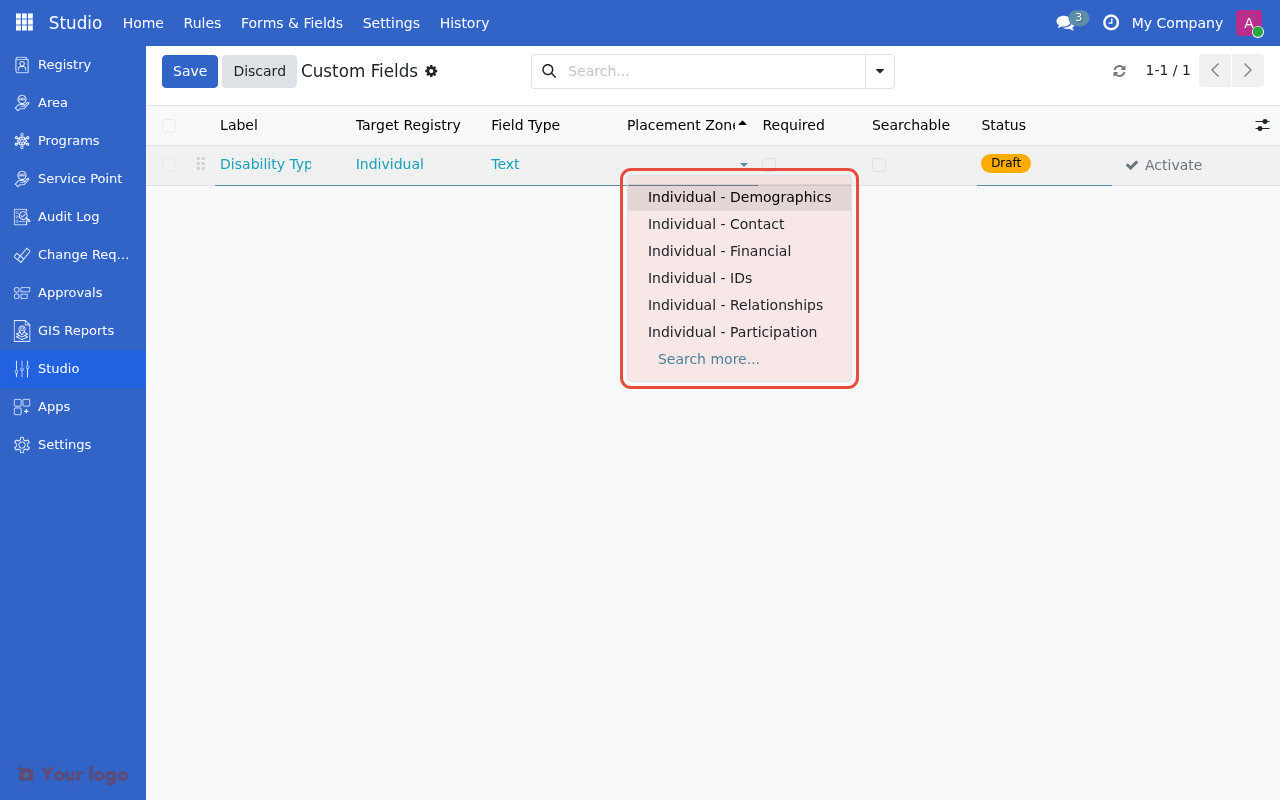
Choose a placement zone from the dropdown to set where the field appears.#
Placement zones#
Select where the field appears in the registry form:
Individual Registry Zones:
Zone |
Description |
|---|---|
Individual - Demographics |
Birthdate, gender, personal info |
Individual - Contact |
Address, phone, email |
Individual - Financial |
Bank accounts, income details |
Individual - IDs |
National ID, program IDs |
Individual - Relationships |
Family connections |
Individual - Participation |
Program enrollments, events |
Group Registry Zones:
Zone |
Description |
|---|---|
Group - Contact |
Group address, phone |
Group - Financial |
Group bank details |
Group - IDs |
Group IDs |
Group - Relationships |
Member connections |
Group - Participation |
Program enrollments |
Step 5: Save the field#
Click Save or press Enter to save the field. The field is created in Draft status.
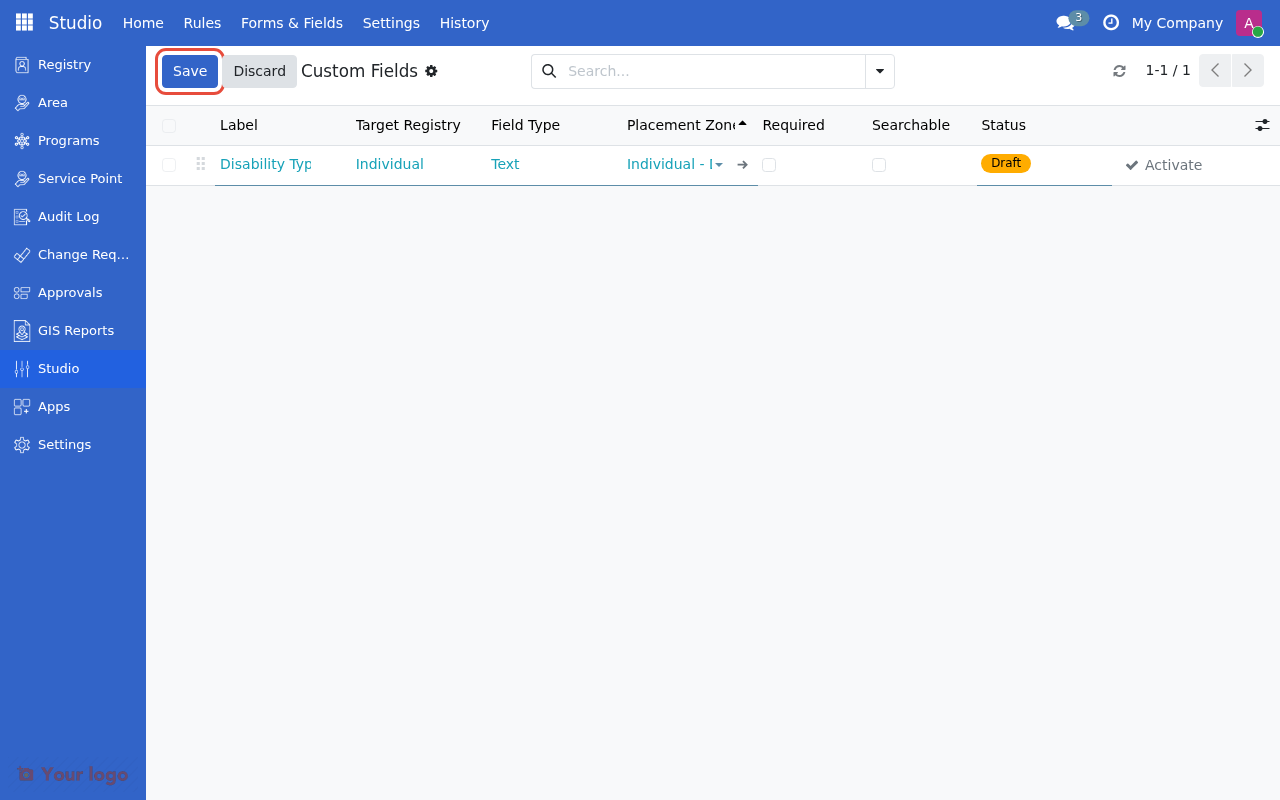
Click Save to save the field in Draft status.#
Note
Fields are created as Draft by default. Draft fields can be edited freely but are not visible in registry forms until activated.
Optional columns#
The list view has additional optional columns you can enable:
Column |
When to Use |
|---|---|
Required |
Check if users must fill this field before saving |
Searchable |
Check if field should appear in search filters |
Selection Options |
For Selection/Multi-Select types only |
Selection options (for Selection/Multi-Select)#
For Selection or Multi-Select fields, you'll need to open the field details (double-click the row) to enter the choices:
physical|Physical Disability
visual|Visual Impairment
hearing|Hearing Impairment
cognitive|Cognitive Disability
Format: value|Label (one per line). If you omit the value, the label is used as both.
Link options (for Link type)#
If you chose Link, open the field details to configure:
Setting |
What to Enter |
|---|---|
Link to |
Select the model to link to (e.g., Area, Language) |
Filter |
Optional domain to filter records (e.g., |
Visibility conditions (advanced)#
For conditional visibility, open the field details and configure:
Setting |
Use When |
|---|---|
Always Visible |
Field always appears |
Show Conditionally |
Show based on another field's value |
Condition operators:
Operator |
Meaning |
|---|---|
Is Set |
Show when the controlling field has any value |
Is Not Set |
Show when the controlling field is empty |
Equals |
Show when the controlling field equals a specific value |
Does Not Equal |
Show when the controlling field doesn't equal a value |
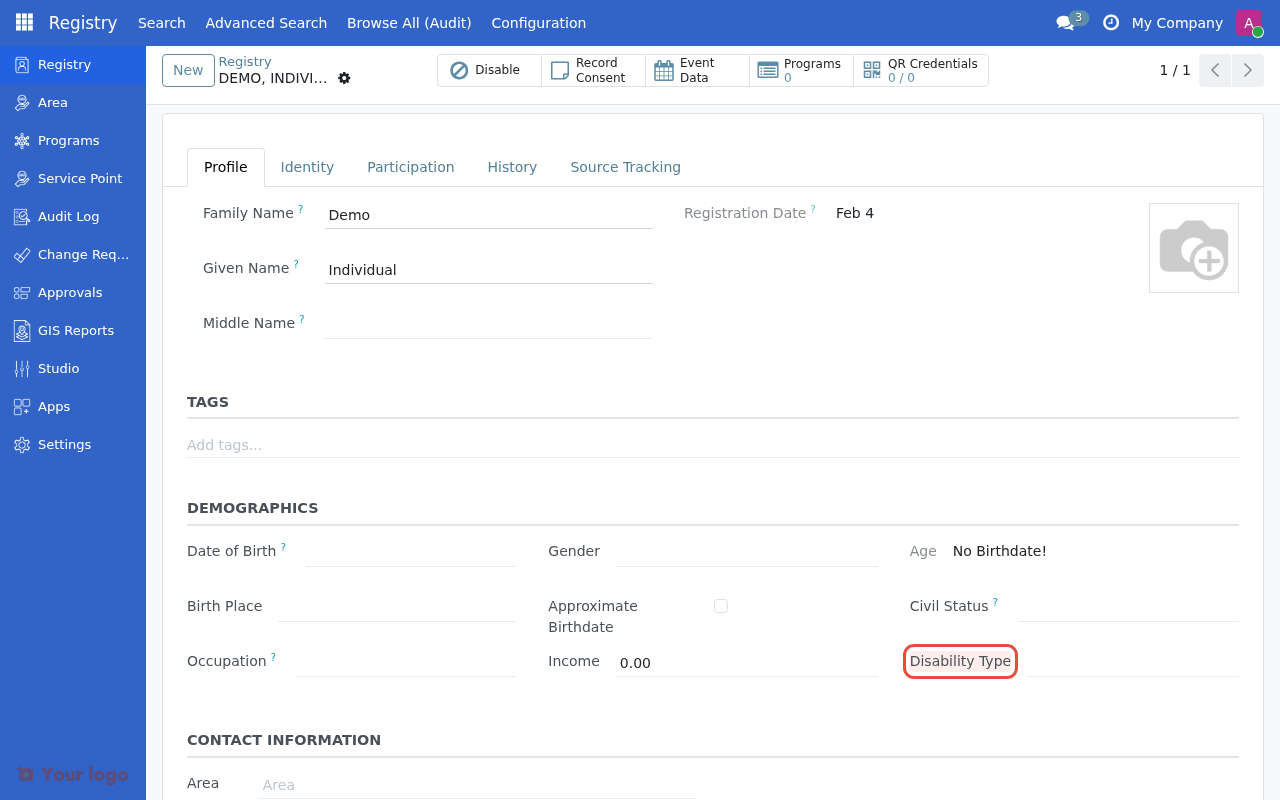
Example: Only show "Disability Type" when "Has Disability" field is set.
Step 6: Activate the field#
Draft fields must be activated before they appear in registry forms.
To activate from the list view:
Click the Activate button next to the Draft field
To activate from the field details:
Double-click the field row to open details
Click Activate in the header

Click Activate to make the draft field live in registry forms.#
Activating a field makes it visible to all users immediately
Once activated, the field cannot be edited directly (must deactivate first)
Activation requires Studio Manager permission
Warning
Activating makes the field live for all users. The field will appear in registry forms immediately after activation.
After creating a field#
Managing existing fields#
View all custom fields#
Studio → Custom Fields shows all fields you've created:
Column |
Shows |
|---|---|
Label |
Display name of the field |
Target Registry |
Individual or Group |
Field Type |
Text, Selection, Date, etc. |
Placement Zone |
Where field appears in registry |
Required |
Whether field is mandatory |
Searchable |
Whether field appears in search filters |
Status |
Draft, Active, or Inactive |
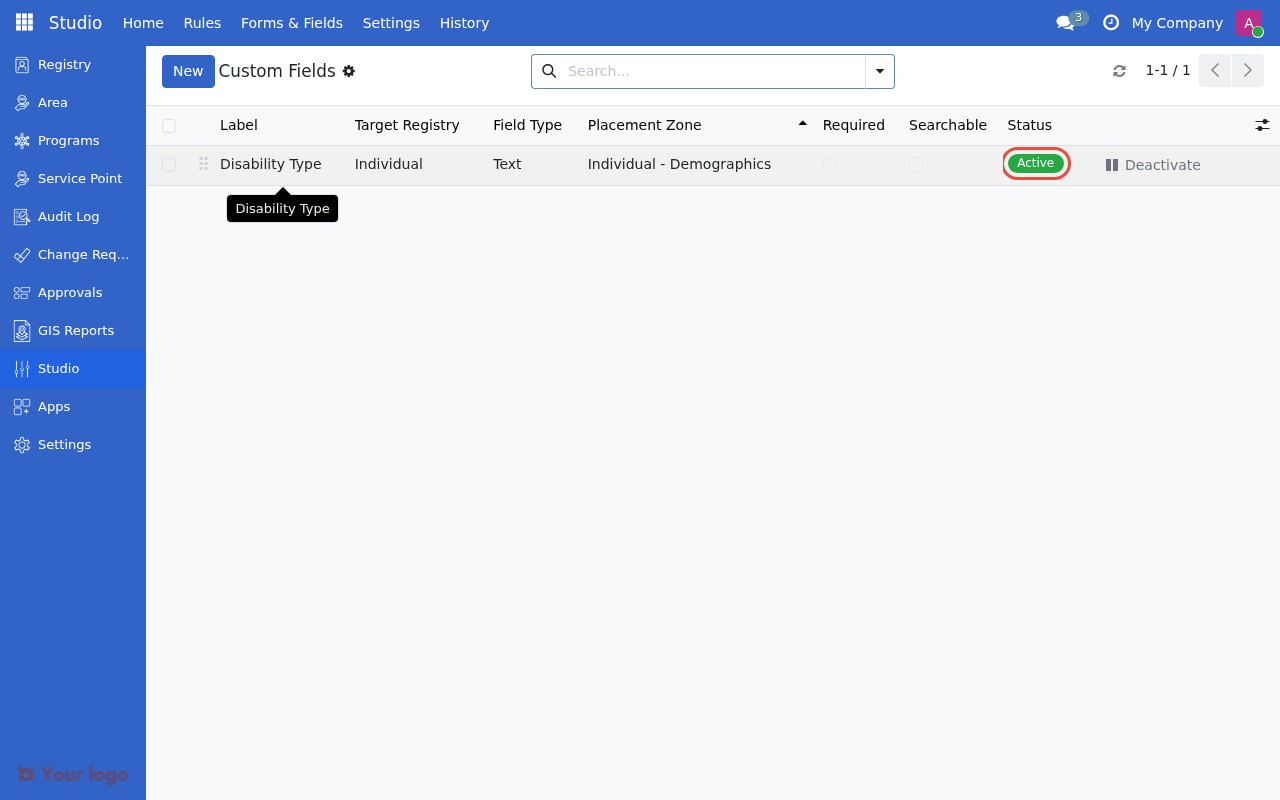
The field now shows Active status in the Custom Fields list.#
Edit a field#
For Draft fields (editable inline):
Click on the field row to select it
Edit values directly in the columns
Click Save or press Enter
For Active fields:
You cannot edit active fields directly
Options:
Deactivate → Edit → Reactivate (may cause data issues)
Create new field → Migrate data → Delete old field (requires developer)
Deactivate a field#
Warning
Deactivating hides the field from forms, but existing data is preserved in the database.
From the list view:
Click Deactivate button next to the Active field
From the field details:
Double-click the field to open details
Click Deactivate in the header
If data exists, system shows impact warning: "This field contains data in X records"
Confirm deactivation
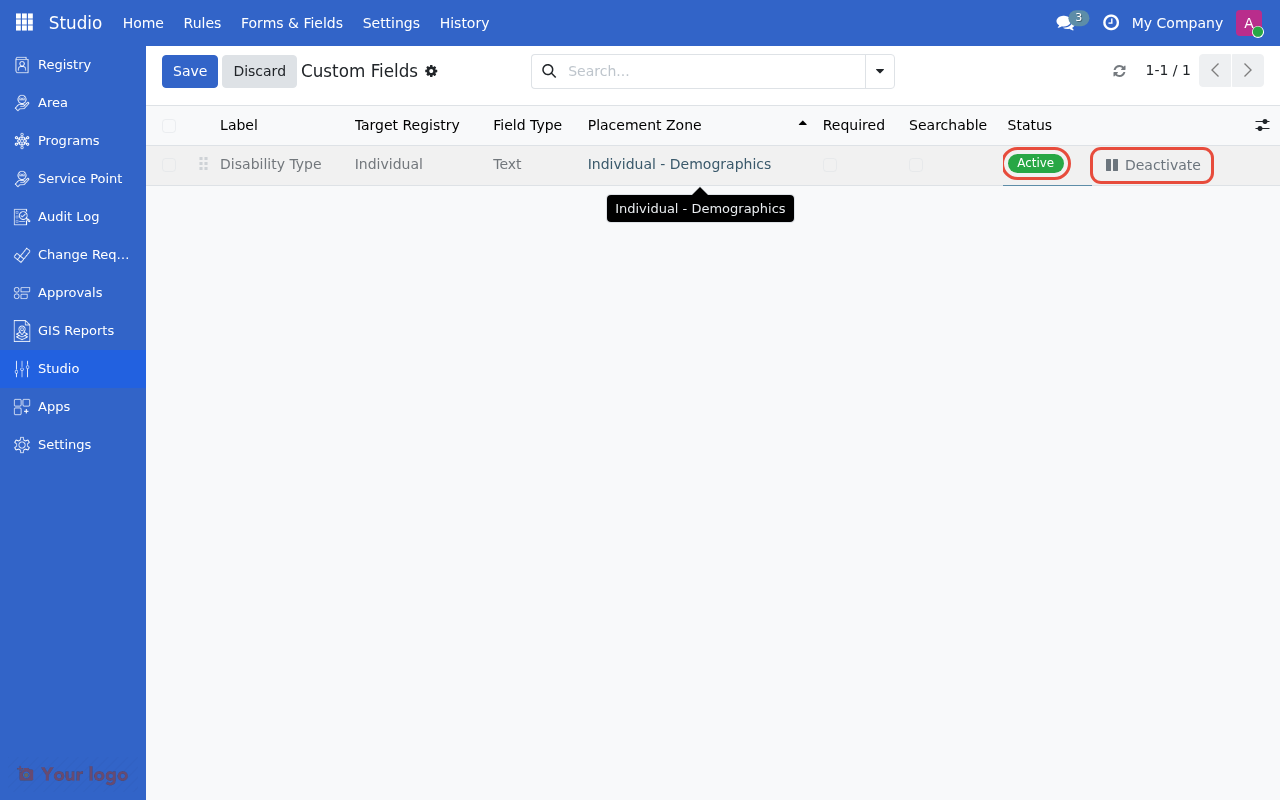
Click Deactivate to disable the field from registry forms.#
Delete a field#
You can only delete inactive fields:
Deactivate the field first
Open the field
Click Delete
Confirm deletion
Warning: This removes the field configuration. Data may still exist in the database but won't be accessible through the UI.
Field type reference#
Text field#
Use for: Short single-line text (up to 256 characters)
Examples:
ID numbers: "Pantawid ID"
Phone numbers: "WhatsApp Number"
Short names: "Nickname"
Options:
Can be marked as required
Can be made searchable
Long text field#
Use for: Multi-line text notes
Examples:
"Special Needs Description"
"Home Visit Notes"
"Program Comments"
Displays as: Multi-line text area
Number fields#
Whole Number (integer):
Examples: "Number of Dependents", "Age in Years"
No decimal places
Decimal Number (float):
Examples: "Vulnerability Score", "Monthly Income"
Allows decimals
Options:
Can mark as required
Can make searchable
Date field#
Use for: Calendar dates
Examples:
"Last Assessment Date"
"ID Expiry Date"
"Enrollment Date"
Shows: Calendar picker in UI
Date & time field#
Use for: Date with time component
Examples:
"Appointment DateTime"
"Interview Scheduled"
"Last Login"
Shows: Calendar picker with time selector
Yes/No field#
Use for: True/false, checkbox data
Examples:
"Has Disability"
"Owns Land"
"Receives Other Benefits"
Displays as: Checkbox
Selection field#
Use for: Choose one option from a list
Examples:
"Disability Type" (Physical, Visual, Hearing, Cognitive)
"Housing Material" (Concrete, Wood, Bamboo, Mixed)
"Education Level" (None, Primary, Secondary, Tertiary)
Displays as: Dropdown list
Configuration:
Define value/label pairs
Order matters (shows in defined order)
Can add/remove choices before activating
Multi-select field#
Use for: Choose multiple options from a list
Examples:
"Languages Spoken" (English, Tagalog, Cebuano, Ilocano)
"Disabilities" (Multiple types)
"Income Sources" (Employment, Farming, Remittances, Pension)
Displays as: Tag selector (multiple tags can be selected)
Configuration: Same as Selection field - define options using value|Label format.
Link field (advanced)#
Use for: Linking to other records
Examples:
Link to Area (geographic region)
Link to Language
Link to custom lookup table
Note: This is advanced and may require developer help for complex relationships.
Common patterns#
Country-specific ID#
Label: Pantawid ID Number
Type: Text
Target: Individual
Location: Identity > IDs
Required: No (only for Philippines beneficiaries)
Searchable: Yes
Disability tracking#
Field 1:
  Label: Has Disability
  Type: Yes/No
  Target: Individual
  Location: Profile > Demographics
  Required: No

Field 2:
  Label: Disability Type
  Type: Dropdown
  Target: Individual
  Options: Physical, Visual, Hearing, Cognitive, Other
  Location: Profile > Demographics
  Visibility: Show when "Has Disability" Is Set
  Required: No
Housing conditions#
Label: Housing Material
Type: Selection
Target: Group
Options:
  - concrete: Concrete/Brick
  - wood: Wood
  - bamboo: Bamboo/Nipa
  - mixed: Mixed Materials
  - other: Other
Location: Profile > Contact
Required: No
Vulnerability score#
Label: Vulnerability Score
Type: Decimal Number
Target: Individual
Location: Profile > Financial
Required: No
Help Text: Score from 0-100 based on PMT assessment
Are you stuck?#
Field doesn't appear in the registry form?
Make sure the field is Active, not Draft
Try refreshing your browser (Ctrl+F5 or Cmd+Shift+R)
Check that you're viewing the correct registry (Individual vs Group)
Can't change the technical name?
Technical names are auto-generated from the label and cannot be edited. They use the x_ prefix (e.g., "Disability Type" becomes x_disability_type). If a name already exists, a number is appended (e.g., x_disability_type_1).
Field appears in wrong location?
Edit the field (if still Draft)
Change the Placement Zone
Save and check again
Getting "field already exists" error?
Field names must be unique within a registry
Choose a different label
Check if someone already created this field
Want to rename a field?
For Draft fields: Edit and change the label
For Active fields: You can only change the label, not the technical name
Need calculated fields (like Age from Birthdate)? This requires developer help. Calculated fields need Python code.
Want to make field visible only for specific programs? Studio supports basic conditional visibility. For program-specific fields, contact a developer.
Field shows but can't enter data?
Check user permissions for the registry
Verify field isn't hidden by conditional visibility
If the field was set as read-only (via advanced settings), it cannot be edited
How do I migrate data from one field to another? This requires developer help using database migration scripts.
Can I activate multiple draft fields at once? Yes, select multiple fields in the list view and use the Activate action from the Actions menu.
What's the difference between creating as draft vs immediate activation?
Immediate activation (default): Field is created and usable right away
Create as Draft: Field is created but not visible in registry forms until you manually activate it - useful if you want to review settings first
Next steps#
Create event types from surveys: Event Type Designer
Define eligibility rules: CEL expressions
Return to Studio overview: Studio Overview