Export registrant data
Contents
Export registrant data#
Applies to: Social Registry, SP-MIS
What you will do#
Export registrant data from OpenSPP to CSV or Excel files for analysis, backup, or preparing data updates.
Before you start#
You need Administrator access (export requires admin permissions)
Know which fields you need to export
Understanding export#
Export serves several purposes:
Purpose |
Description |
|---|---|
Record keeping |
Archive or backup registrant data |
Analysis |
Analyze data in Excel, Google Sheets, or other tools |
Import templates |
Get correct headers for importing new data |
Update preparation |
Get IDs needed to update existing records |
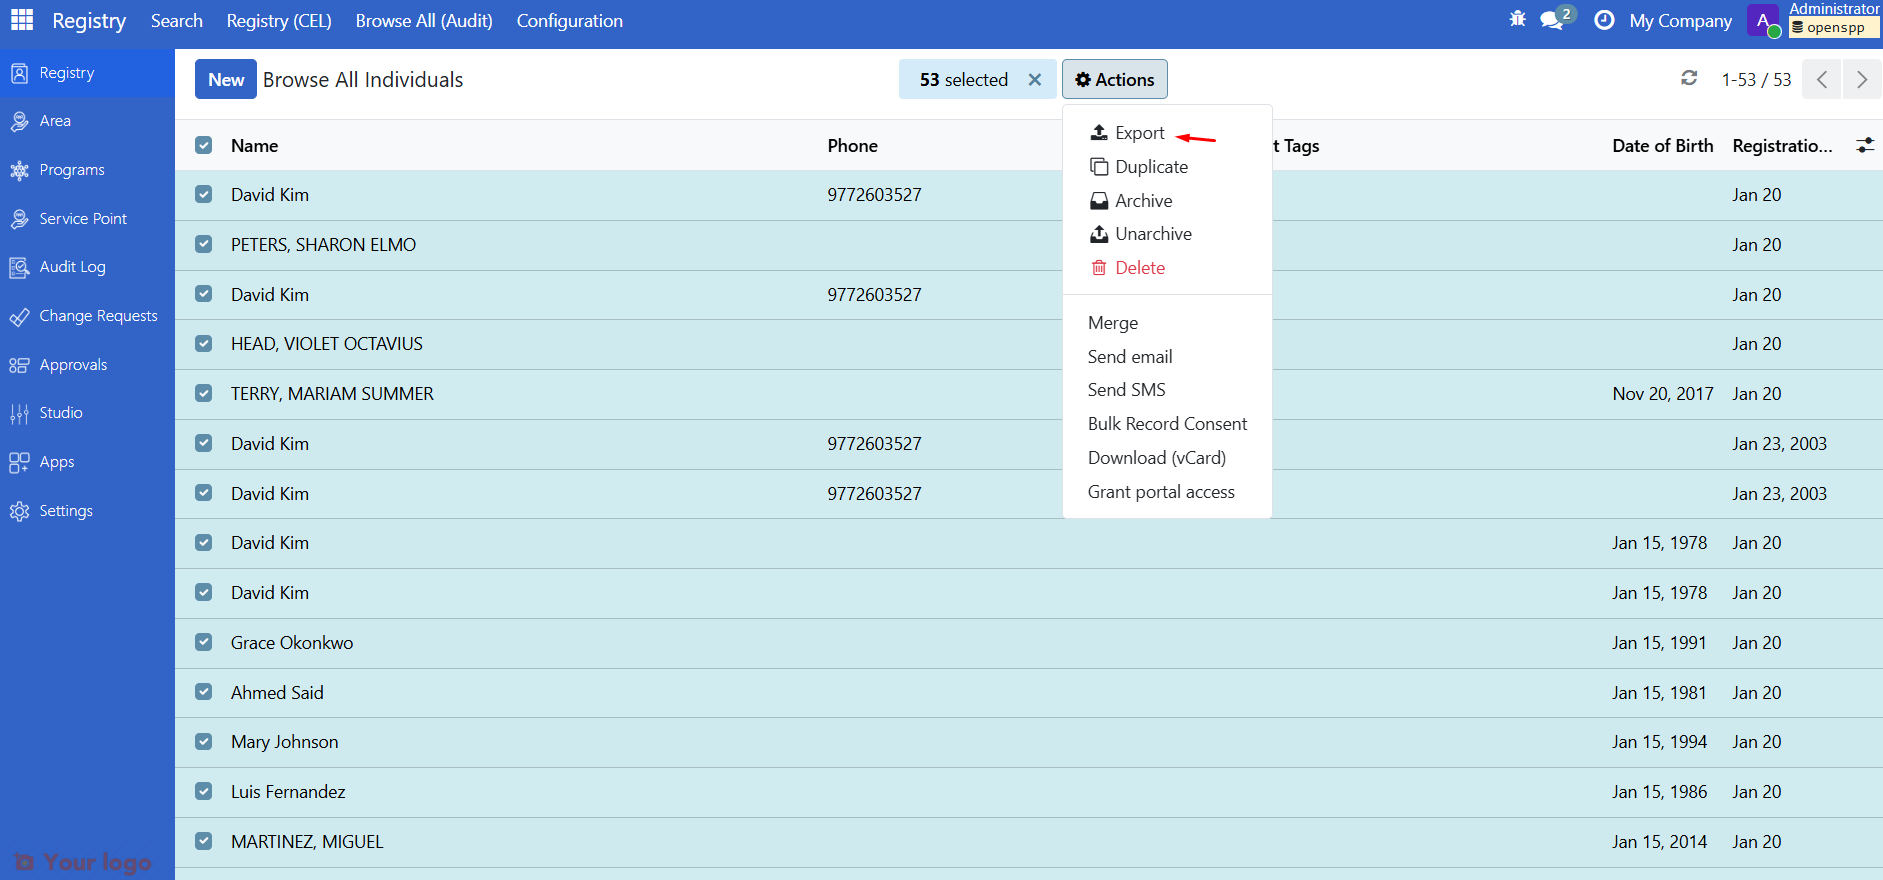
Export data#
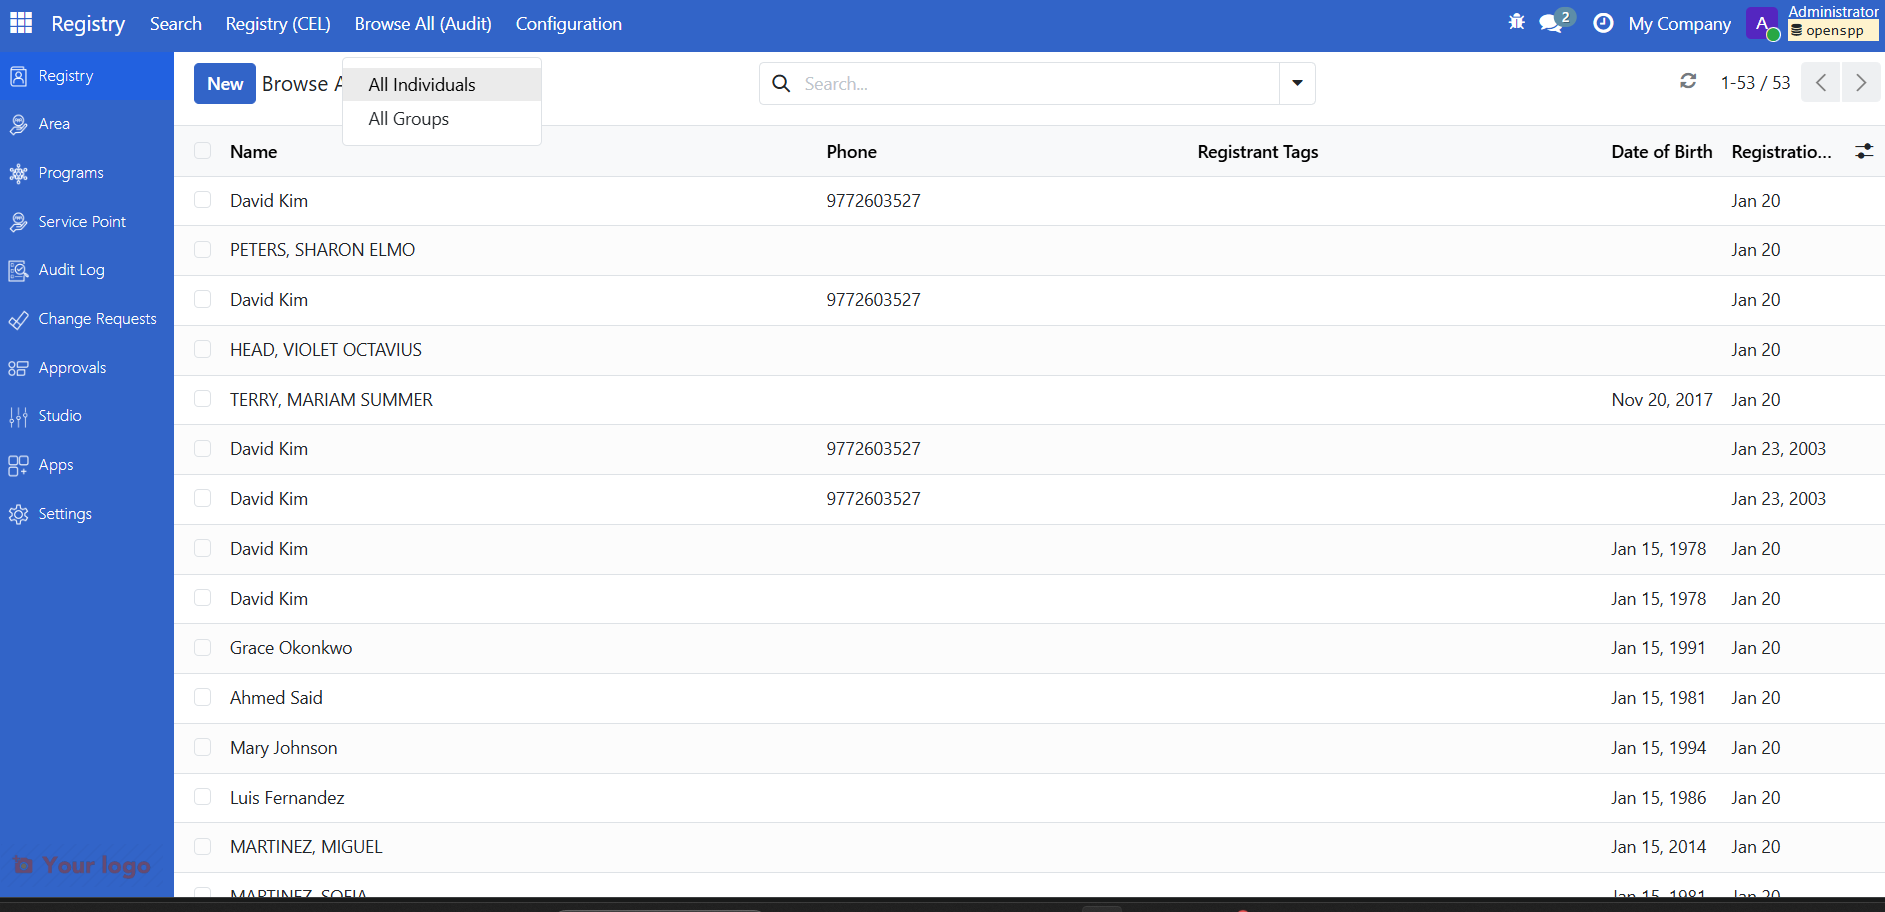
Step 2: Select records to export#
Select the records you want to export using one of the options below.
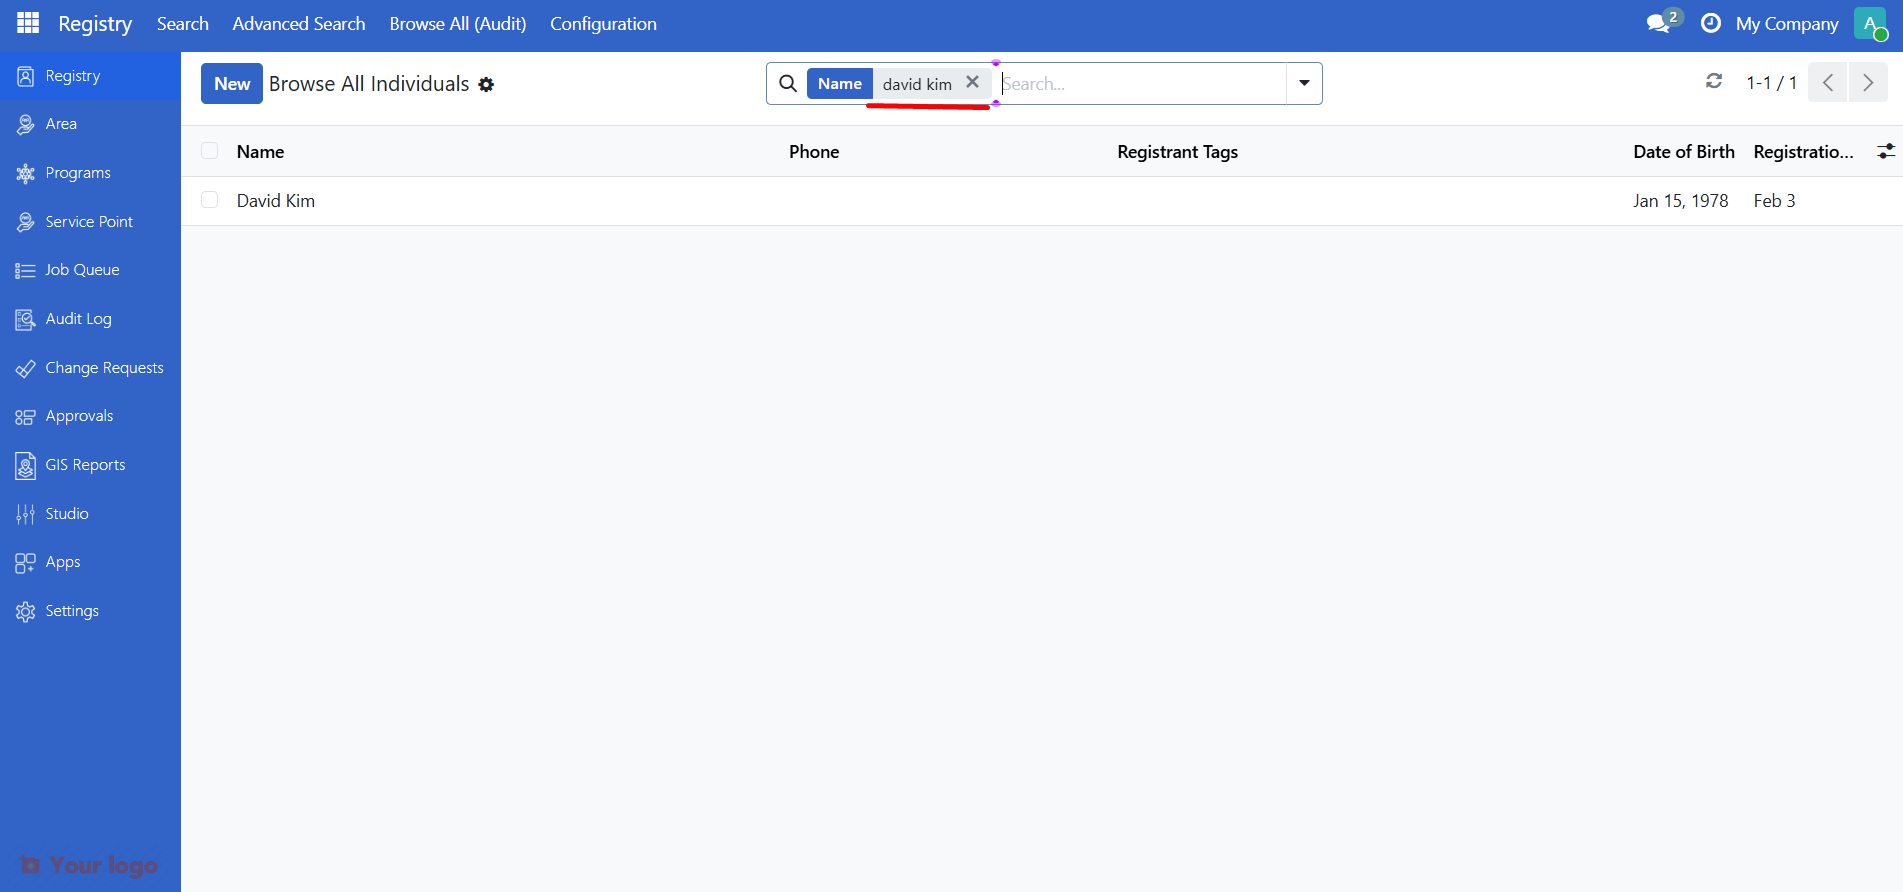
Export specific records#
Use the search box to find the record(s), then click the checkbox next to the registrant.
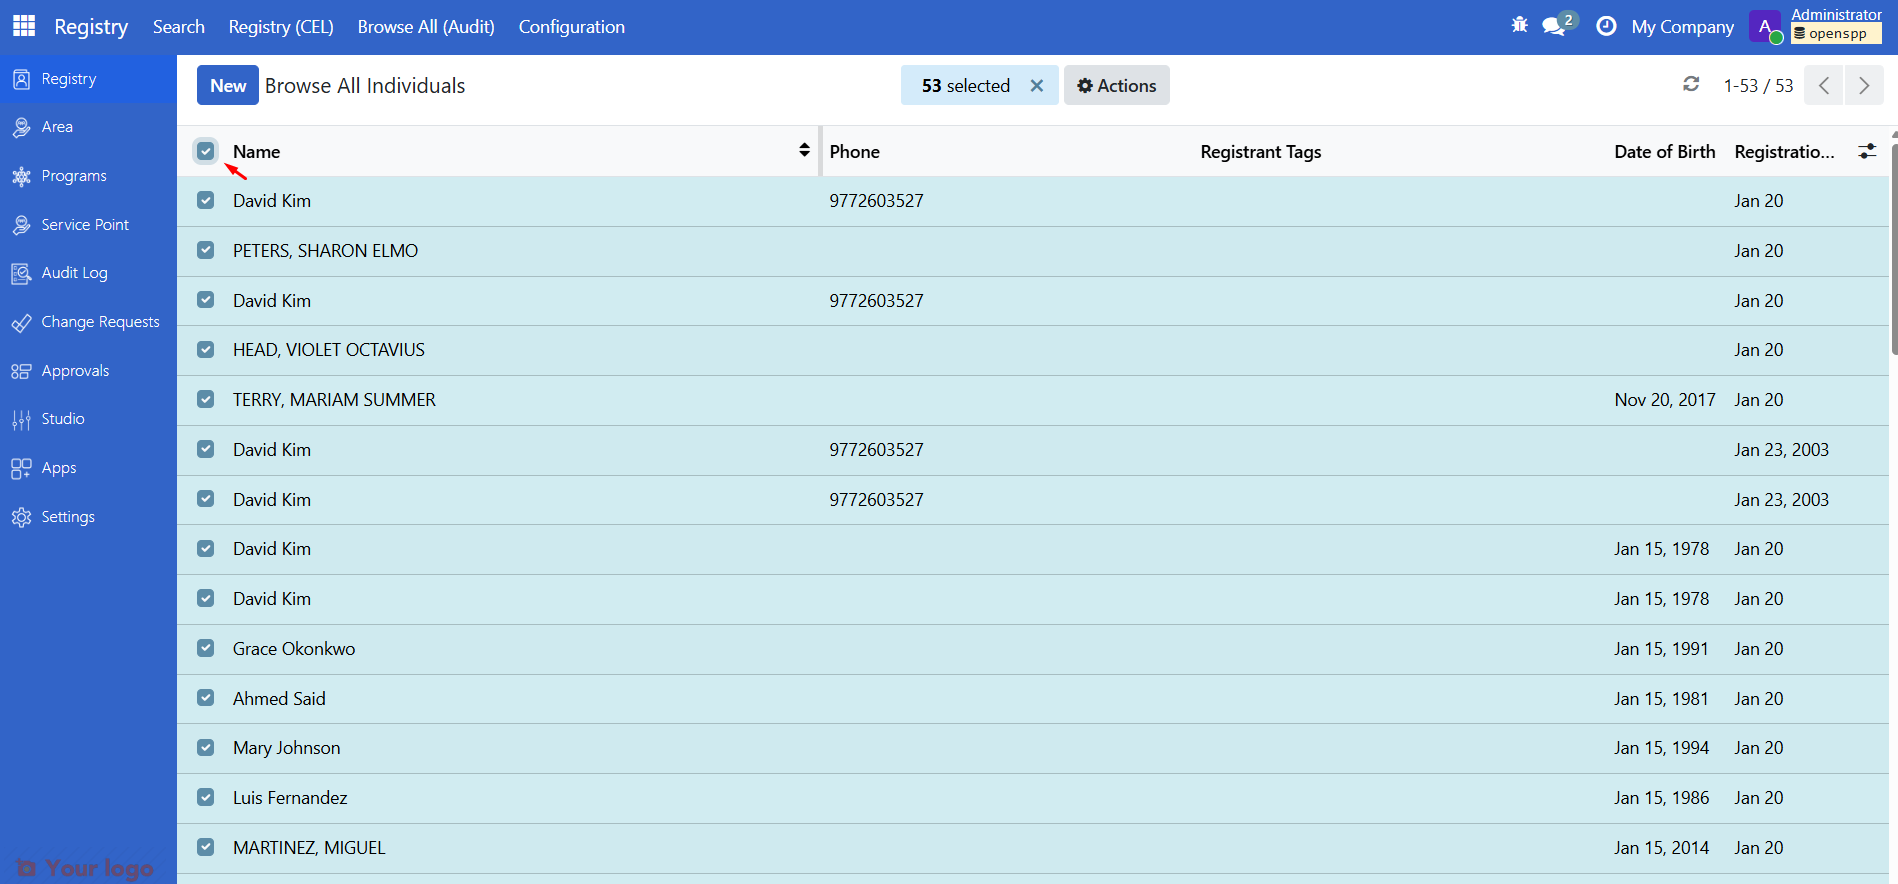
Export current page#
Click the checkbox in the header row to select all records on the current page.
Export all records#
Click the checkbox in the header row, then click the Select all link.
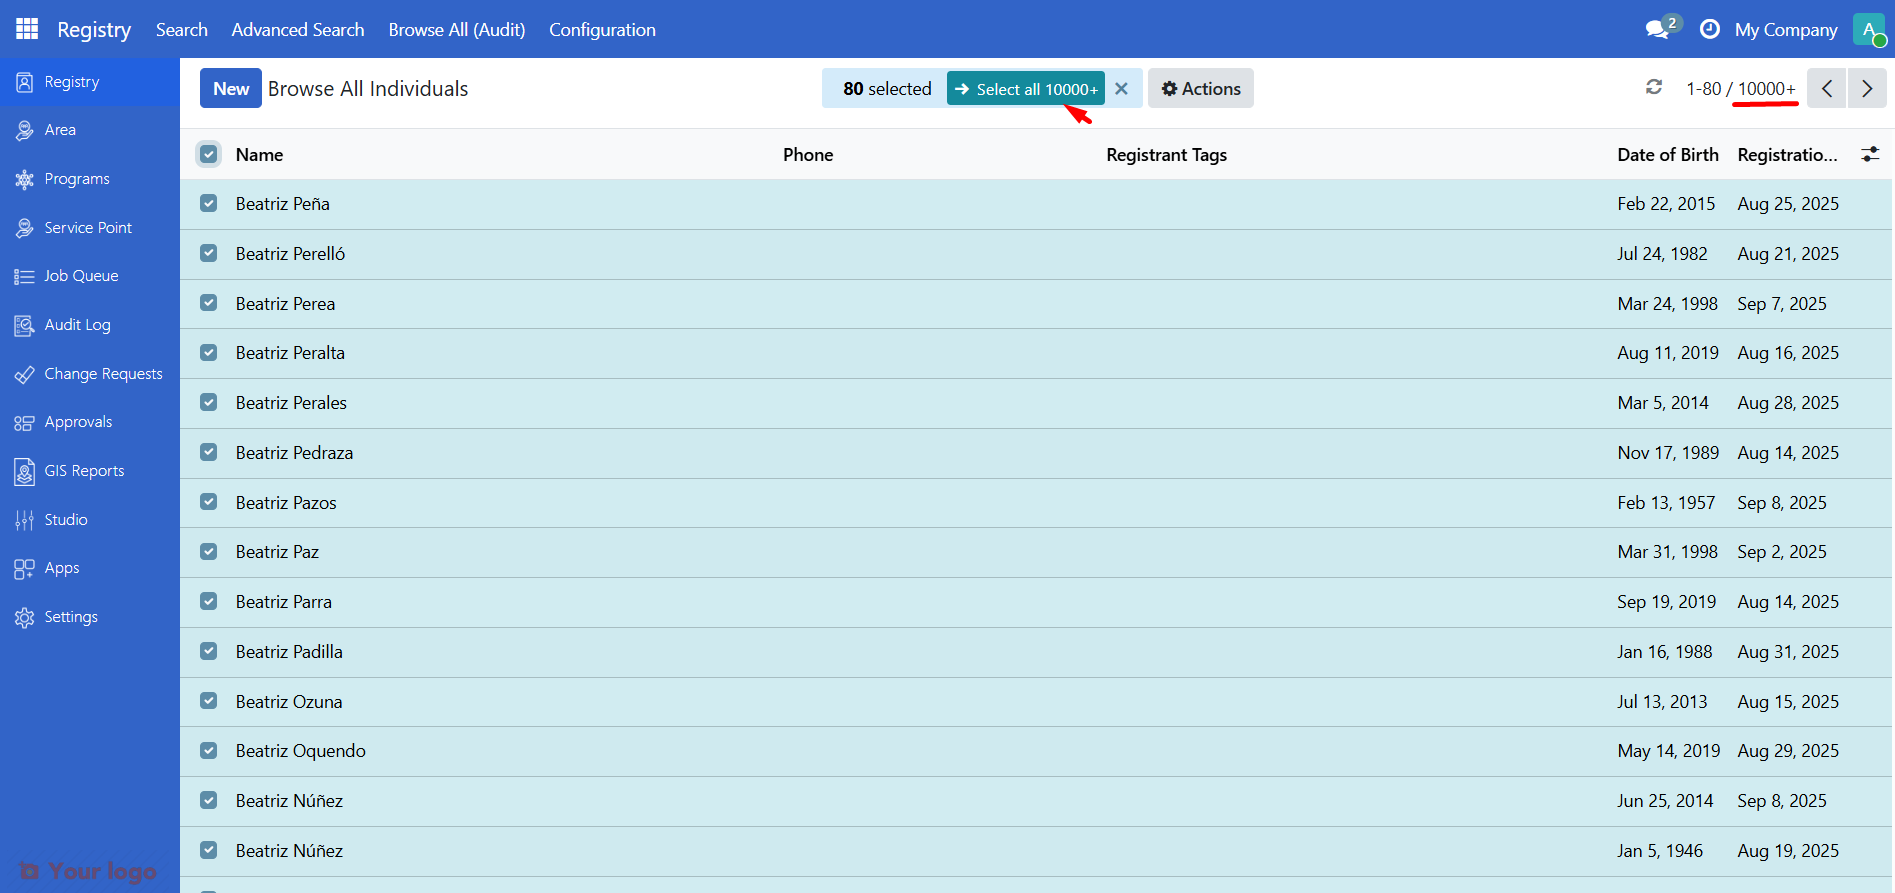
Tip
To see the total number of records, click 10000+ (or the displayed count) in the pagination bar at the top left of the page. This reveals the actual record count.
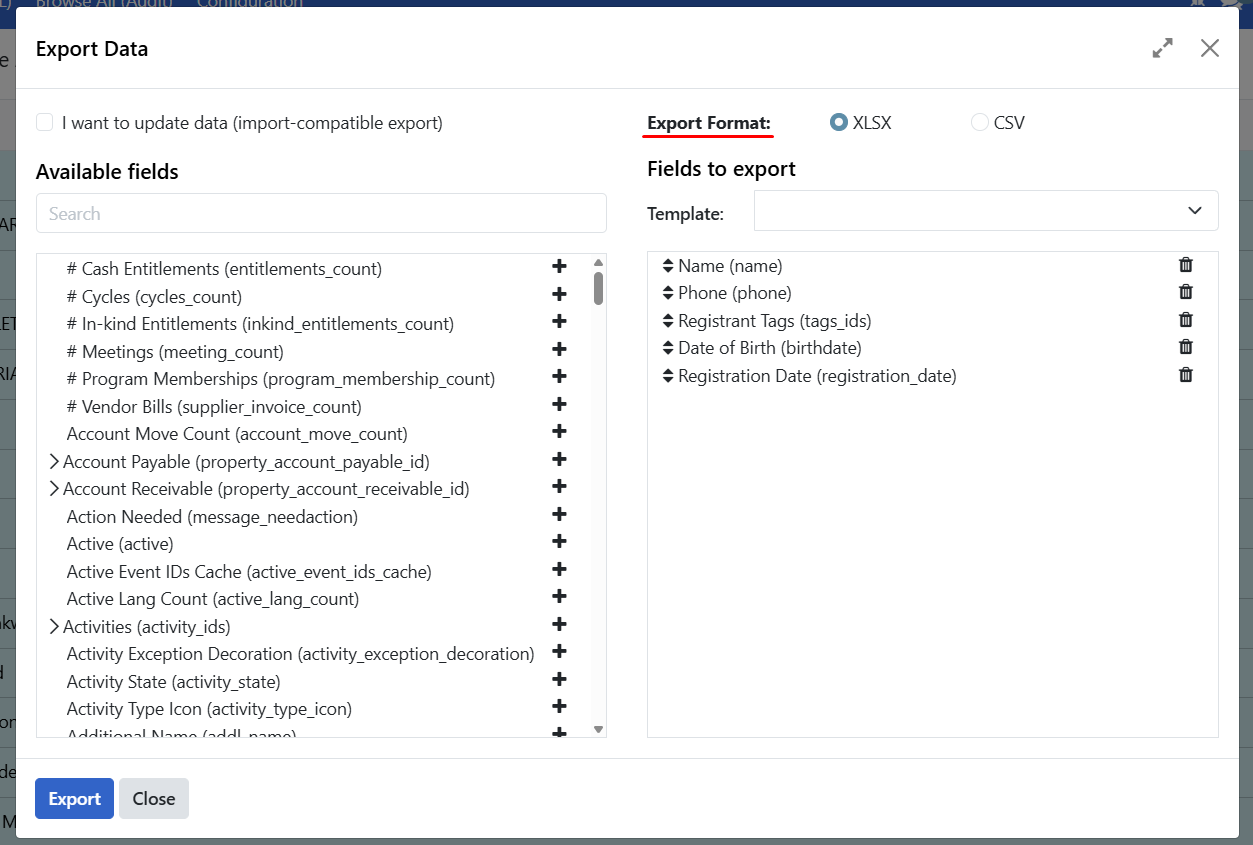
Step 4: Choose export format#
Select your preferred format:
Format |
Best for |
|---|---|
CSV |
Data analysis tools, programming, universal compatibility |
XLSX |
Excel users, preserves formatting |
Step 5: Select fields to export#
The export dialog shows available fields and fields to export:
Section |
Description |
|---|---|
Available fields |
All fields you can add to export |
Fields to export |
Currently selected fields |
To add a field:
Click the + icon next to a field
To remove a field:
Click the trash icon in the "Fields to export" list
To see nested fields:
Click the arrow > next to a field to expand it
Common export fields#
The following are among the most commonly exported fields. Use the export dialog to add or remove them from Fields to export.
Individual fields
Field |
Description |
|---|---|
name |
Full name (auto-generated from family/given name) |
family_name |
Last name / surname |
given_name |
First name |
addl_name |
Middle name |
birthdate |
Date of birth |
gender_id |
Gender |
address |
Physical address |
Email address |
|
phone |
Primary phone number |
registration_date |
Date of registration |
Group fields
Field |
Description |
|---|---|
name |
Group name |
group_type_id |
Type of group (Household, etc.) |
address |
Physical address |
Email address |
|
phone |
Primary phone number |
registration_date |
Date of registration |
Nested fields
Some fields have nested data. Click the arrow to expand:
reg_ids > Shows all ID documents
phone_number_ids > Shows all phone numbers
tags_ids > Shows all tags
Step 6: Export#
Once the format is set and the fields are selected, click Export to download the file.
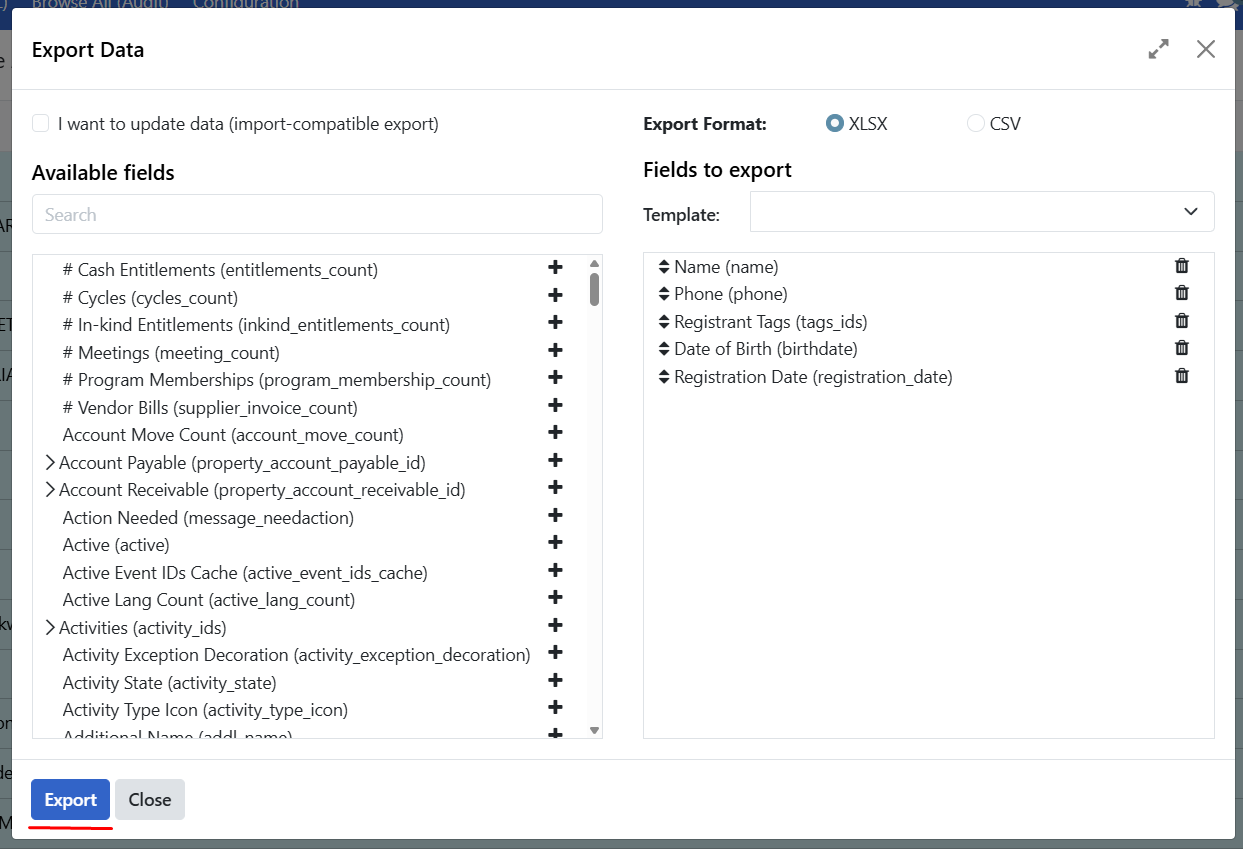
The file downloads to your computer.
Export for specific purposes#
Depending on what you want to achieve with the export, there are different settings to take into consideration. The settings for the most common scenarios are described below.
For analysis or reporting#
Export all the fields you need for your analysis:
Select all relevant records
Add all fields you want to analyze (ex: Created on, Created by, etc..)
Choose CSV (for data tools) or XLSX (for Excel)
Click Export
For creating import templates#
Get a template with correct headers for importing new data:
Select just one record (to get the headers)
Check "I want to update data (import-compatible export)"
Add the fields you will need for import
Export the file
Open the exported file, delete the ID column, then delete all data rows, keeping only the header row.
Fill in your new data
For updating existing records#
When you need to update records and import them back:
Select the records you want to update
Check "I want to update data (import-compatible export)"
Click Export
This option:
Includes the ID column (required for updates)
Shows only fields that can be imported
Hides calculated fields (like Age)
After export:
Open the file
Modify the values you want to change
Keep the ID column unchanged
Import the file back to update records
Export templates#
Save time by creating templates for exports you run frequently. This saves you the work of selecting which exact fields to include and what format to select.
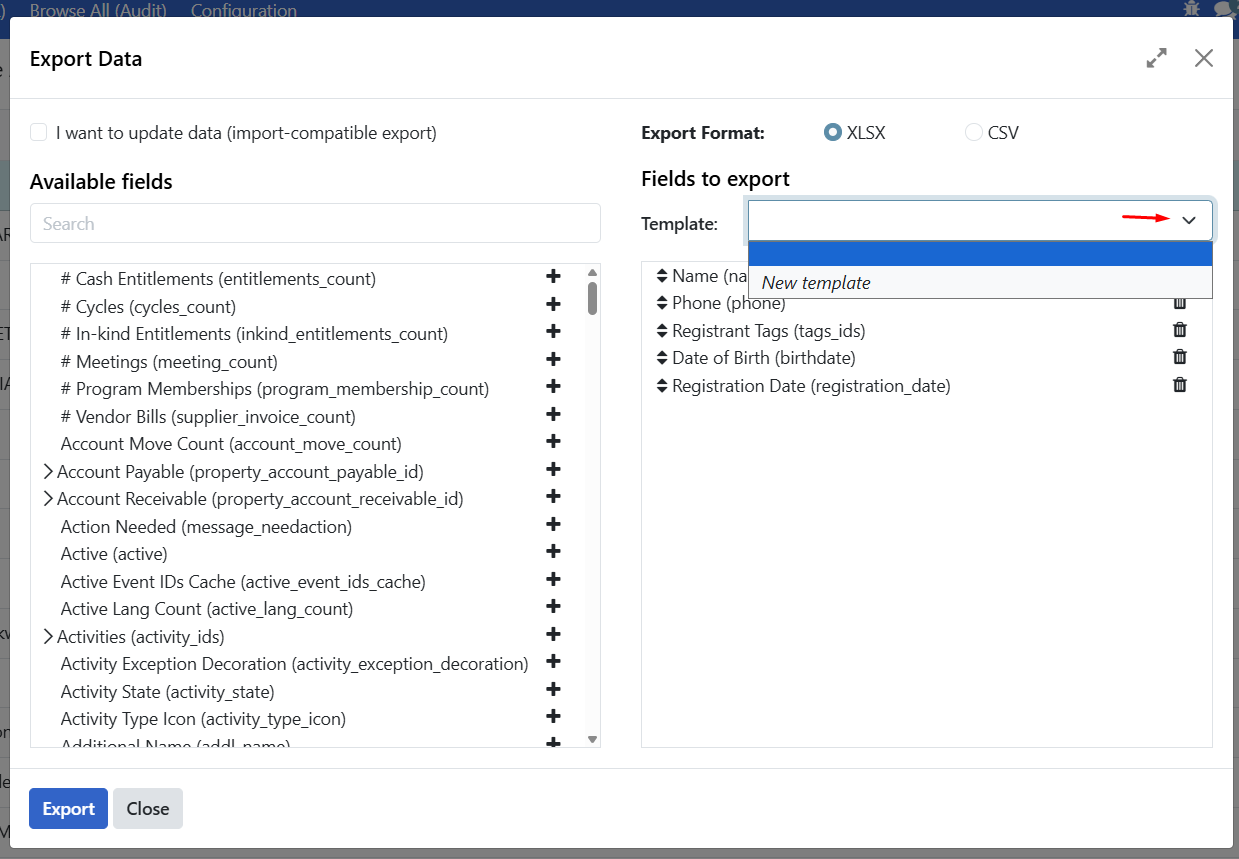
Create a new template#
Configure your export (select all the fields you need)
Click the dropdown arrow next to template selection
Click New template
Enter a name for your template
Click the save icon
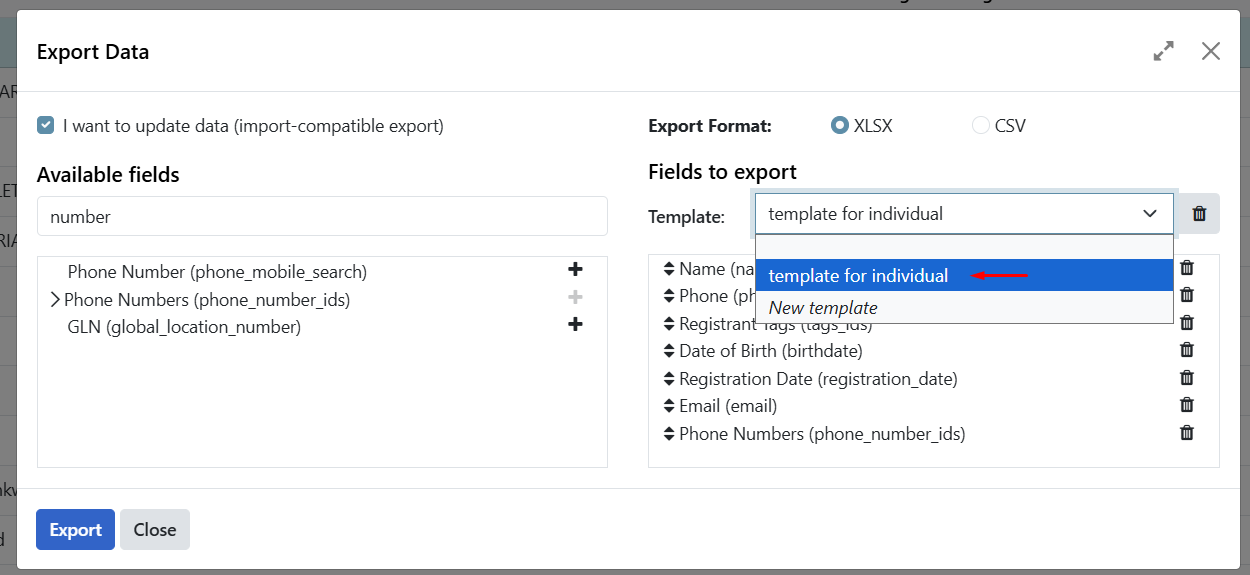
Use an existing template#
Open the Export dialog
Click the template dropdown
Select your saved template
Fields are automatically selected
Are you stuck?#
Export option not visible?
You need Administrator access
Contact your administrator to request export permissions
Cannot find a field?
Some fields may be nested (click arrows to expand)
Some calculated fields are not exportable
Check if the field is available for the record type (Individual vs Group)
Exported dates look wrong?
Dates export in YYYY-MM-DD format
Excel may reformat them based on your regional settings
Format the column as Text to preserve the original format
Phone numbers missing leading zeros?
Format the column as Text in Excel after opening
Or open the CSV in a text editor to see raw values
Export takes too long?
Export fewer records at a time
Select fewer fields
Try CSV format (faster than XLSX)
Need to export more than shown on page?
Click the header checkbox, then click Select all link
This selects all records matching your current search/filter
Template not saving?
Make sure you clicked the save icon after naming the template
Refresh the page and check if the template appears
Next steps#
Import registrant data - Import data back into OpenSPP
Search and filter registrants - Filter records before exporting
Register an individual - Register individuals manually