Step 4: Understanding program cycles
Contents
Step 4: Understanding program cycles#
This tutorial is for users who want to learn how program cycles organize benefit distribution.
What you'll learn#
Understand what program cycles are and how they organize benefit distribution into time periods. You'll learn how to create cycles and view their basic information.
Before you start#
You completed Step 3: Import and enroll beneficiaries
Your program has eligibility rules configured
You need Program Manager or System Administrator access
Allow 5-10 minutes to complete this step
The scenario#
Your Cash Transfer for Vulnerable Families program needs to distribute benefits on a regular schedule. Cycles organize this into manageable periods (for example, monthly distributions).
Understanding cycles#
A program cycle represents one period during which benefits are distributed. Think of it as one "round" of your program.
For example:
January 2025 cycle: Distribute benefits for January
February 2025 cycle: Distribute benefits for February
Each cycle has:
Start and end dates: The period covered
Status: Draft → To Approve → Approved → Distributed → Ended
Beneficiaries: Families enrolled in this cycle
Entitlements: Benefits generated for each family
Steps#
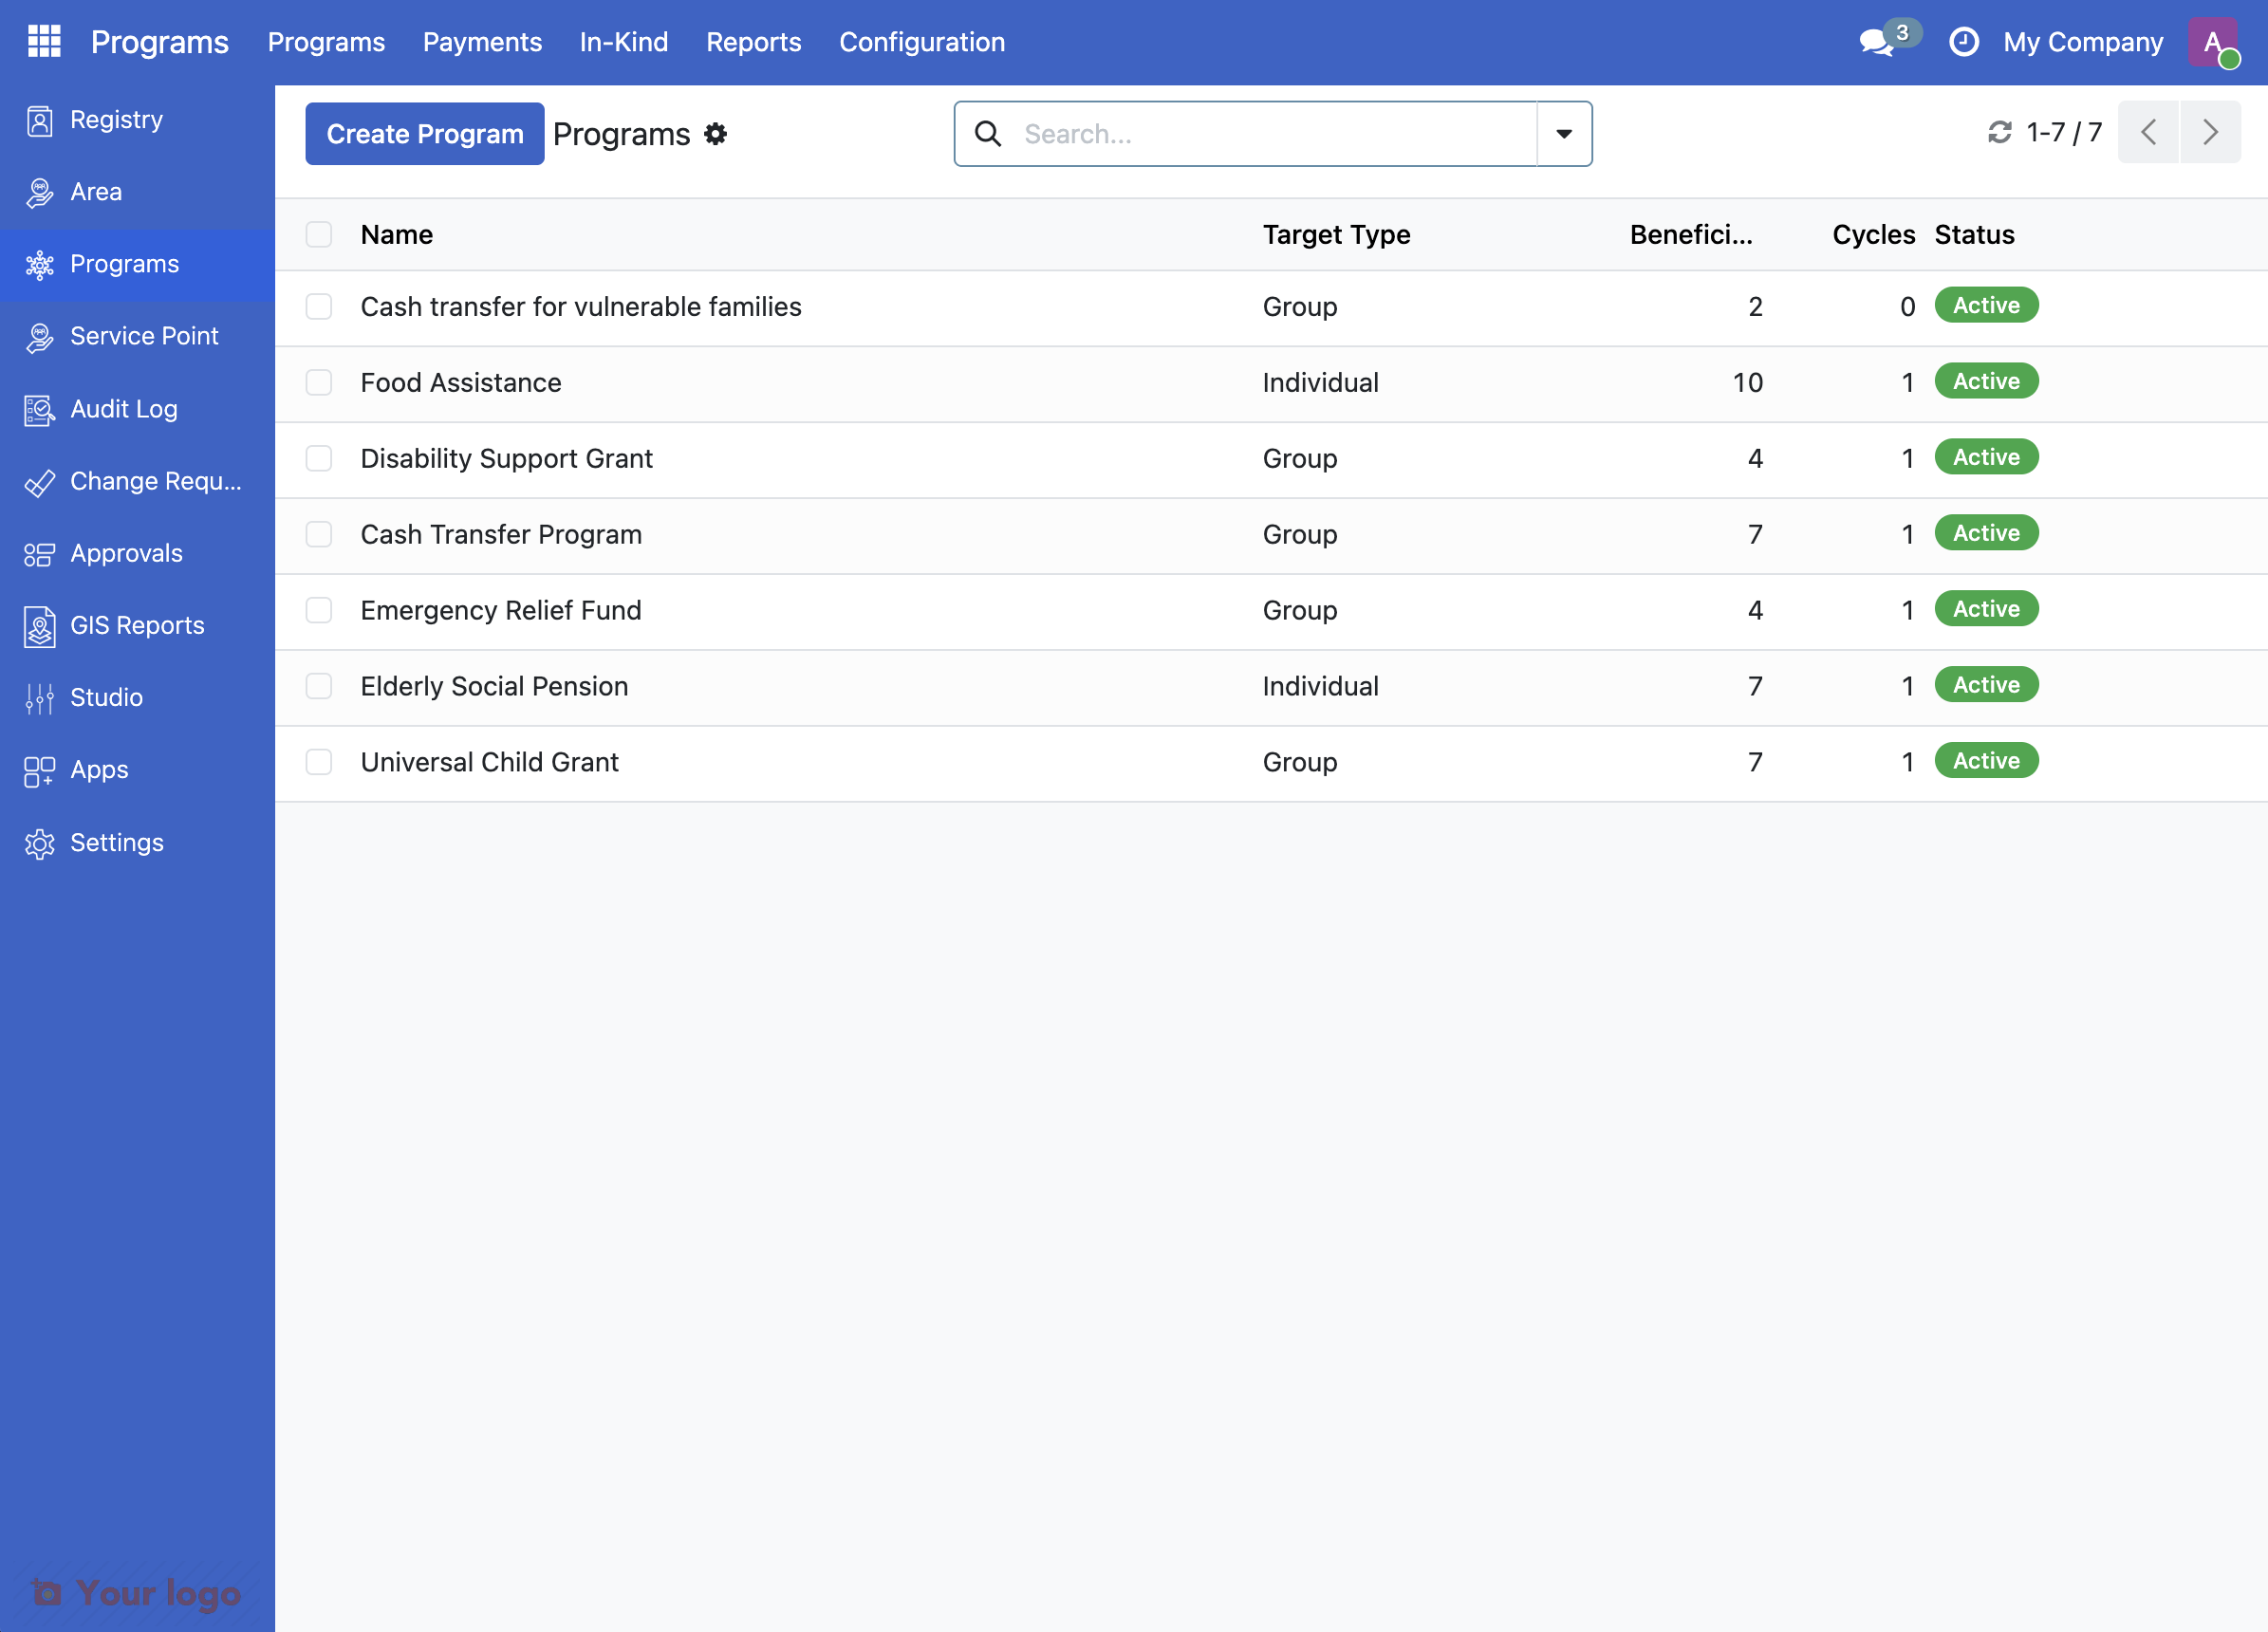
2. View your program#
Click on Cash transfer for vulnerable families to open your previously created program. You'll see the program Overview tab with a Recent Cycles section.
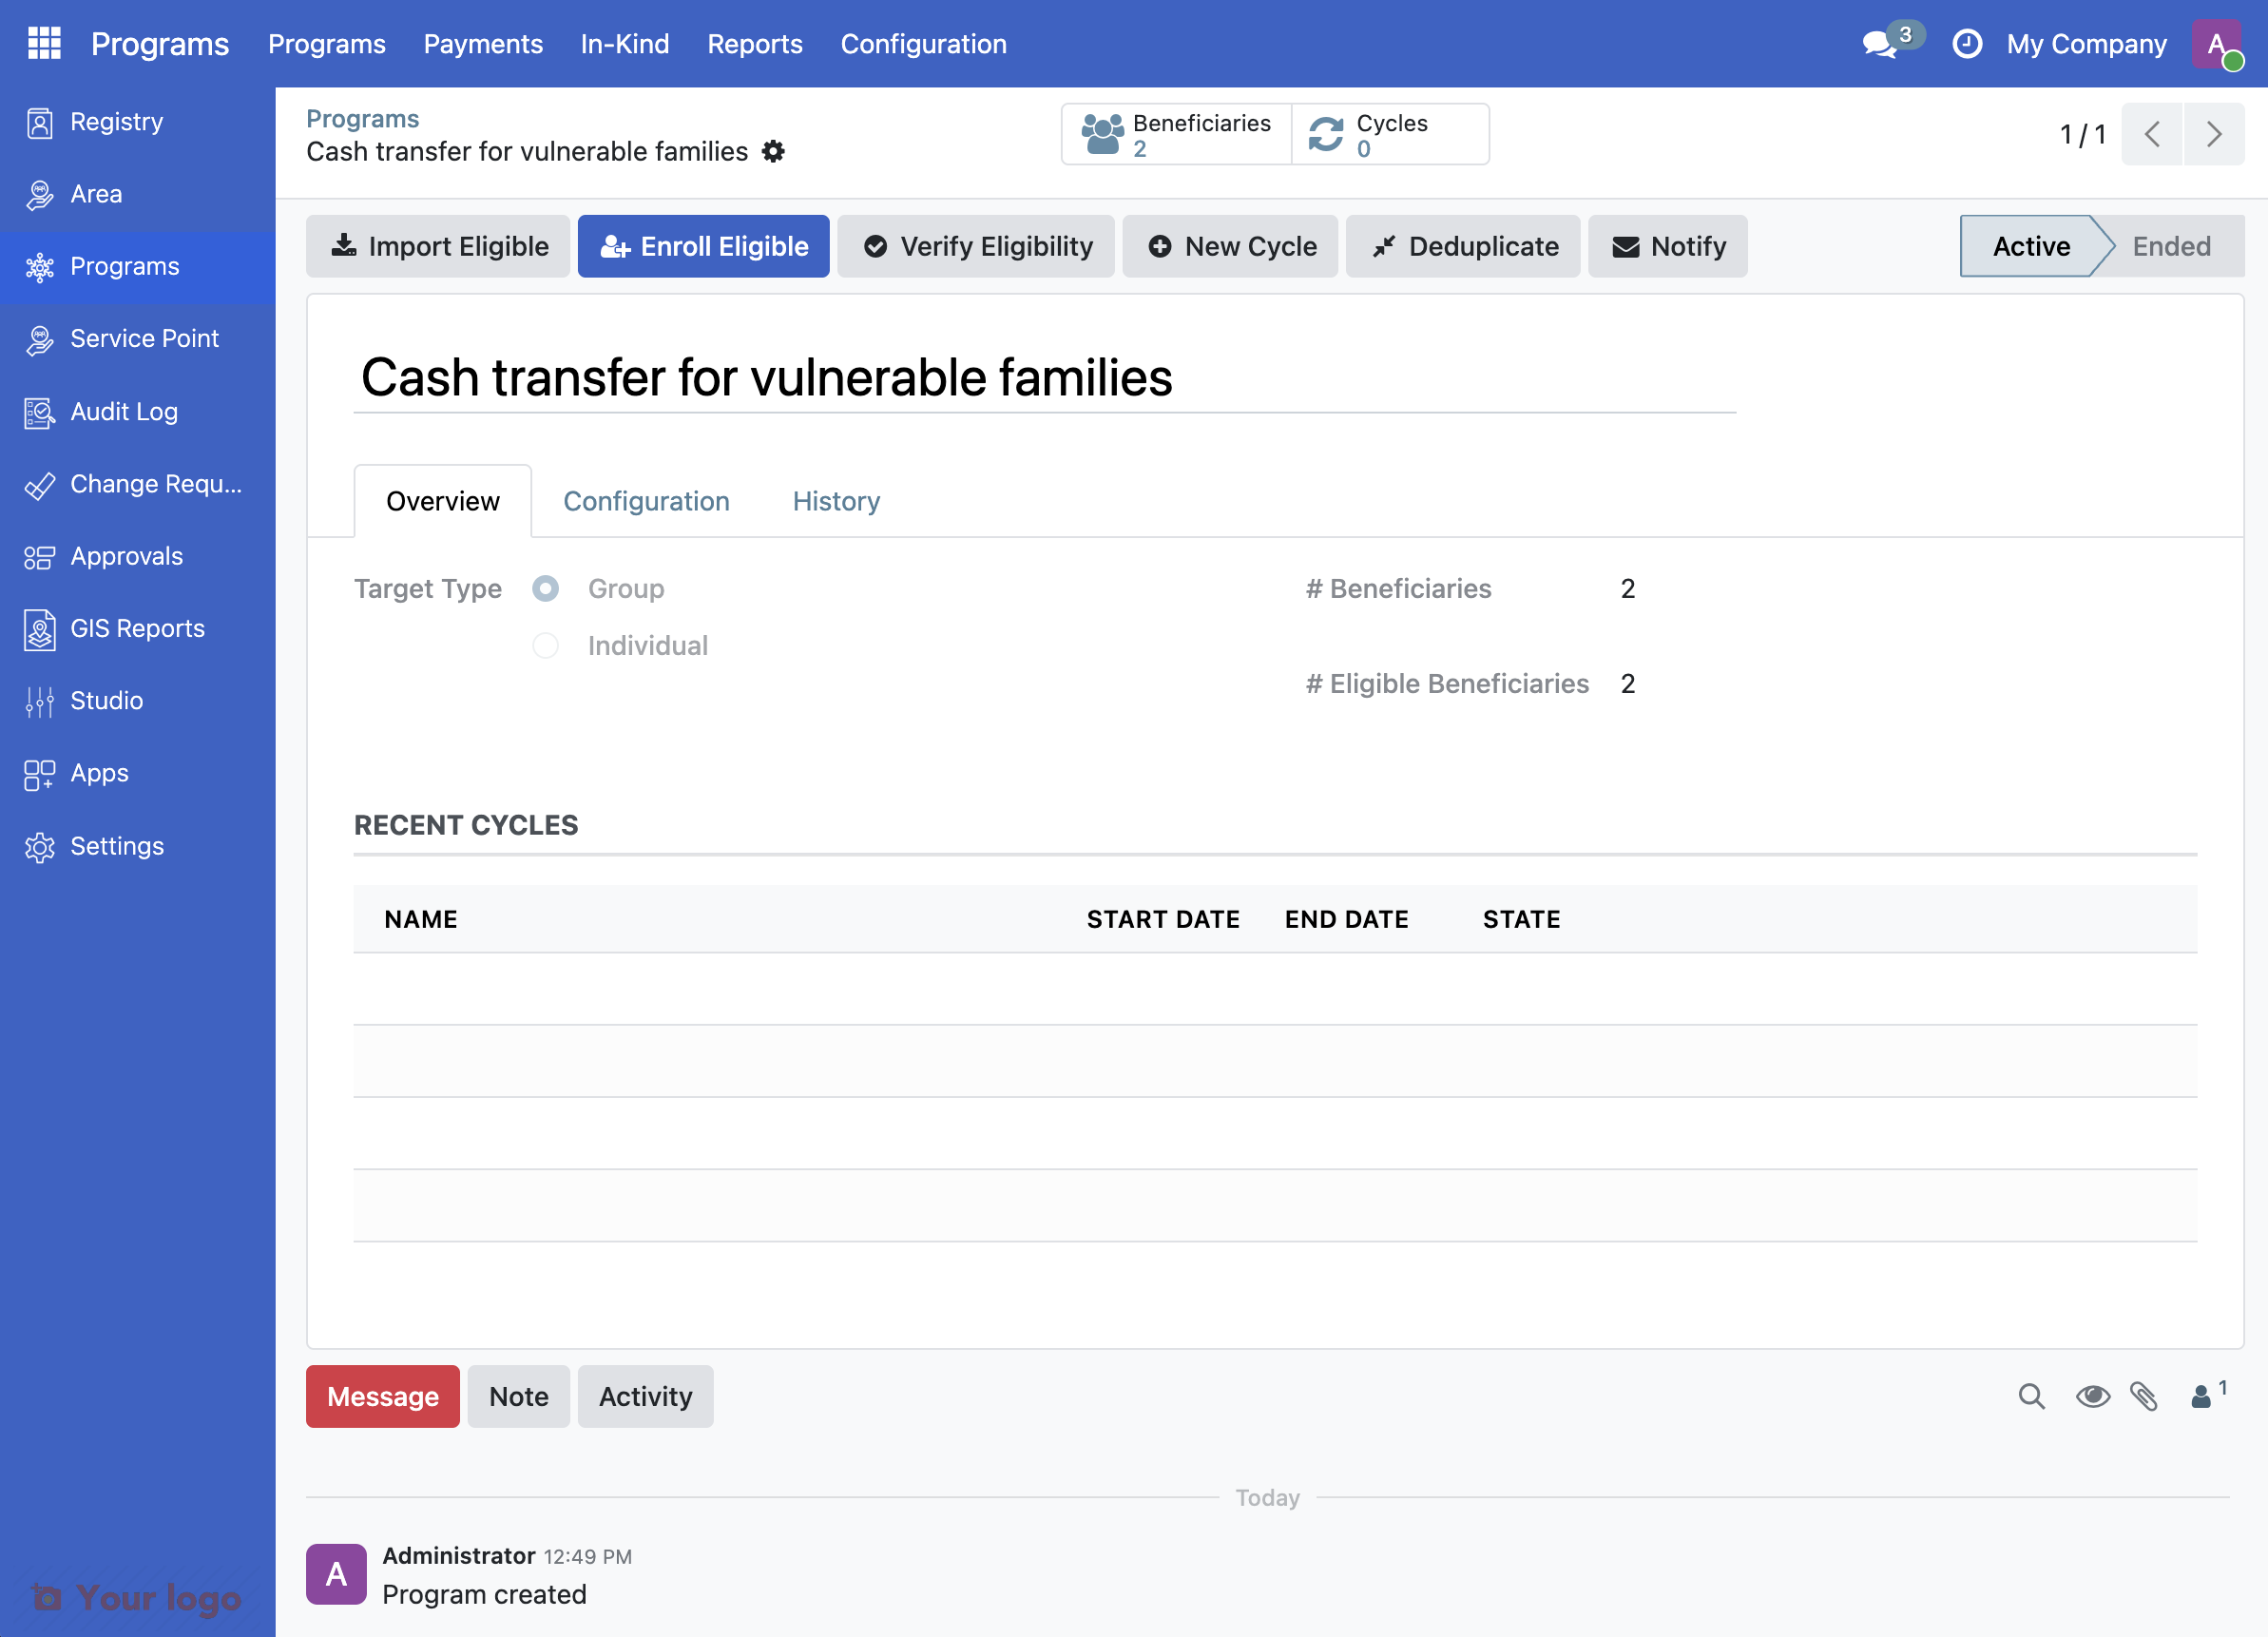
3. Create a new cycle#
Click the New Cycle button at the top of the program form.
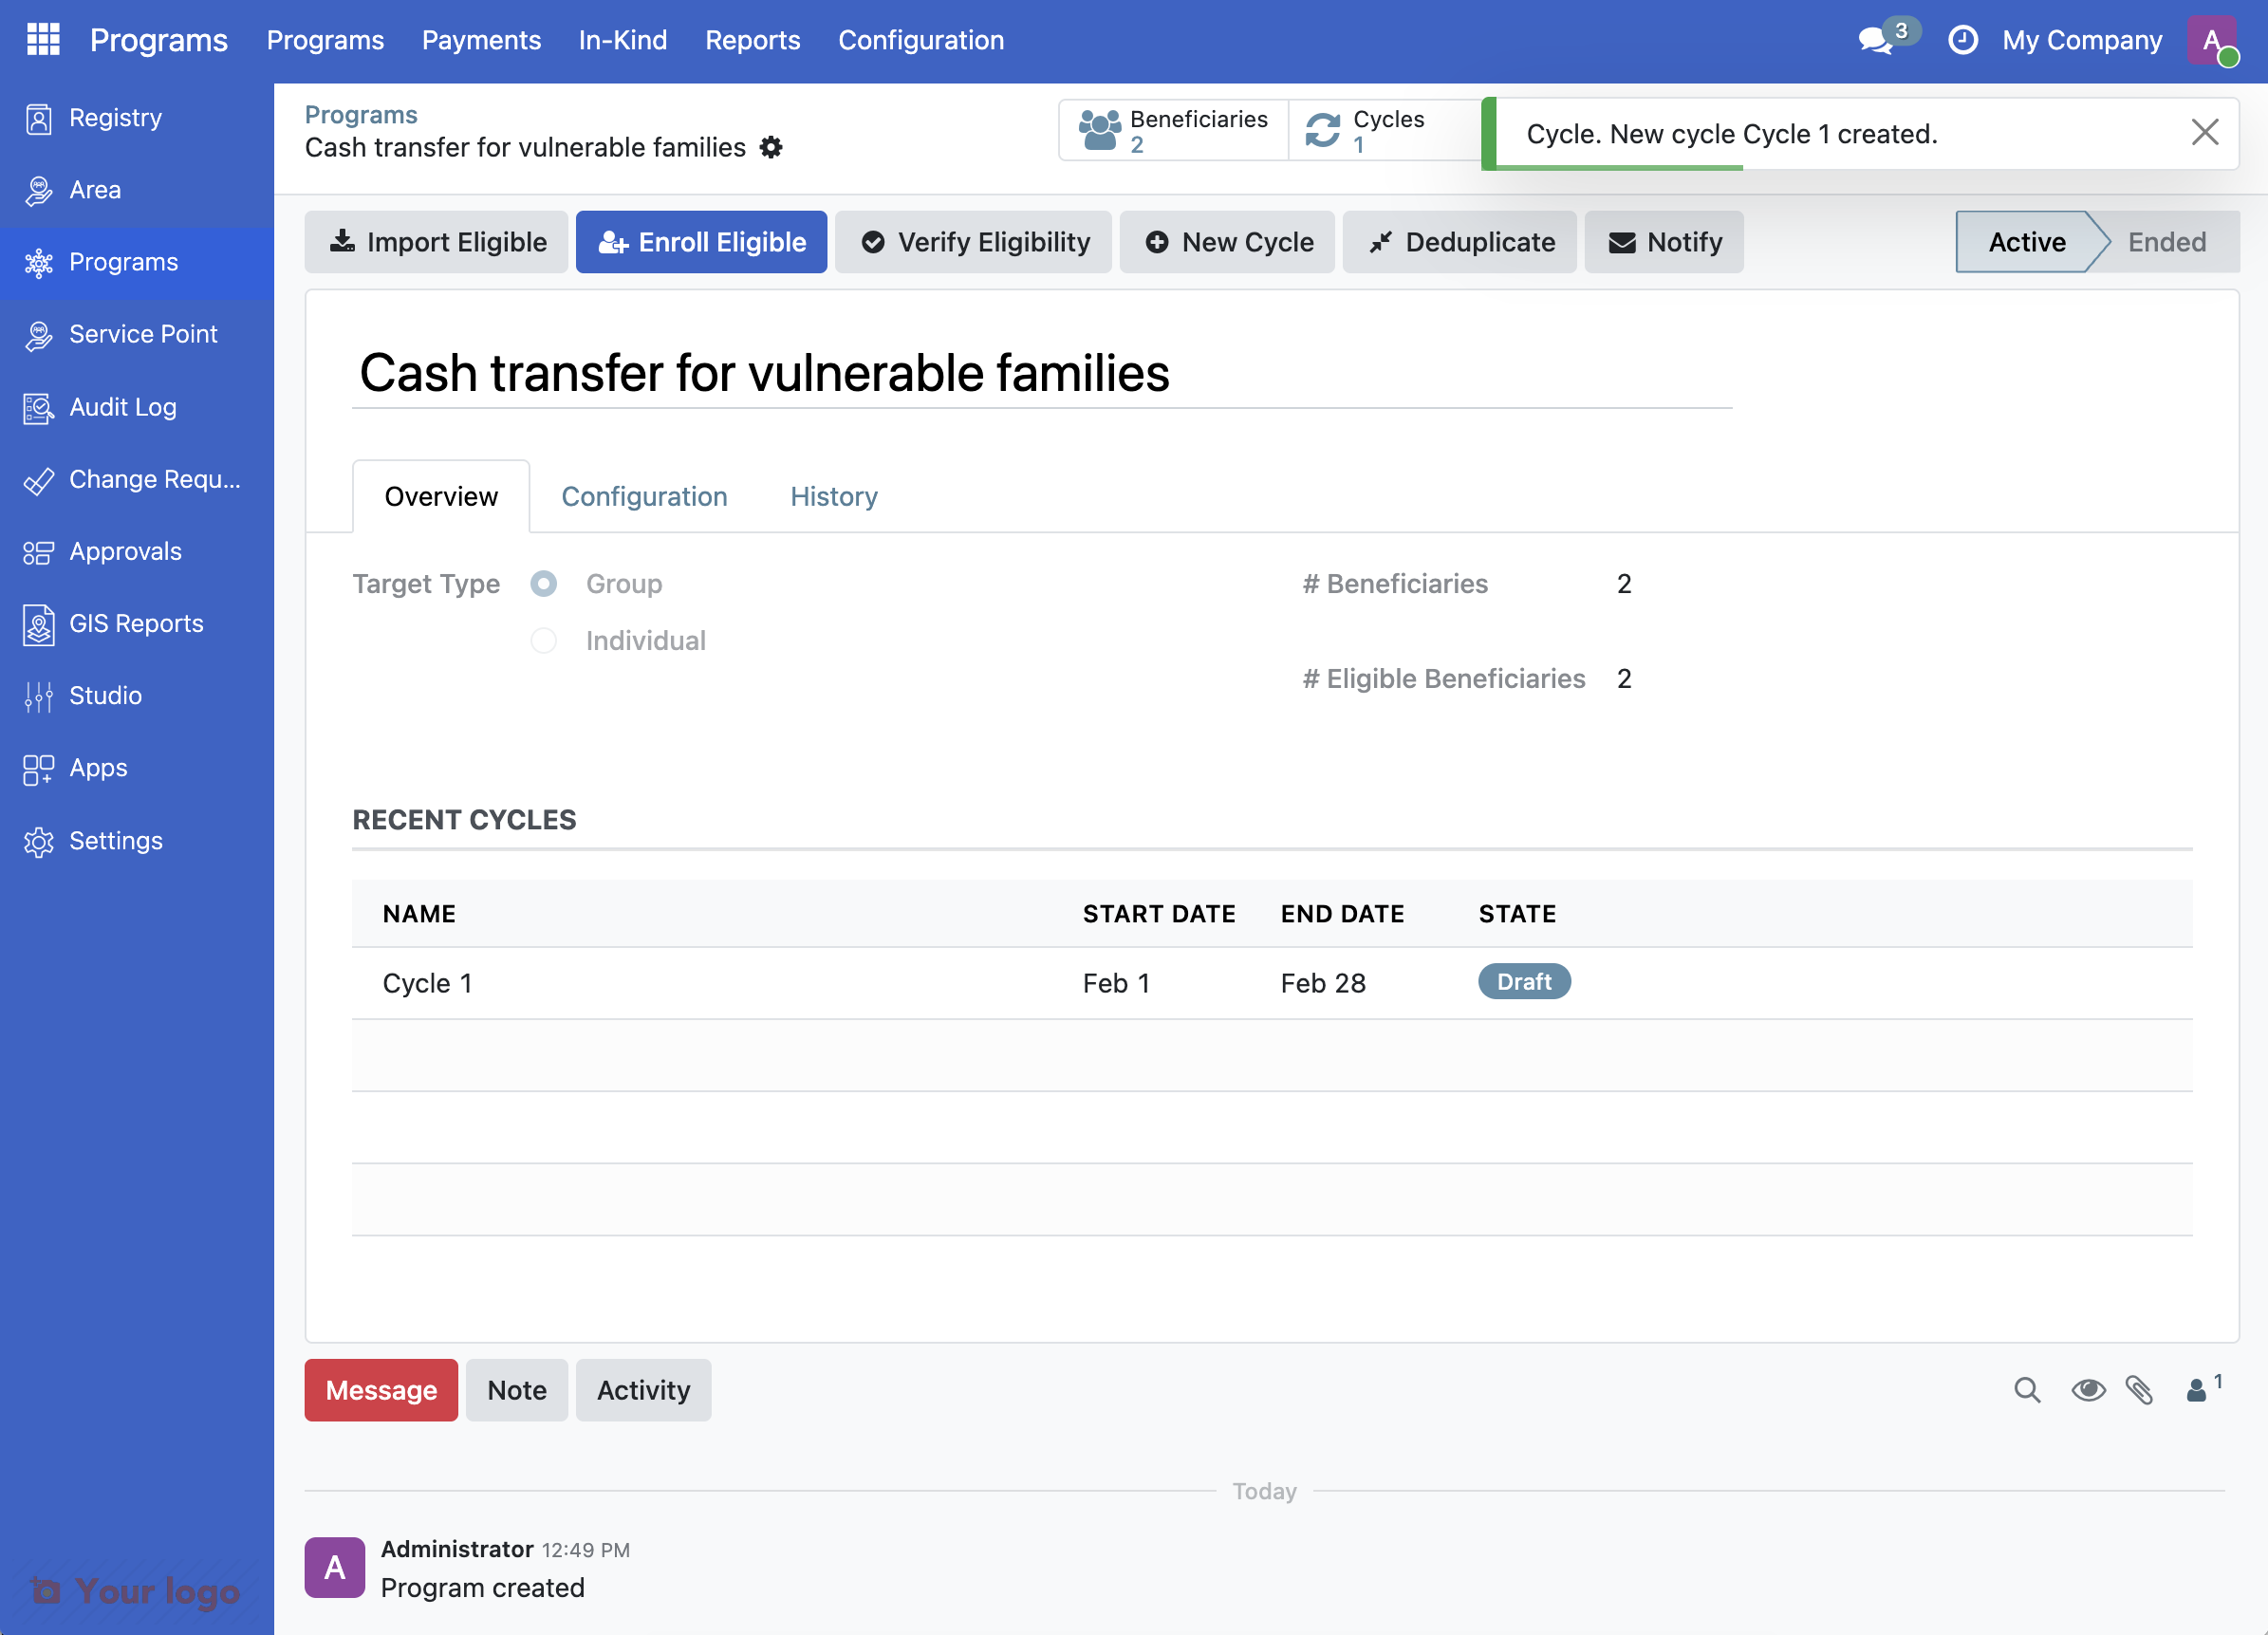
This instantly creates a new cycle listed in the Recent Cycles list with:
Auto-generated name (for example, Cycle 1)
Auto-calculated start and end dates
Draft status
4. Open the cycle details#
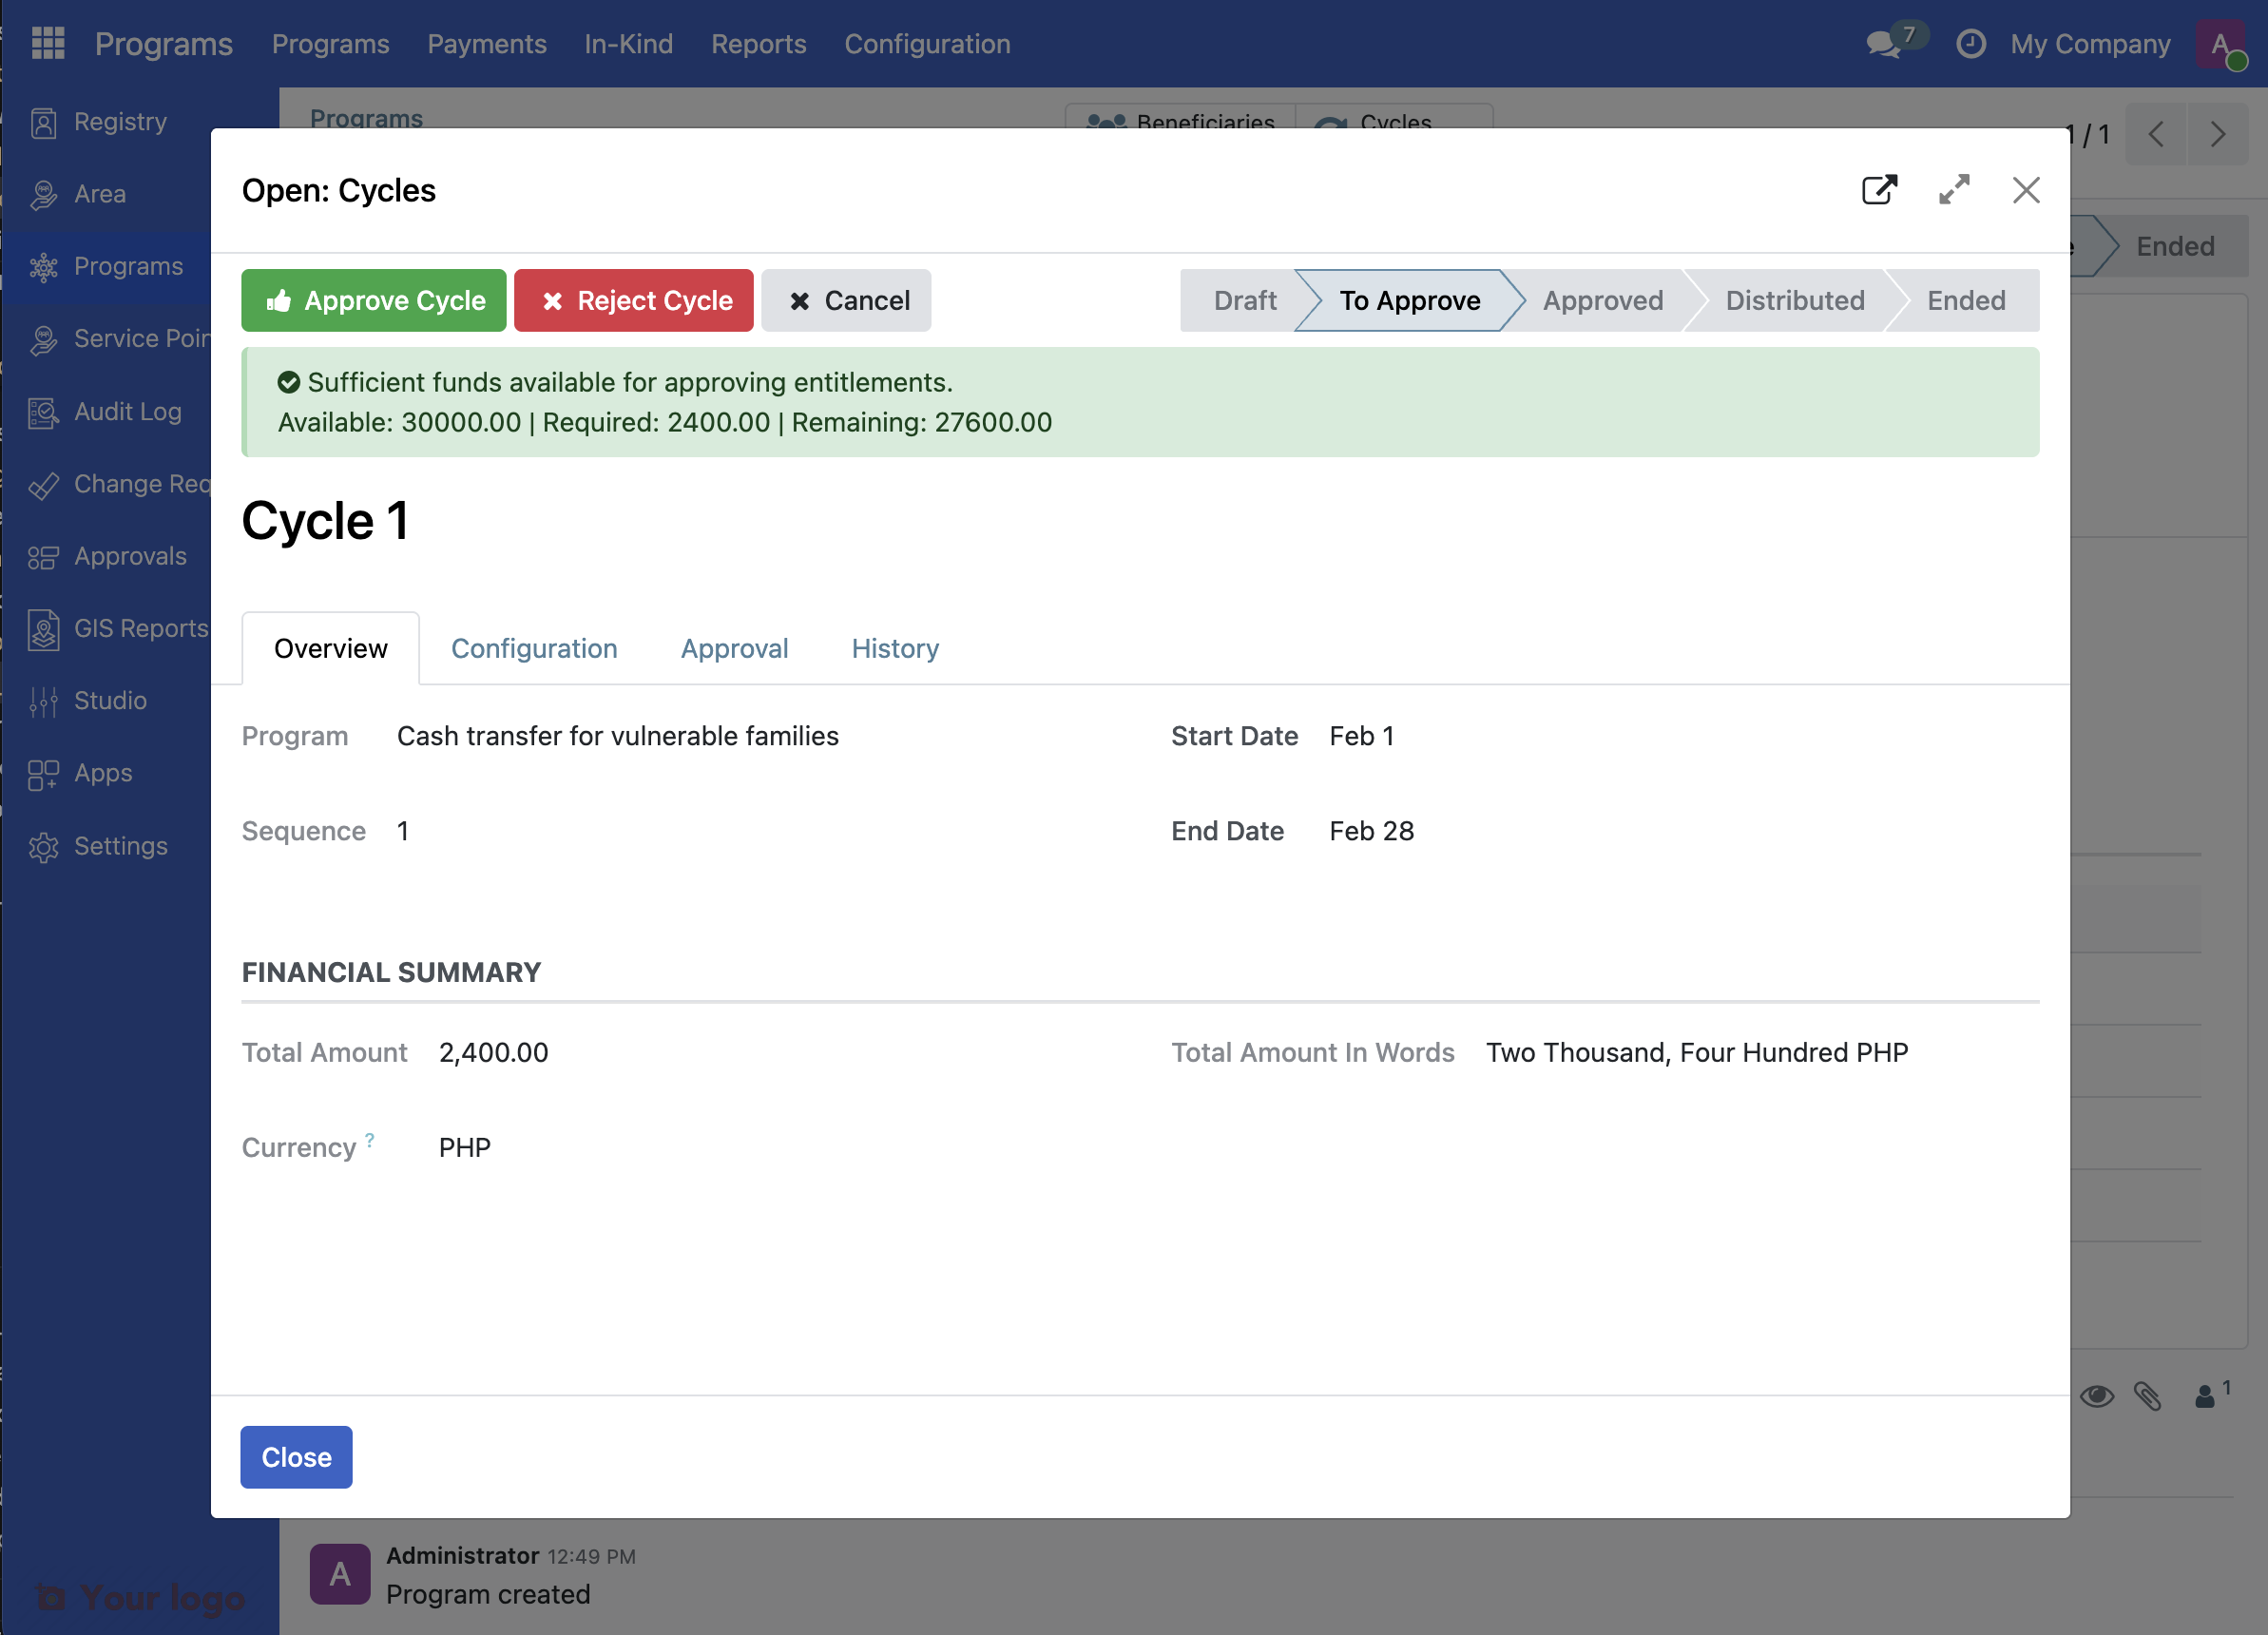
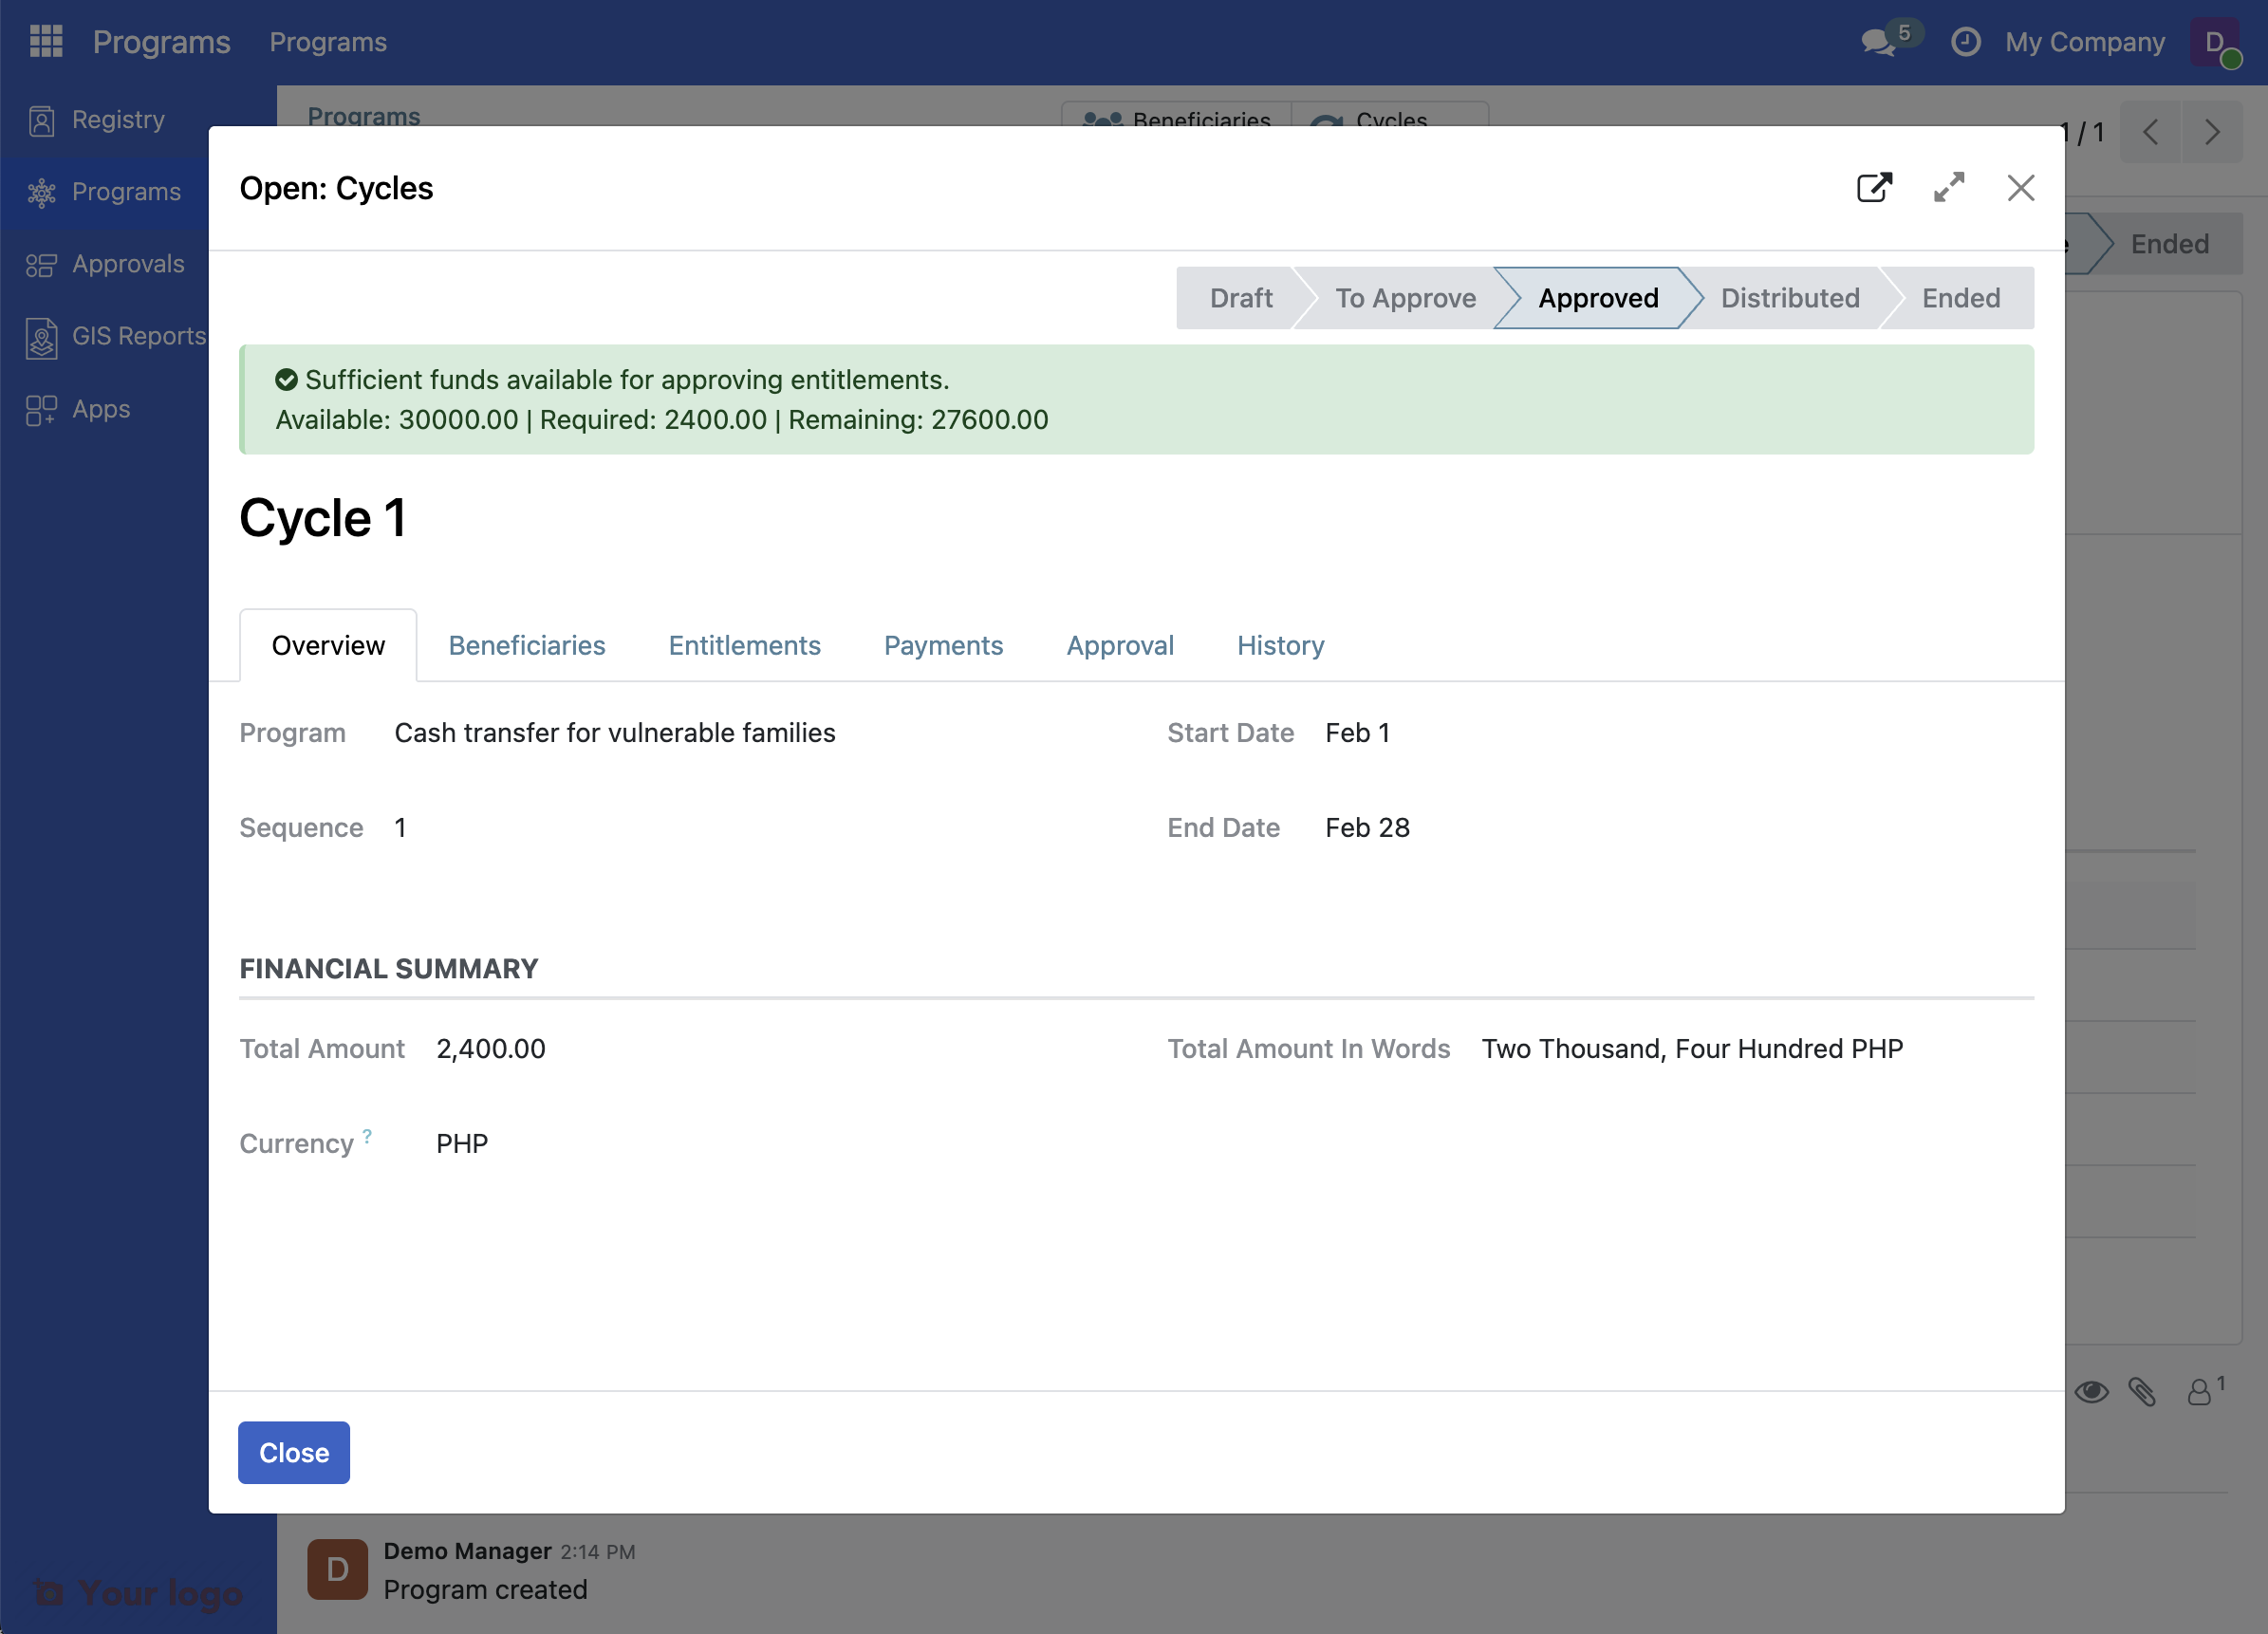
Click on the cycle name in the Recent Cycles list to open the cycle dialog. You'll see:
Program name
Cycle sequence number
Start and end dates
Financial summary (total amount, currency)
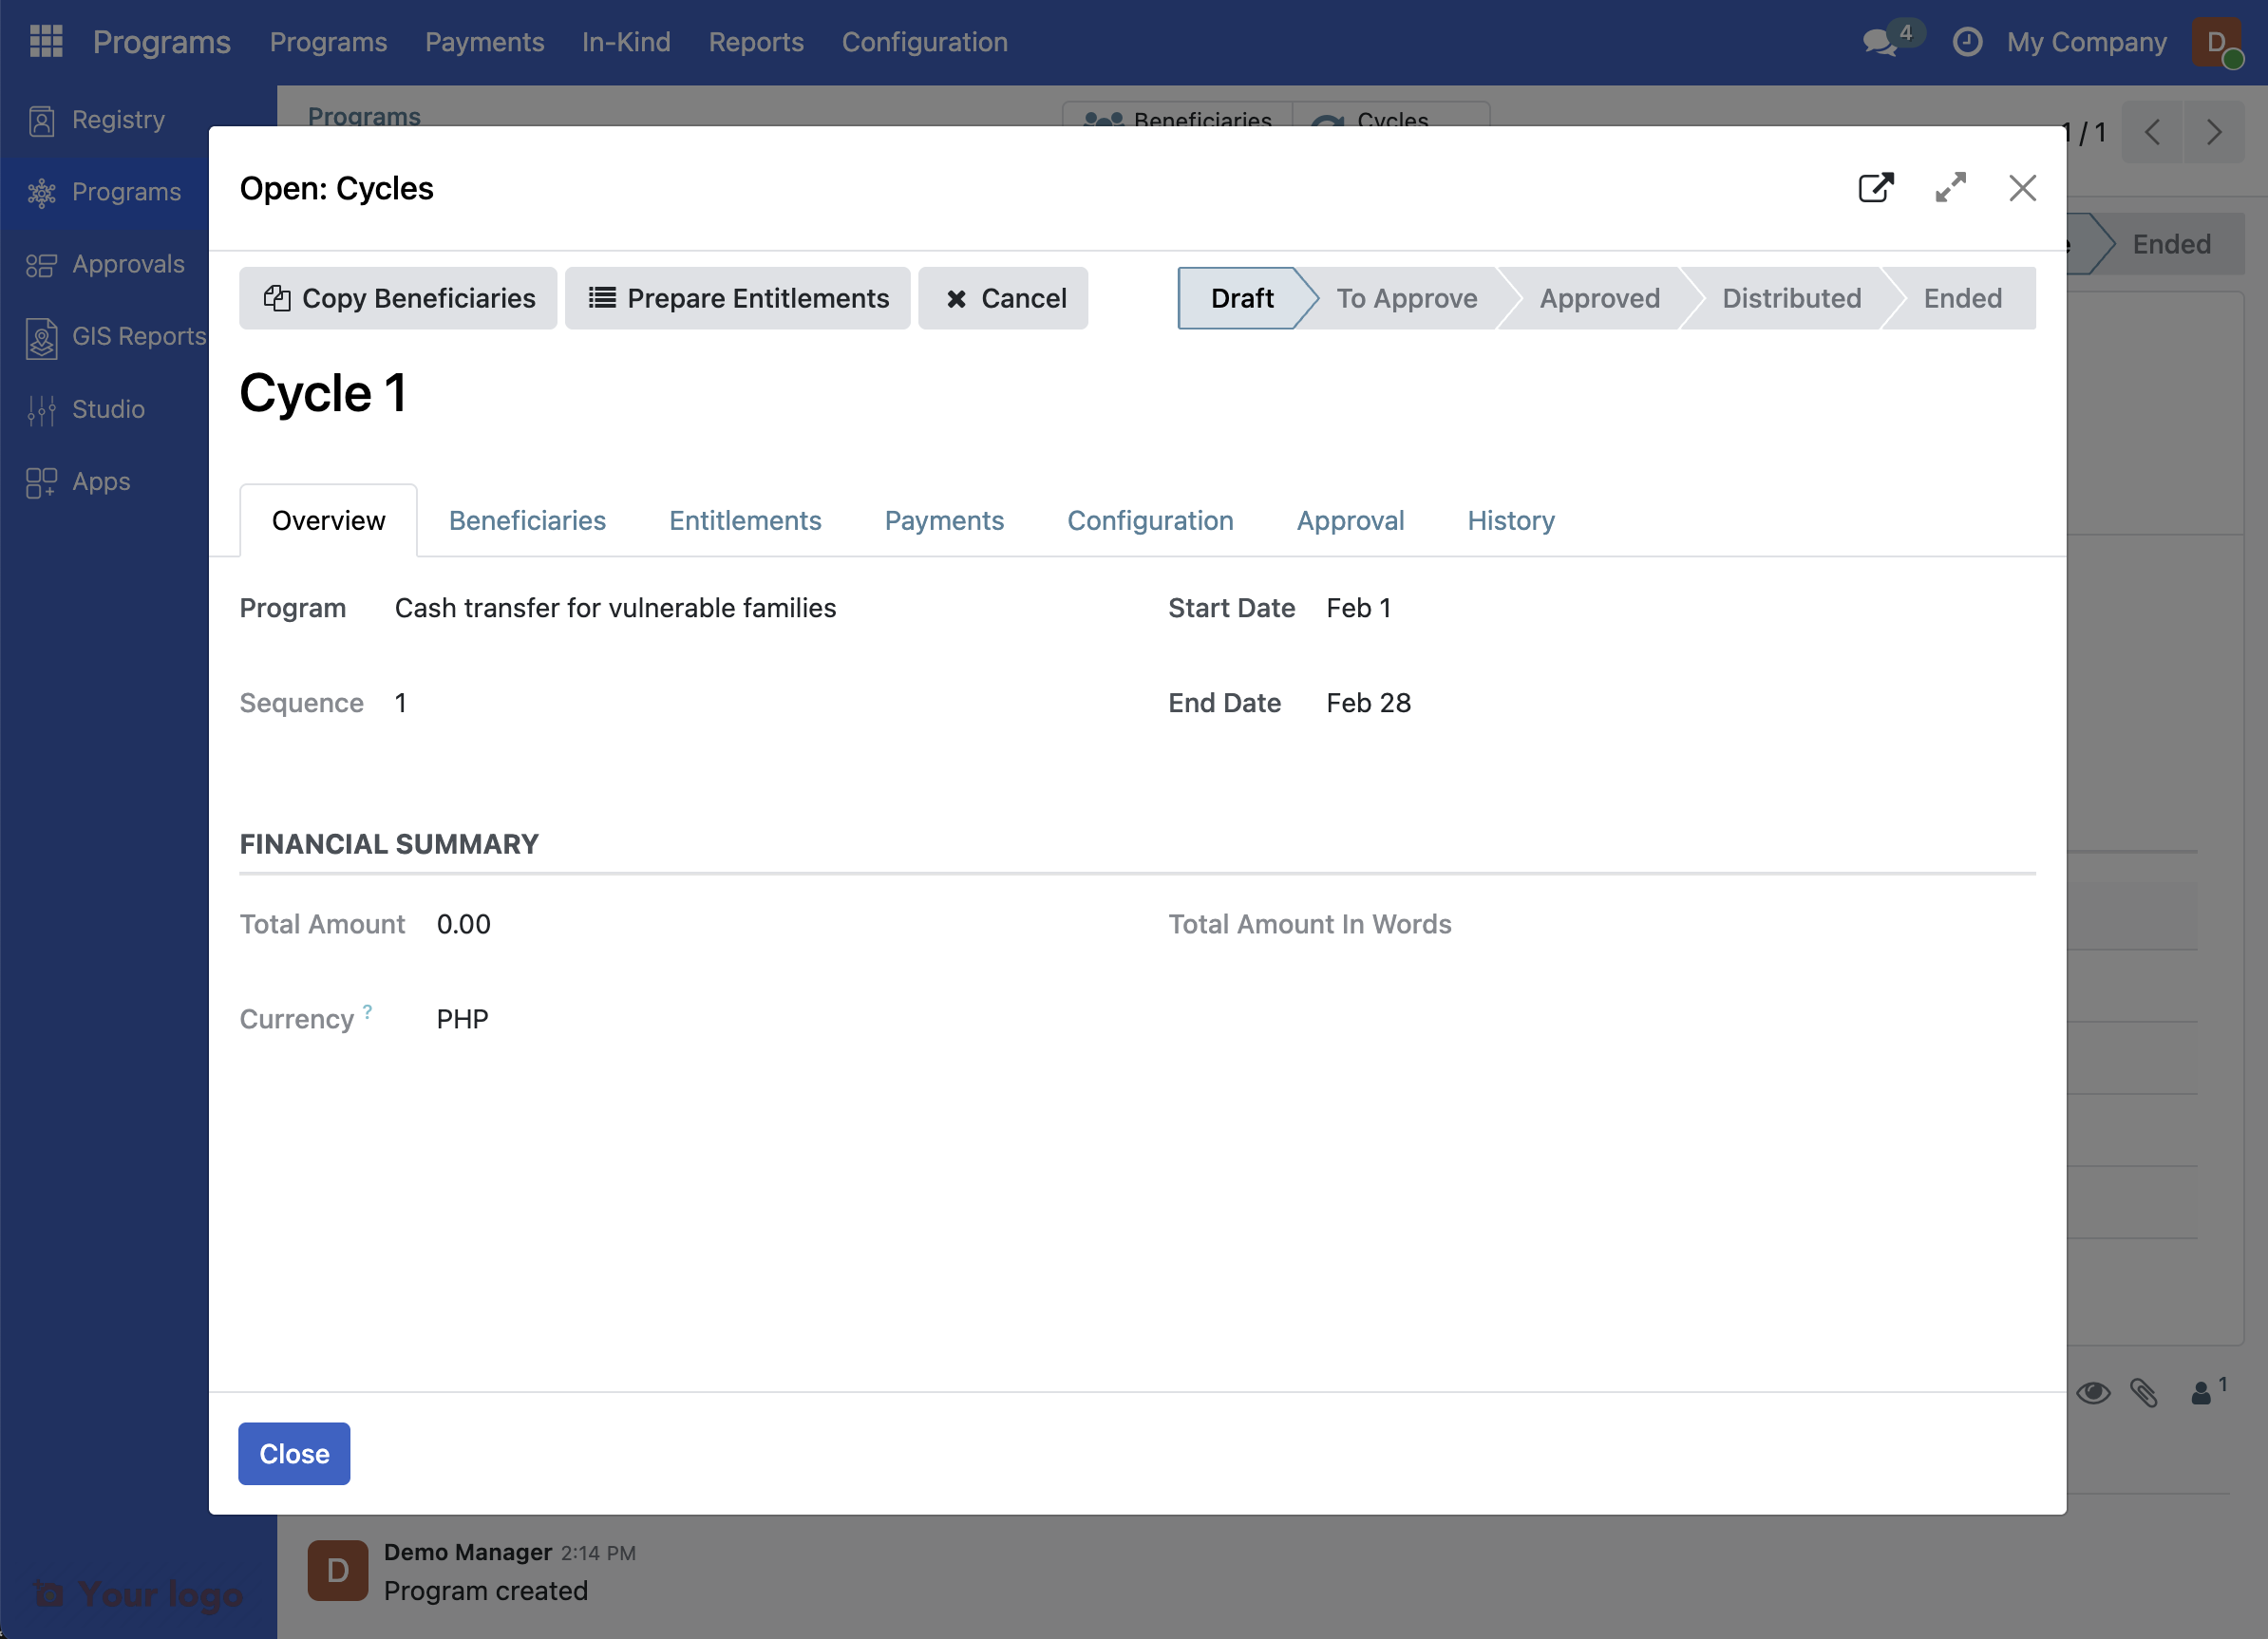
5. Prepare entitlements#
Click the button Prepare Entitlements.
Note that this adds the amount under Financial Summary.
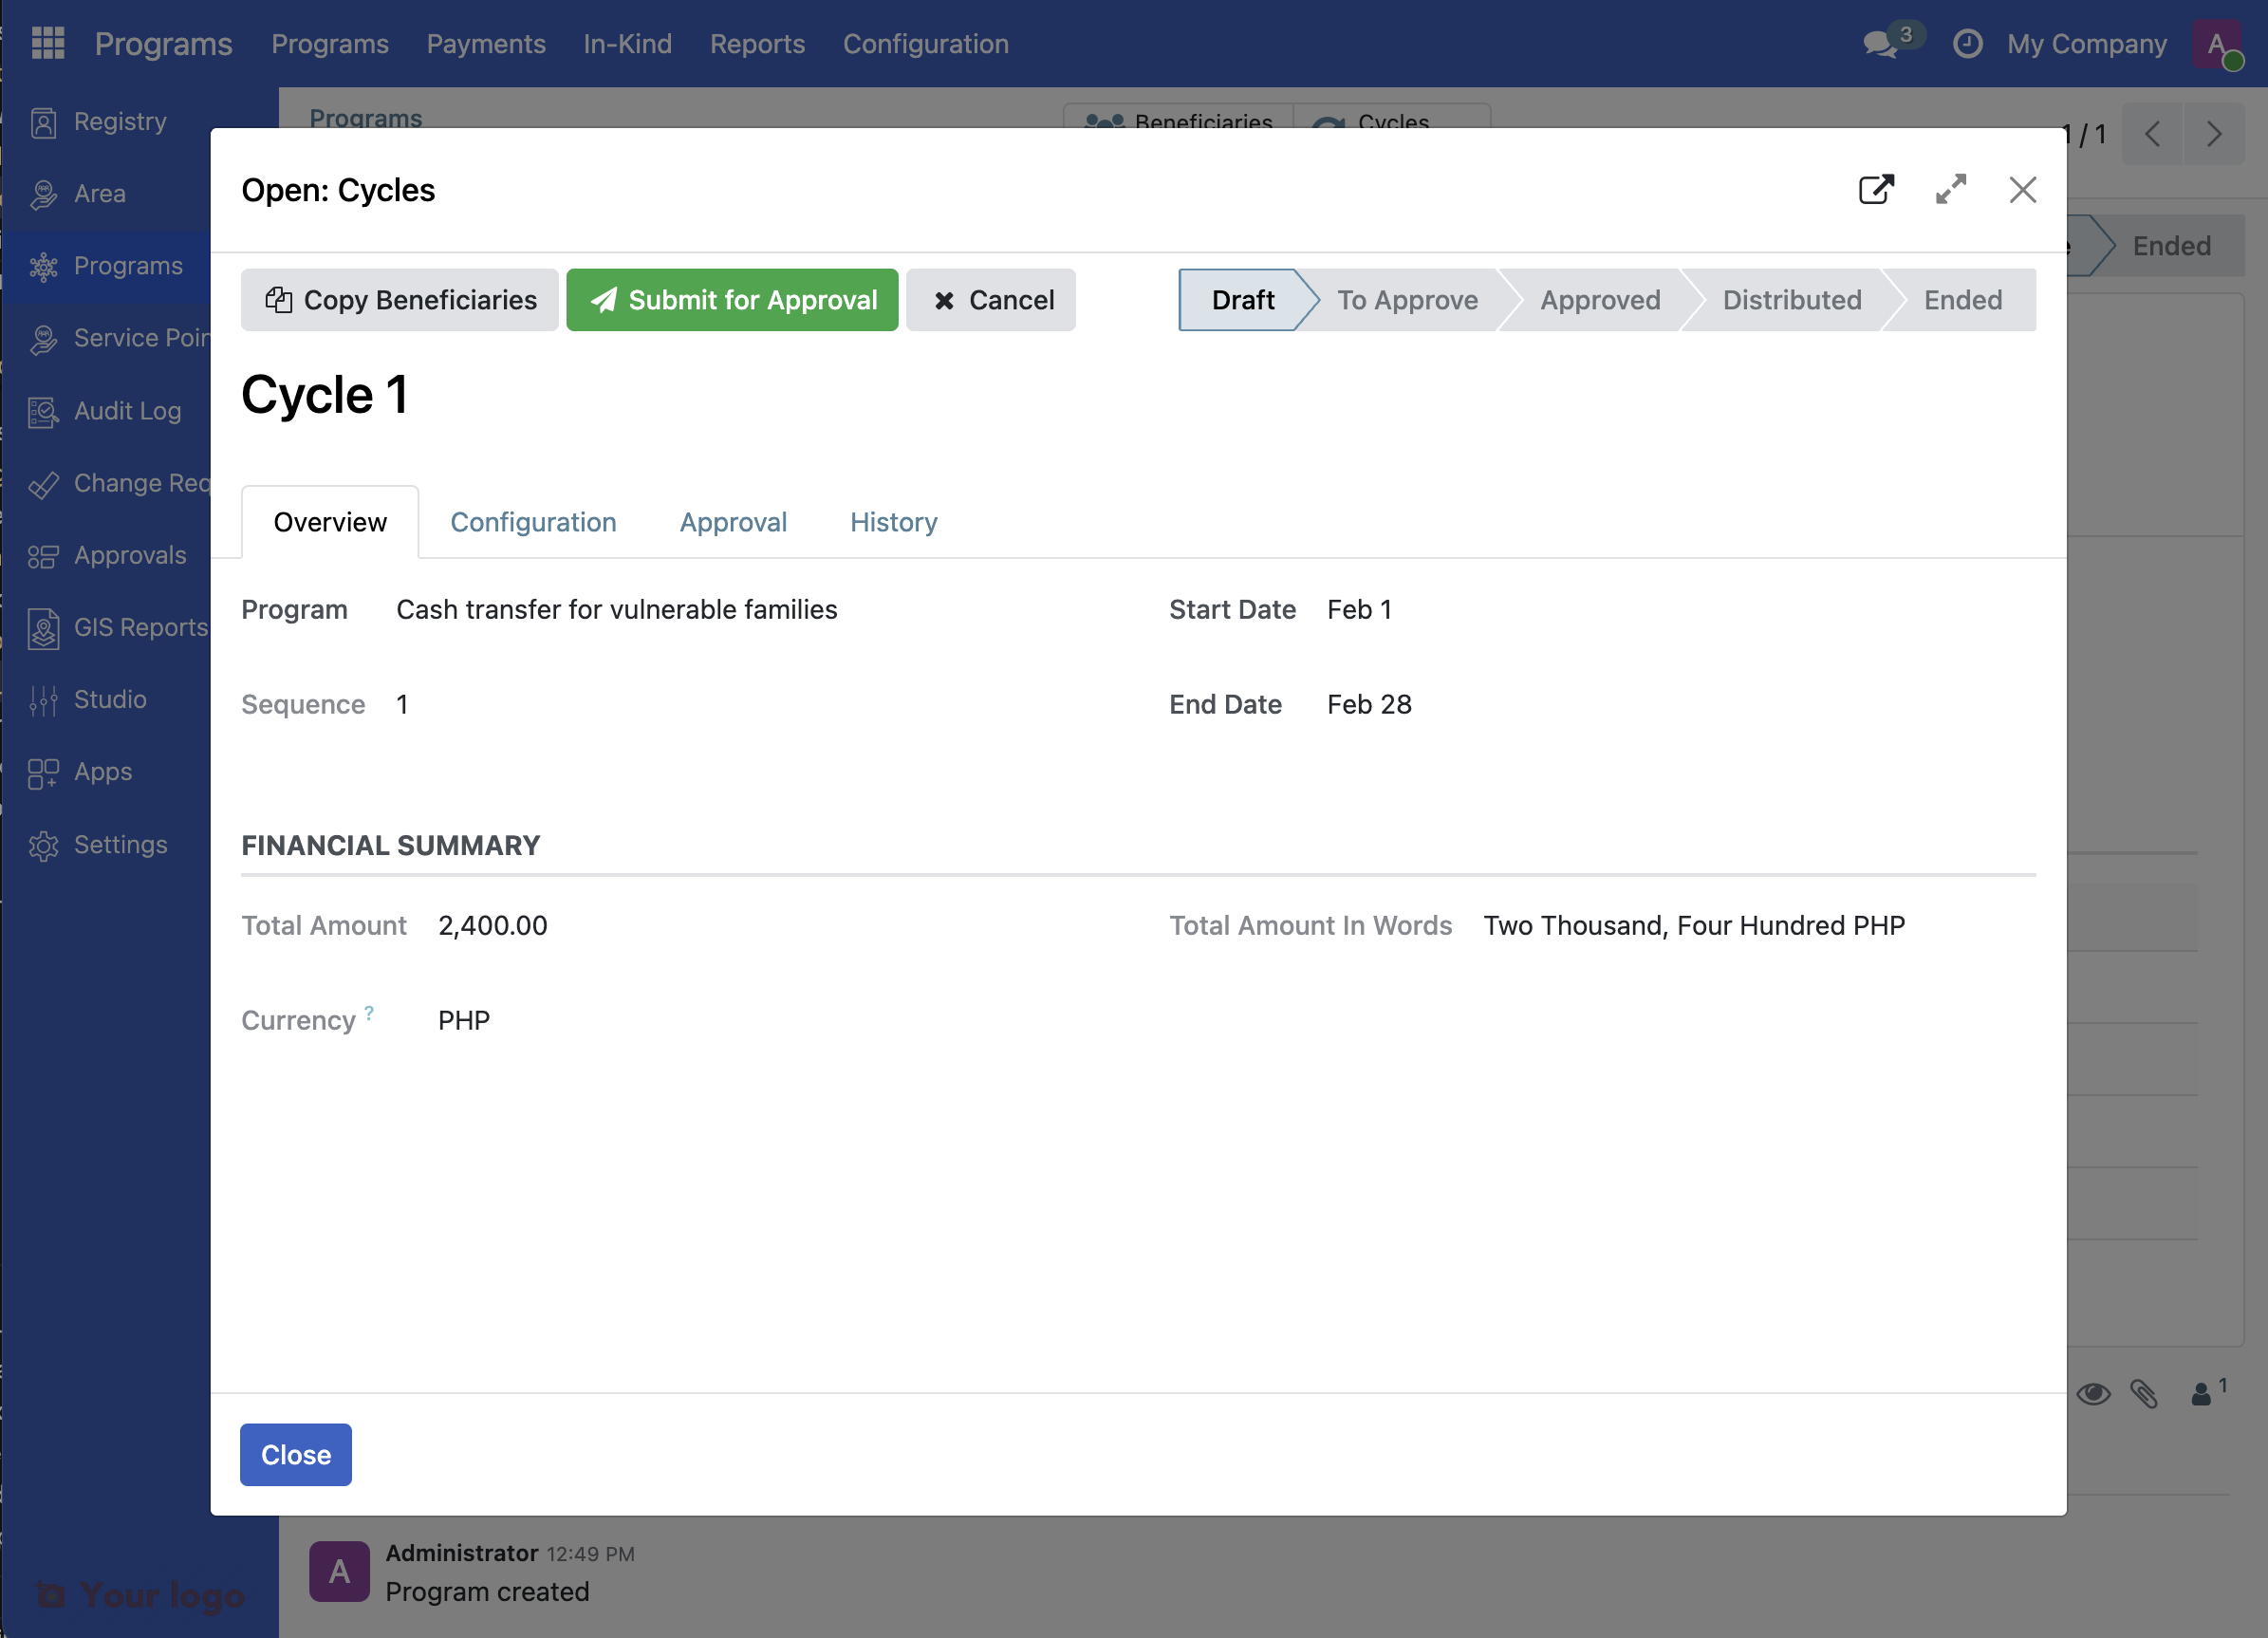
6. Submit entitlements for approval#
Click the button Submit for Approval.
Note that this will verify that the available funds are sufficient for the cycle.
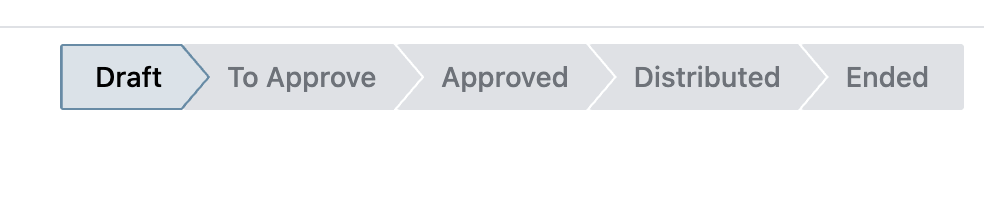
7. Understand cycle status progression#
Look at the status badges at the top of the cycle dialog. A cycle progresses through these statuses:
Draft: Cycle is being set up
To Approve: Cycle is ready for approval
Approved: Cycle is approved and entitlements can be generated
Distributed: Benefits have been distributed
Ended: Cycle is complete
8. Approve the cycle#
Click Approve Cycle. Notice that the state of the cycle is now set to Approved
What you accomplished#
You now understand program cycles:
Cycles organize distribution into time periods
New Cycle button creates cycles instantly with auto-generated names and dates
Beneficiaries tab shows which families are enrolled
Status progression tracks the cycle from Draft to Ended
What's next#
Cycles and entitlements work together:
Cycles define when benefits are distributed
Entitlements define what benefits each family receives
In the next step, you'll learn how to configure benefit amounts and generate entitlements.
Are you stuck?#
Can't find the New Cycle button? Make sure you're viewing the program form (not the programs list). The New Cycle button is at the top of the program form, next to Import Eligible and Enroll Eligible buttons.
New cycle has weird dates? Cycles use auto-calculated dates based on your program schedule. You can edit the cycle dates later if needed by opening the cycle and clicking Edit.
Don't see any beneficiaries in the Beneficiaries tab? This is normal for a new cycle. Beneficiaries are enrolled either:
Automatically when they meet eligibility criteria
Manually using the "Copy Beneficiaries" button
By importing from the registry
What's the difference between Draft and To Approve?
Draft: Cycle is still being set up, beneficiaries may still be added
To Approve: Cycle is ready for review and approval by a supervisor
Can I delete a cycle? Yes, you can delete Draft cycles. Once a cycle is Approved or has entitlements generated, it cannot be deleted (to preserve financial records).
Next step#
Continue to Step 5: Configure and generate entitlements.