Import and export registrant data
Contents
Import and export registrant data#
This guide offers a comprehensive, step-by-step overview of the process for exporting registrant data from OpenSPP. It details the procedures, configurable options, and considerations available to system administrators, including how to use the export functionality to prepare files for re-import into OpenSPP.
Prerequisites#
To be able to import or export registrant data from OpenSPP, you need to:
Ensure your user account has the System Admin role. Learn more in this guide: User access documentation.
Have access to spreadsheet software capable of editing and saving CSV or Excel files, such as Microsoft Excel or Google Sheets
Determine the list of fields relevant to the data you wish to export.
Objective#
By the end of this tutorial, you'll have a solid grasp of how to export registrant data from OpenSPP, along with the steps for importing data—whether you're updating existing records or adding new registrants to OpenSPP.
Process#
The export process begins by selecting individual or group records for export, configuring the export parameters, and saving the output as either a CSV or XLSX file. This exported file can serve both as a reference for record-keeping and as a source for re-importing data to update existing registrants in OpenSPP.
This guide also covers how to import new registrant data—either by using a pre-generated template from the export process or by manually constructing a compatible file from scratch.
Perform export registrant#
When exporting data from Openspp, you will need to define which fields you wish to extract from OpenSPP into the xslx or csv file. Specifying these export parameters is done in the Registry section of OpenSPP, which you can access by logging in as System Admin into OpenSPP then clicking on the menu icon in the top-left corner and selecting Registry.
![]()
Depending on your needs, you can export data for Groups or Individuals. The export procedure is identical in both cases, but the exportable fields differ.
Navigate to either Groups or Individuals and select which records to export by clicking the checkboxes beside each record. To select all displayed records from the current page, click the checkbox beside Name.
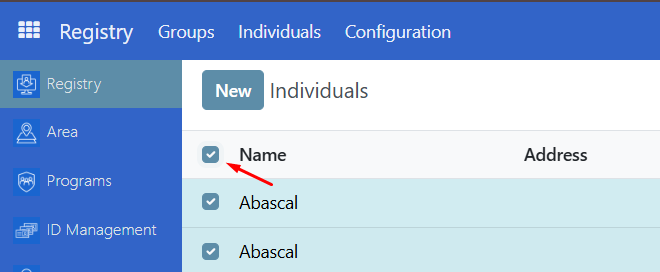
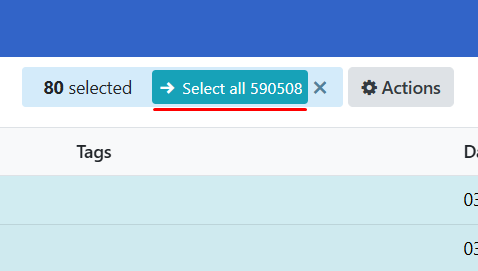
If you want to export all records from all the pages, make sure to click the checkbox beside the Name then click on Select all.
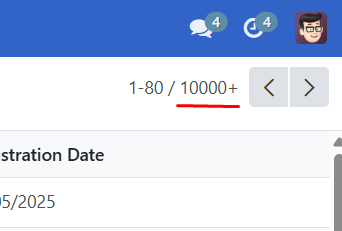
Note
OpenSPP will display record count as 10,000+ if it exceeds 10,000 records, you can click it to display the actual number.
Define export parameters#
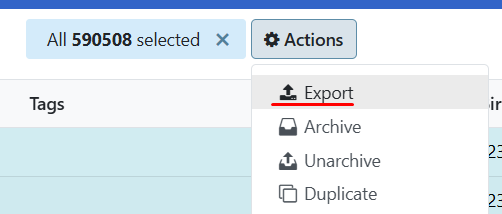
After selecting records, click the Action button then select Export from the list of actions.
The Export data modal should display.
Two formatting options are available when exporting data: CSV and XLSX. Which one to select depends on how you will use the exported file.
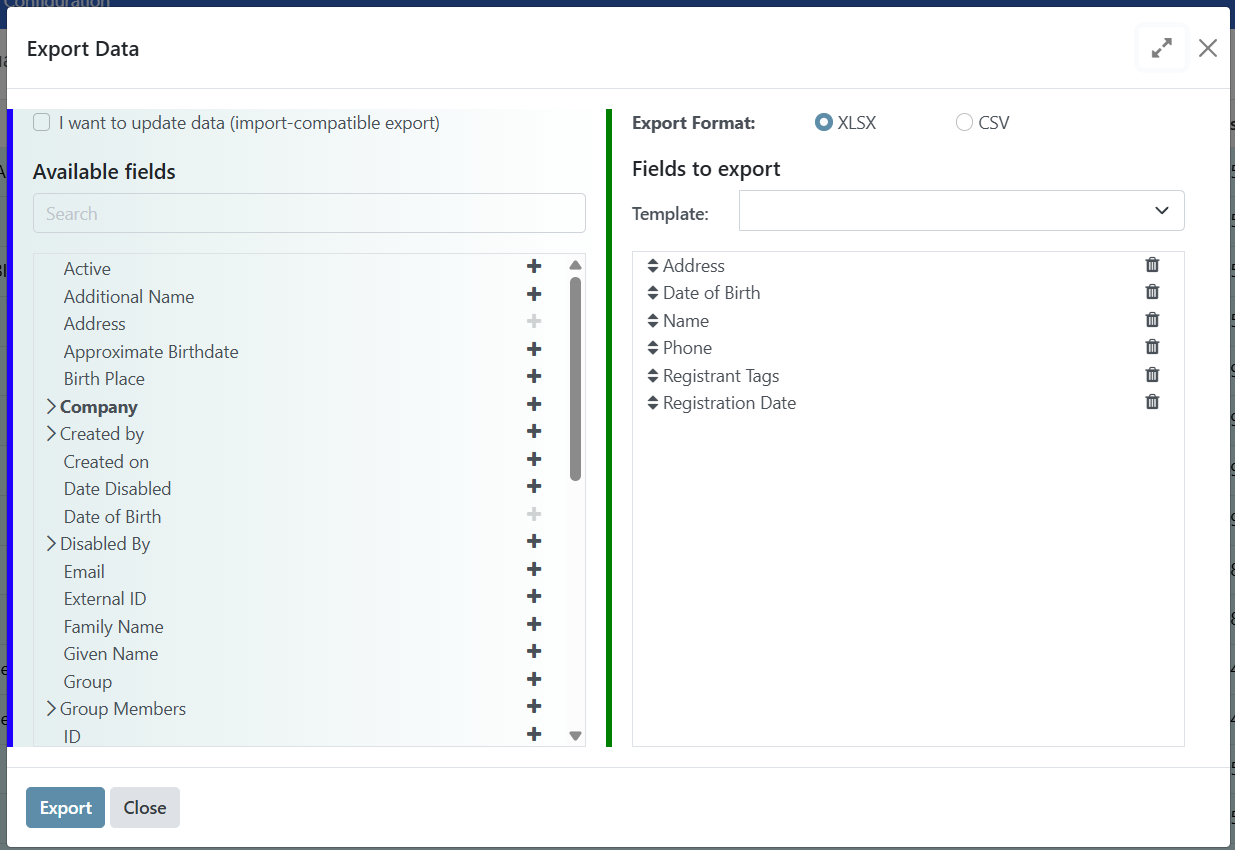
In the Export data modal, The left column displays all data fields available for export, and the right column (Fields to export) shows the fields included in the file export.
Available Fields#
You can click search and type the field you wish to add. for instance, try to search Given Name. Add the fields you would like to export by clicking the + icon. Fields indicated with an arrow > also contain subfields to narrow down the data you want to export. Clicking the arrow will display the subfields available for selection. Depending on your requirements, you can add any fields available for export in the left column.
Fields to export#
Some fields are pre-selected by default as shown here,Name, Address, Phone,Date of Birth, Registrant tags, Registration Date. You may drag and drop these headers vertically to arrange them in the output exported file. You can remove fields in the Fields to export column by clicking the trash icon.
Once you are satisfied with the selected fields in the right column, click the Export button at the bottom of the export window to start the export and download the file.
Creating export templates#
Create a template for the set of fields that you have selected to make it easy to perform the same export later. By clicking on the dropdown arrow, click on New template, set a name for your template, make sure you have already selected your desired fields for this template, and click the save icon.
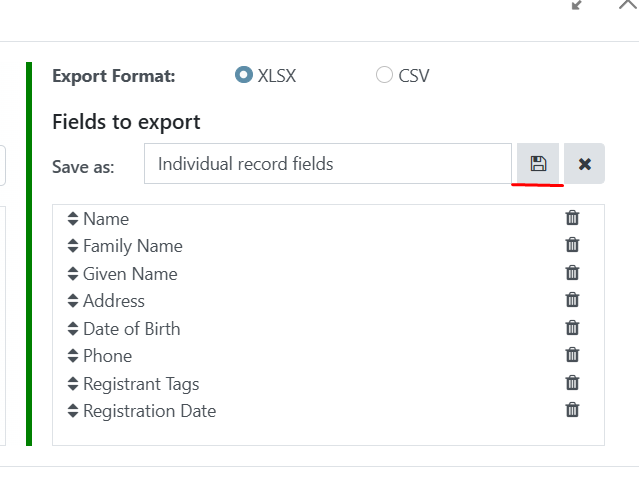
After saving, you can select your template by clicking on the dropdown arrow again and clicking the name of your template. The specific steps and interface may vary depending on the OpenSPP version. Always seek assistance from the support team if you need further guidance.
Perform import#
You can either import to update existing registrant data or import to add a new one, both are explained below.
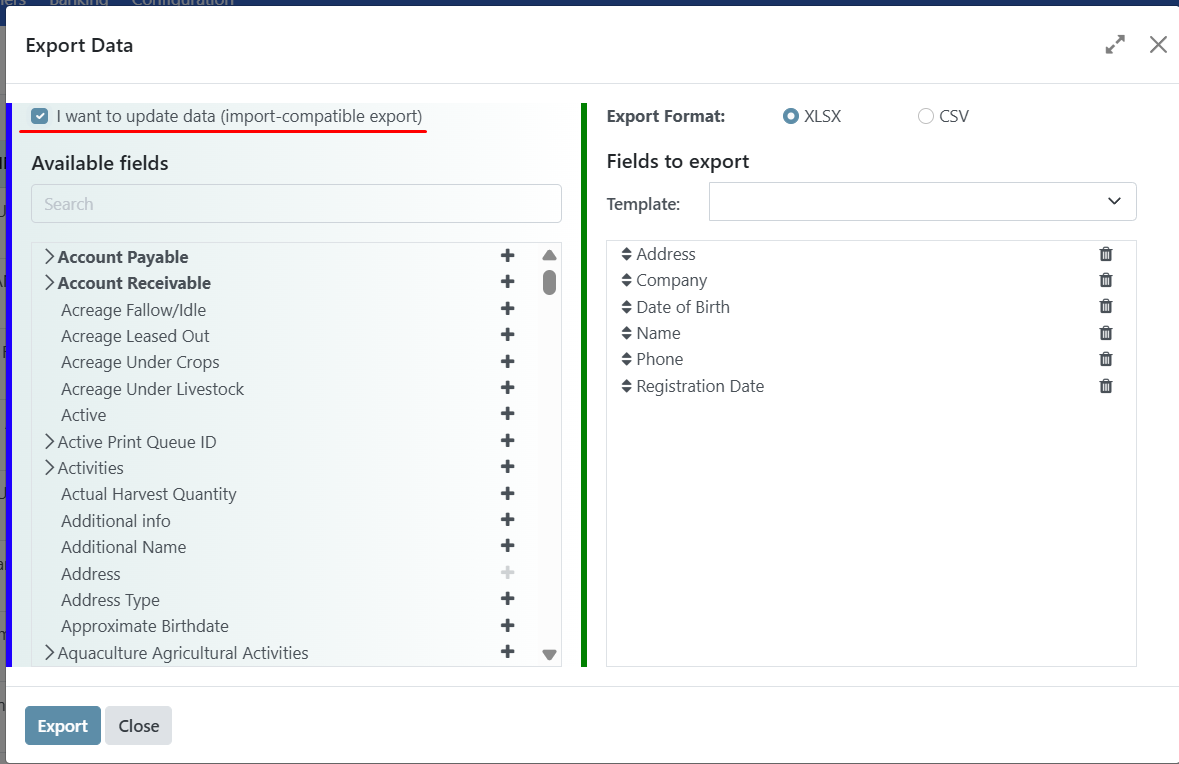
Import to update existing registrant data#
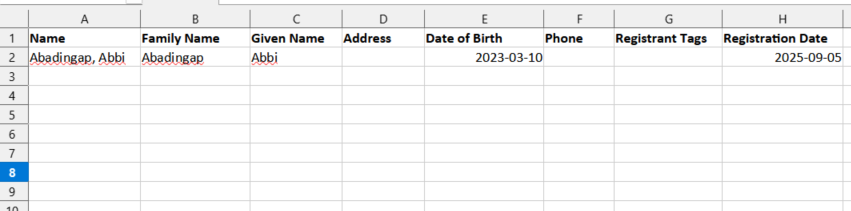
To update existing records or append new data within OpenSPP, select the checkbox labeled I want to update data (import-compatible export). Upon selection, the exported file will automatically include an Id column, which contains the external identifier for each registrant or data entry. This identifier is essential for accurately matching and updating existing records. Additionally, enabling this option will exclude certain fields from the Available fields list—specifically those that cannot be re-imported into OpenSPP. For instance, the Age field is omitted, as it is a derived value based on the Date of Birth and therefore not eligible for direct modification via import.
See below an example of a file with headers including the column ID.
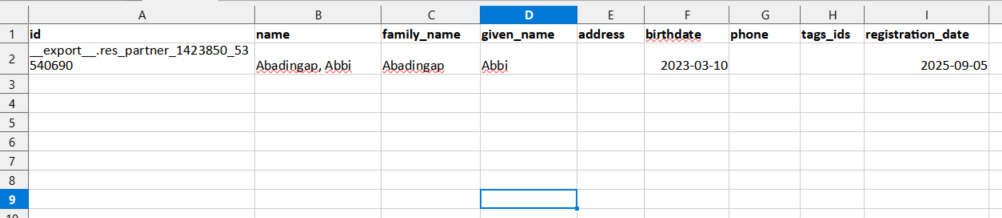
After exporting your file, you may proceed to edit the values as needed. Make sure not to modify the ID value.
Once done updating data in the file, you can then proceed to Preparing file for import section of this document to import it back to OpenSPP.
Note
For bulk updates, the import function offers a more efficient and scalable solution. However, when modifying just one or a few registrant records, it's more practical to update them directly through the UI as a System Admin.
Import to add new registrant data#
If you wish to add a new individual or group (as opposed to updating already existing data), you should prepare headers that are relevant to your import.
For Individuals#
Make sure at least these headers are present in your file:
Name
Familiy Name
Given Name
Example:
Optionally, if you already have existing individuals in OpenSPP, you can export at least one individual and define the headers for export to use as a template.
See Define export parameters section of this document to learn more.
For Groups#
Make sure that at least this header is present in your file:
Name
Example:
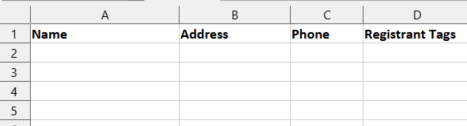
you can add more columns that is needed for your usecase
Optionally, if you already have existing Groups in OpenSPP, you can export at least one Group and define the headers for export to use as a template.
See Define export parameters section of this document to learn more.
Once the headers are finalized, You can then proceed to Preparing file for import section of this document.
Preparing file for import#
Prepare the Excel file for import by filling or replacing values from the associated columns.
Note
OpenSPP supports dates formatted as YYYY-MM-DD (year-month-day).
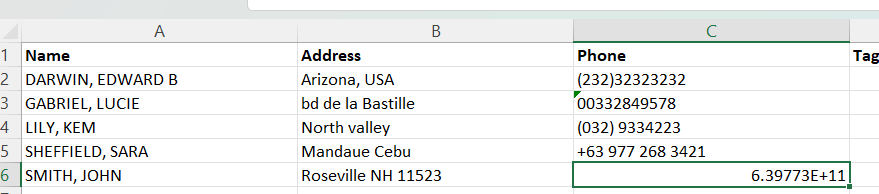
Make sure to convert cells to text for all fields that consist of numbers; similar to phone, date of birth, and registration date. This is to avoid data errors when inputting number values into these fields. For example the phone field, where mobile numbers may start with the + symbol or with leading zeroes can cause a mobile number to be formatted unexpectedly. It is therefore important to format cells to text before adding number values.
Inputting a phone number with a leading + symbol could sometimes be automatically formatted. In this case, you should format the specific cell to Text to resolve the issue.
Once you've finished preparing the file, be sure to save it in either .CSV or .XLSX format—these are the only file types accepted for import into OpenSPP.
Navigate to import page#
After the file is verified and ready, the import can be performed using a System admin account. Navigate to the Registry, and depending on what type of data you are going to import, either click Individuals for individual records or Groups for group records. Click on the Gear icon, then choose Import records from the dropdown menu.
![]()
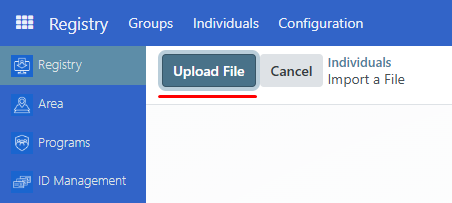
You will be redirected to the upload page. Click on the Upload File button, and choose the file that you prepared.
After uploading your file, you'll be redirected to the next page where you should click Test to begin validating the data in your import document.
Note
It's crucial to run this test before clicking Import, as importing immediately will save all records until an error is encountered—potentially requiring you to delete partial entries and start over. The Test function does not save any data; it simply checks for issues in your file to ensure the import can be completed smoothly in a single pass.
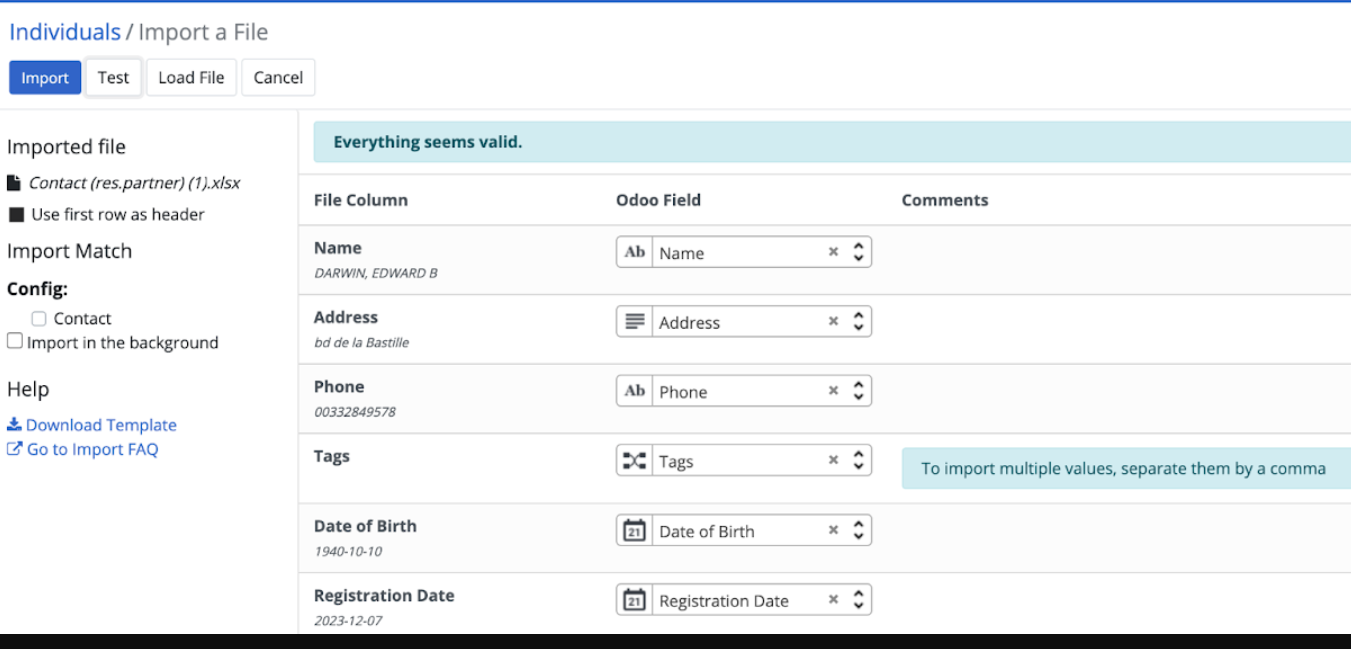
After testing, when the message Everything seems valid appears, you may continue with the import process.
Note
When importing large datasets—typically 2,000 records or more—OpenSPP processes the data in batches during the testing phase. After the initial batch completes, it's important to manually trigger the test again to ensure the remaining records are also validated. For instance, if you're importing 5,300 records, only the first 4,000 will be automatically tested in two batches of 2,000, leaving 1,300 untested until you initiate another round.
If there are any issues with the file, a message will instead be displayed giving directions on how to solve the issue. You may refer to the Error handling section of this document to learn more about common errors.
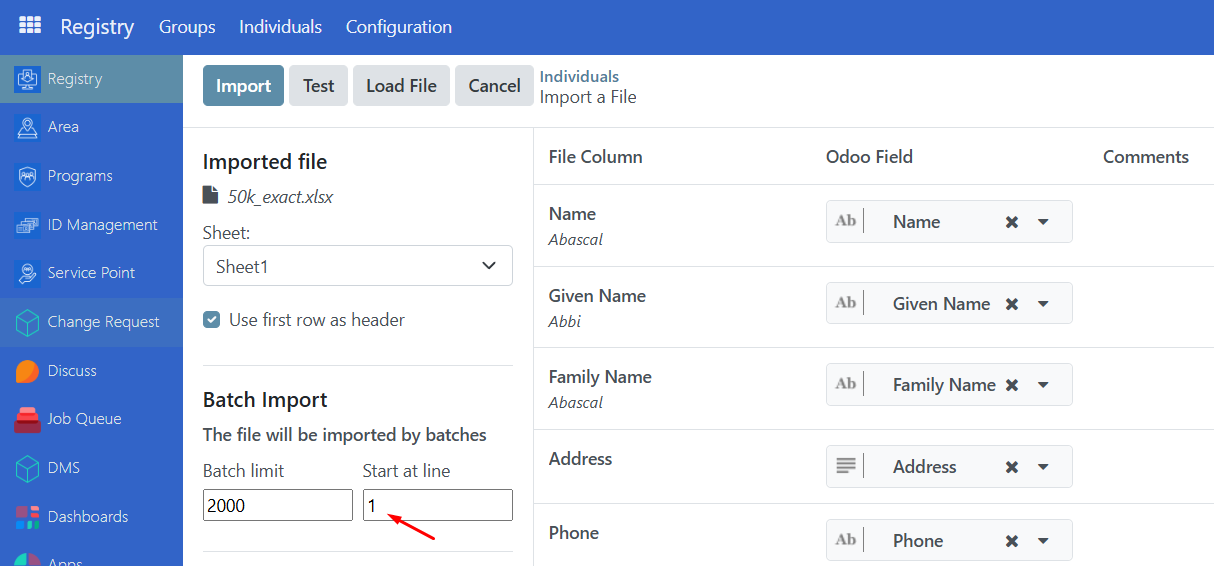
Once the file has been successfully tested and validated, be sure to set Start at line to 1. This ensures that the import process begins at the very first registrant record in your file.
click the Import button. This will redirect to the main table page, and you will receive a notification informing that the records have been successfully imported.

Test or Import time average for larger data sets:
10,000: about 5-10 minutes
100,000: about 10-20 minutes
500,000: about 3-4 hours
Note
Closing the browser window will interrupt the import process, resulting in only partial data being uploaded.
If the network connection is lost, the import will pause automatically and resume once connectivity is restored.
Error handling#
OpenSPP displays different types of error messages on the import page when encountering an error after clicking the Test button. This ensures no invalid value or file would compromise data in OpenSPP. Therefore, it is important to always Test the file first before importing. Here are common errors encountered during import.
Error: "No matching records found"#
Some fields require values that are predefined in OpenSPP, such as the category_id field. Setting a value in this column that does not match the values found in OpenSPP will return an error message. This error will be similar to the screenshot provided below.
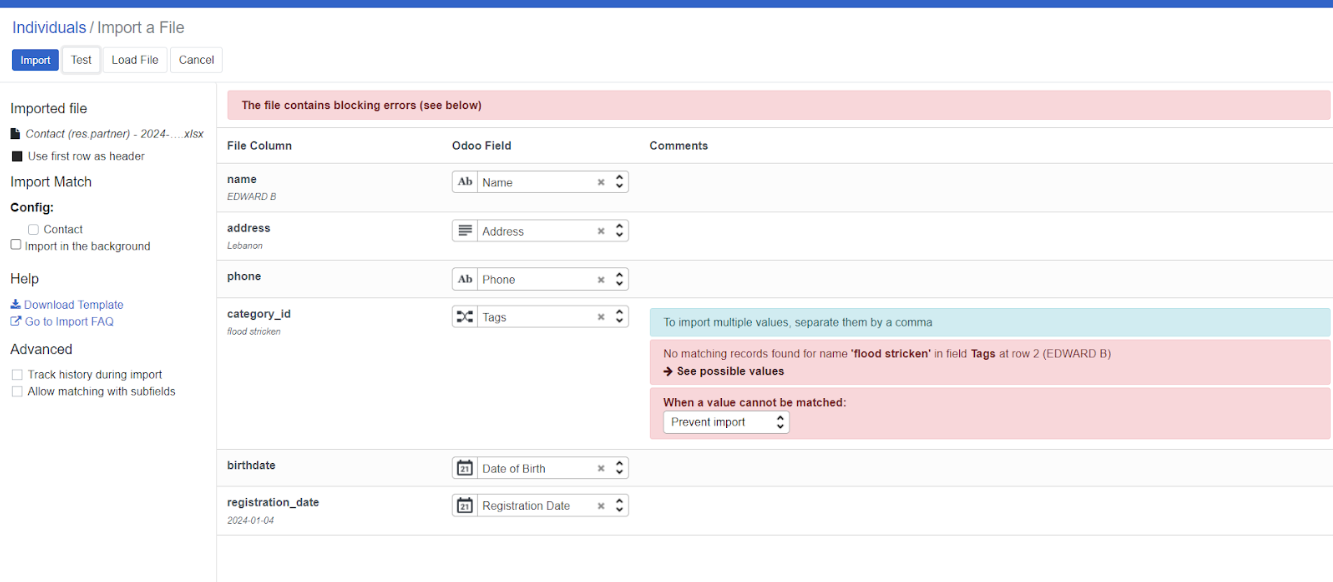
To resolve this type of error, only type in values that are defined in OpenSPP, in this case for category_id, you can navigate to Registry, then click Configuration, and after that, select Registrant Tags. You should see the list of the defined Tags. You may use any of the listed values for category_id, or alternatively, add a new registrant tag.

Error: "To import, select a field"#
If OpenSPP could not recognize your header, it will display To import, select a field beside the unrecognized header, similar to the screenshot below.
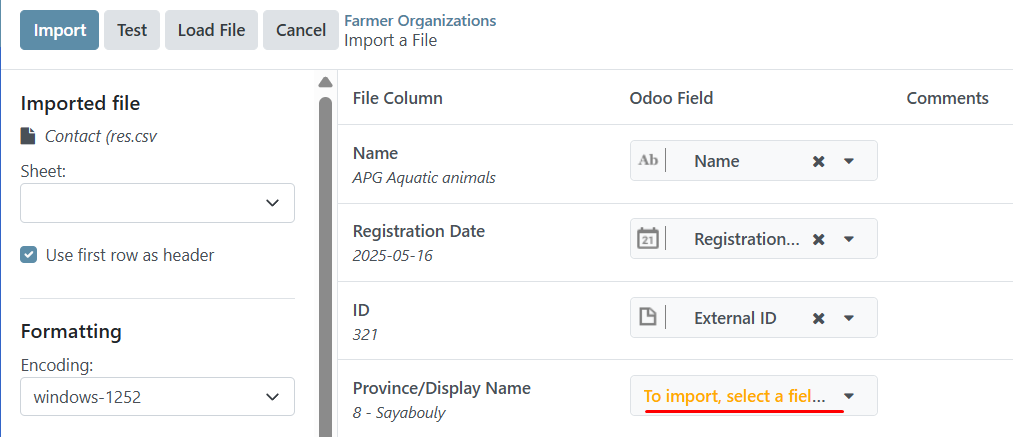
To resolve this error, if you are familiar with what field you want to associate with your header, you can click To import, select a field, and then select from the list of fields you wish to associate your field values with, otherwise, you can remove the header from your Excel file as the field you are trying to import is not available to be imported into OpenSPP.
Error: "Column contains incorrect values"#
Another error is the date format, if the imported format for fields related to date is incorrect, OpenSPP will display an error message. This error will be similar to the screenshot provided below.
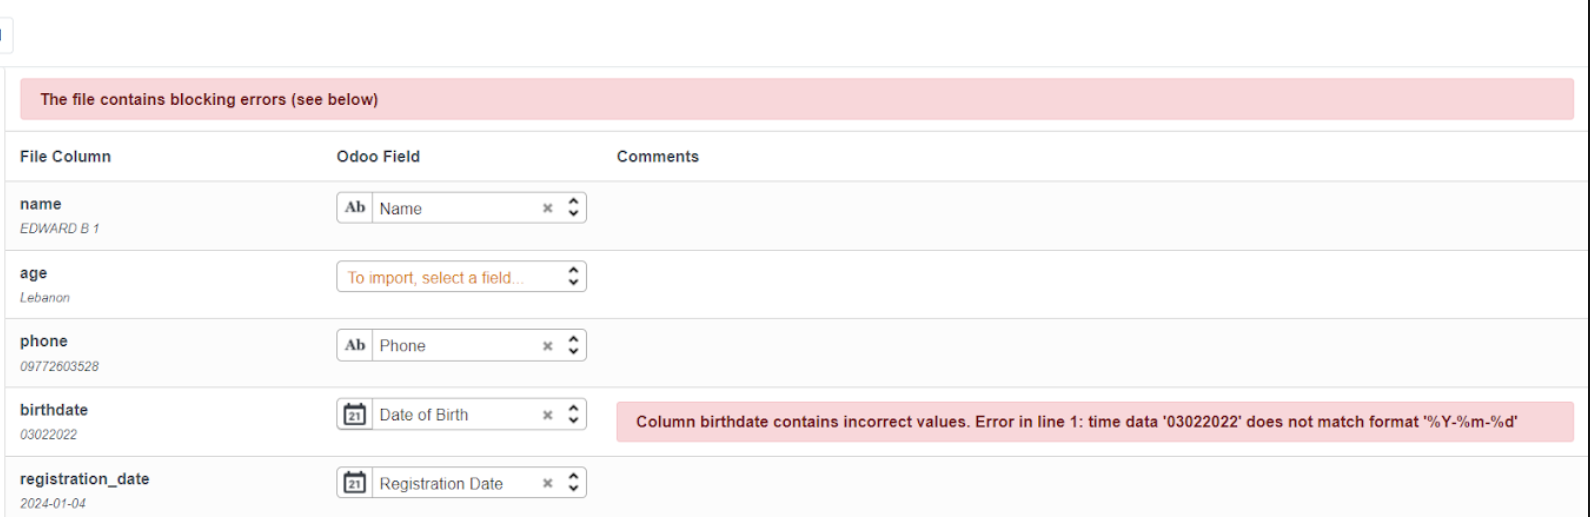
To resolve this error, fix the date format from your Excel file to this format YYYY-MM-DD, save the file, then import to test again.
Error: "You are not allowed to access ‘Import Matching’"#
An issue was encountered when attempting to import using an account with the wrong access rights permissions. This error will be similar to the screenshot provided below.

To resolve this error, assign an admin role into the user account that will perform the import or export process. Learn more about administering permissions here: User access.