Document Management System
Contents
Document Management System#
In this tutorial, you will learn how to use the Document Management System feature in OpenSPP.
Prerequisites#
To utilize the DMS feature, you need to:
Have existing individual records in your registry, either by creating records manually or importing records into OpenSPP. Learn more about this in the guide Register individual or Import and export registrant data
By default, A user account with System Admin has sufficient permission to access the DMS. Learn more in the guide User access
Ensure that the DMS module spp_dms is properly installed and activated. Note that the Change_request (spp_change_request) module automatically installs the DMS module. To learn installing optional modules, refer to the Installing Additional Modules section in the document: Module installation.
A change request must have an attached document.
Objective#
By the end of this tutorial, you will be able to access and review documents uploaded to OpenSPP, manage these documents effectively, and configure the document types allowed for upload.
Process#
Make sure you’re logged in as a system administrator or a user with the appropriate access rights. To customize the document types displayed, navigate to the DMS module and select Configuration → Categories. Once configured, you can browse the auto-generated directories created when a change request is drafted. These directories follow the format CR-[year]-[sequence number], such as CR-2025-000001, and allow you to preview or download documents by directory. To view all uploaded documents across directories, go to DMS → Files. This alternative view organizes change requests by their creation date. For improved document management, you can create custom directories by selecting Directories → New. This lets you define folders where uploaded documents can be stored and organized.
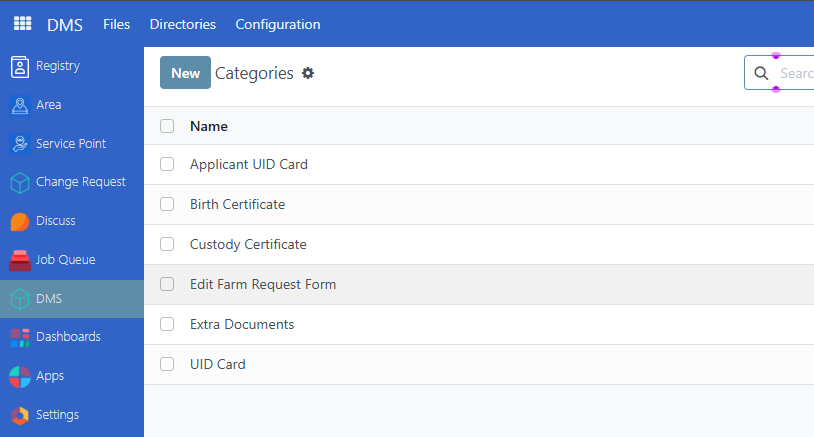
Configure document types#
To modify document types in DMS, navigate to DMS → Configuration → Categories.
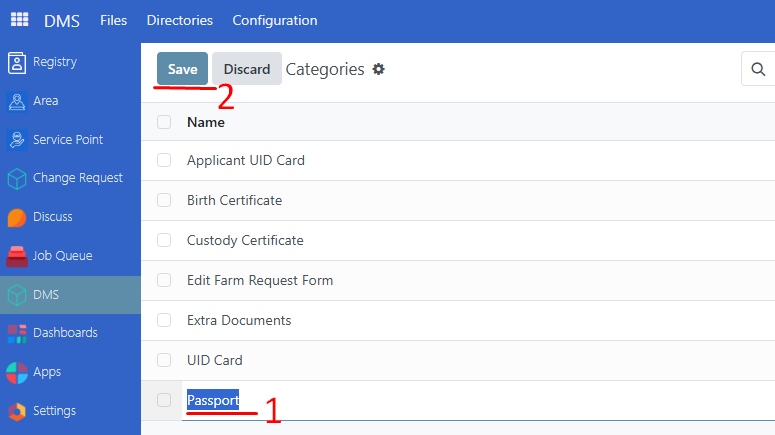
Create new document type#
Click New to create a new document type. Enter the name of the ID type, then click Save to apply the changes.

Edit document type#
To edit a document type, click on the name of the document type to edit it directly. Then click Save to complete the changes.
Delete document type#
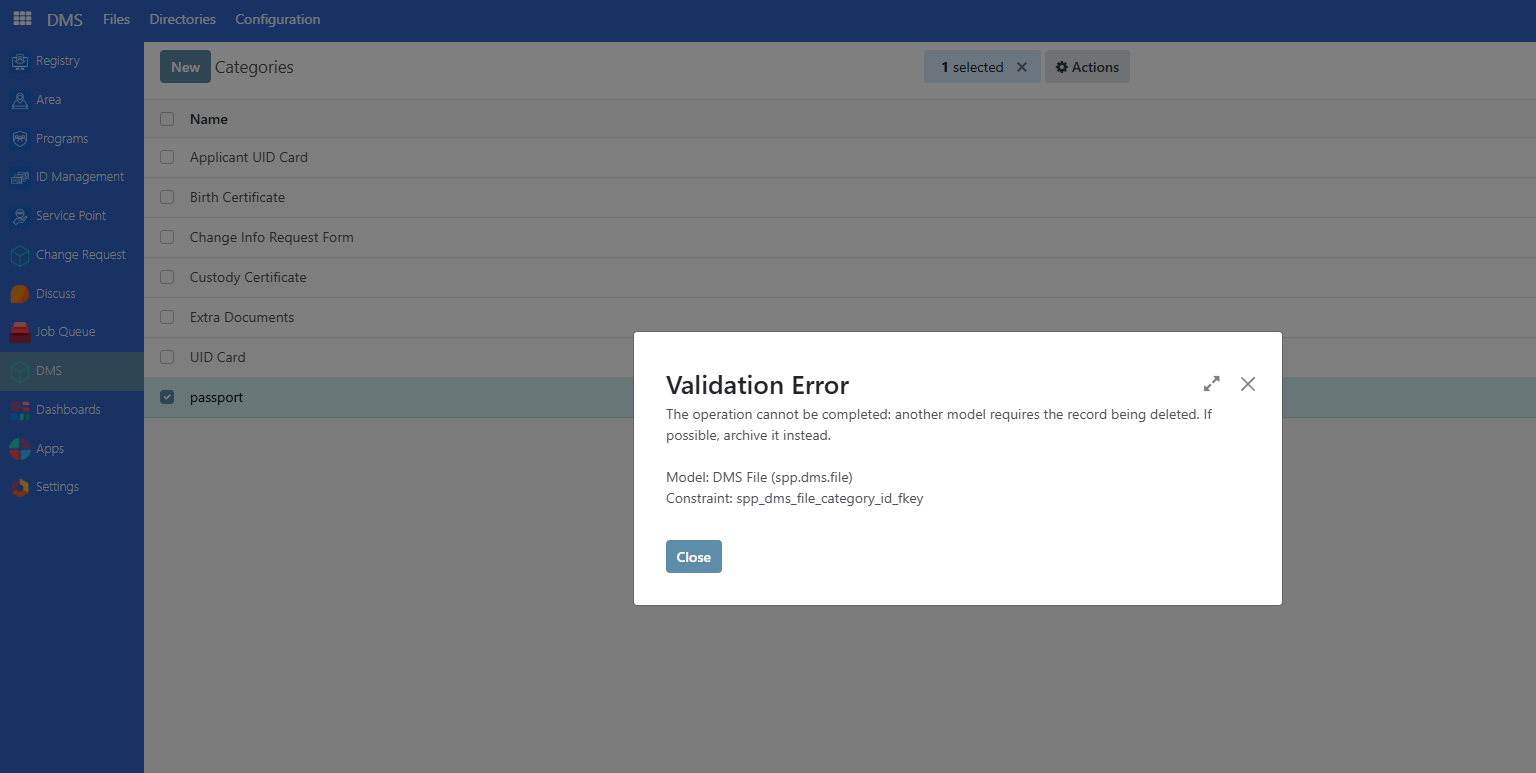
To delete a document type, enable the checkbox beside the document types you wish to delete, then click on Actions → Delete.
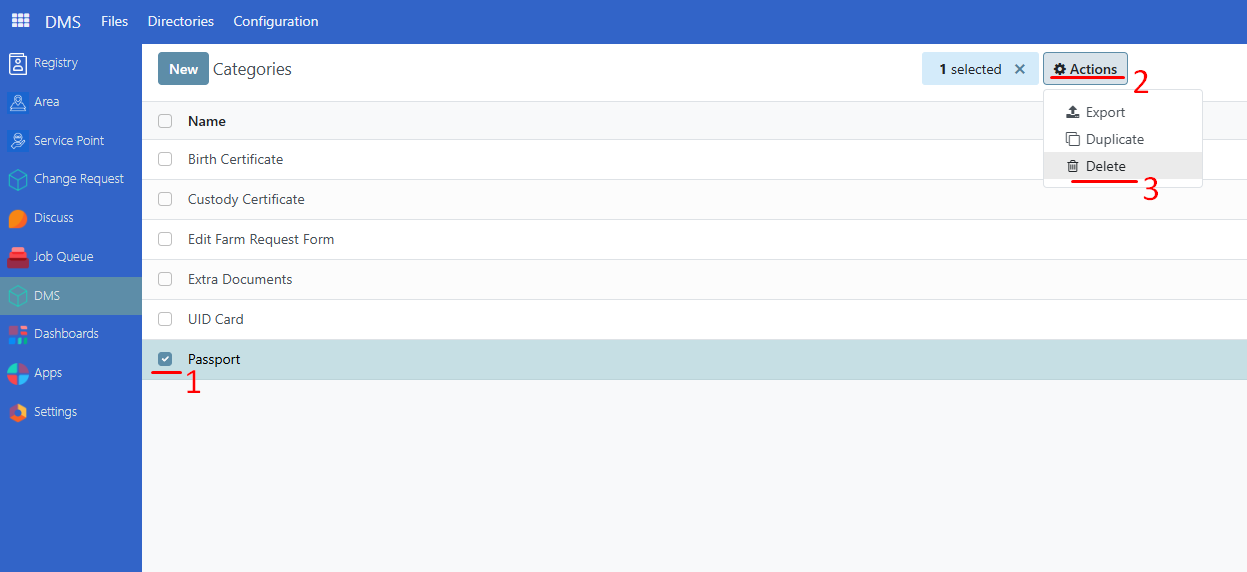
Note: Attempting to delete a document type that is already being used by a change request will display an error message.
Preview and download documents#
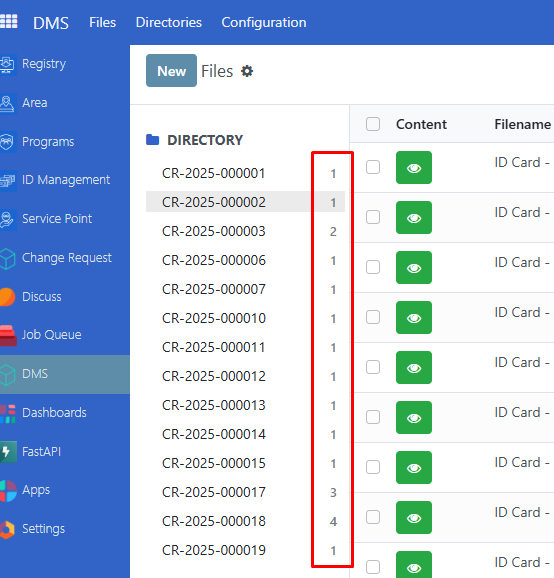
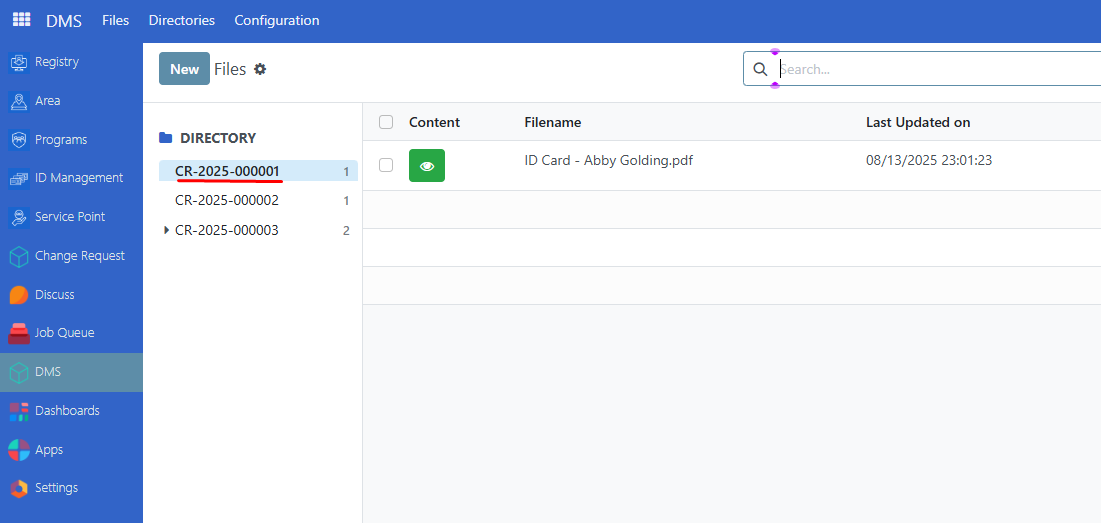
To preview attached documents, navigate to DMS → Files. All attached documents from change requests should be listed on this page.
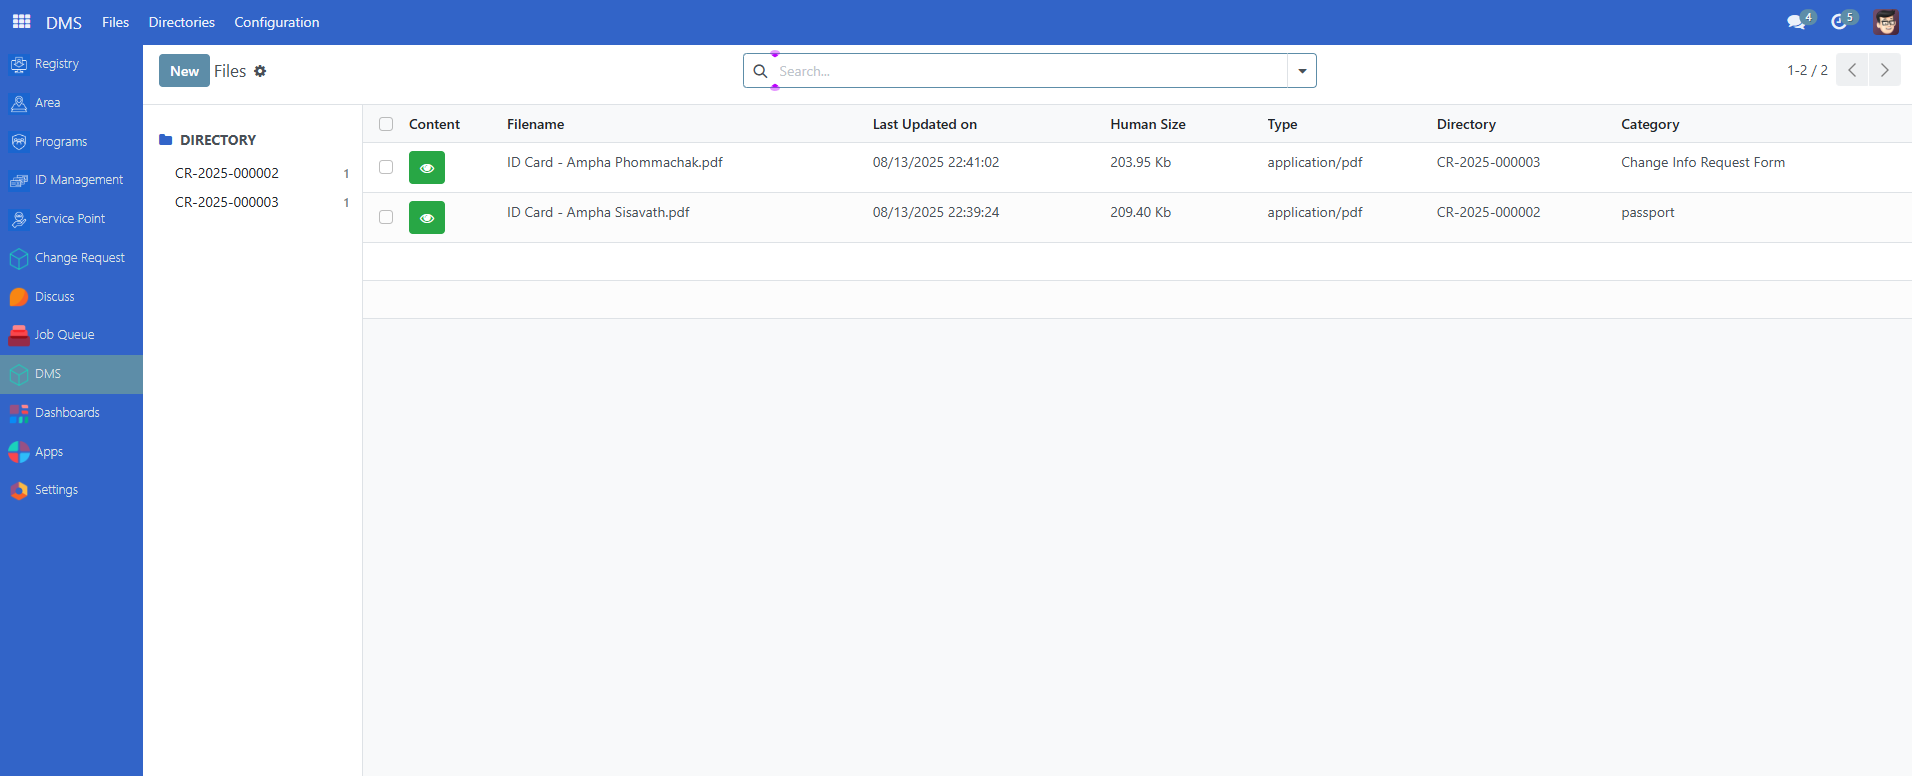
Note: The number shown next to each change request or directory represents the total number of documents attached to that specific request or directory.
Preview document#
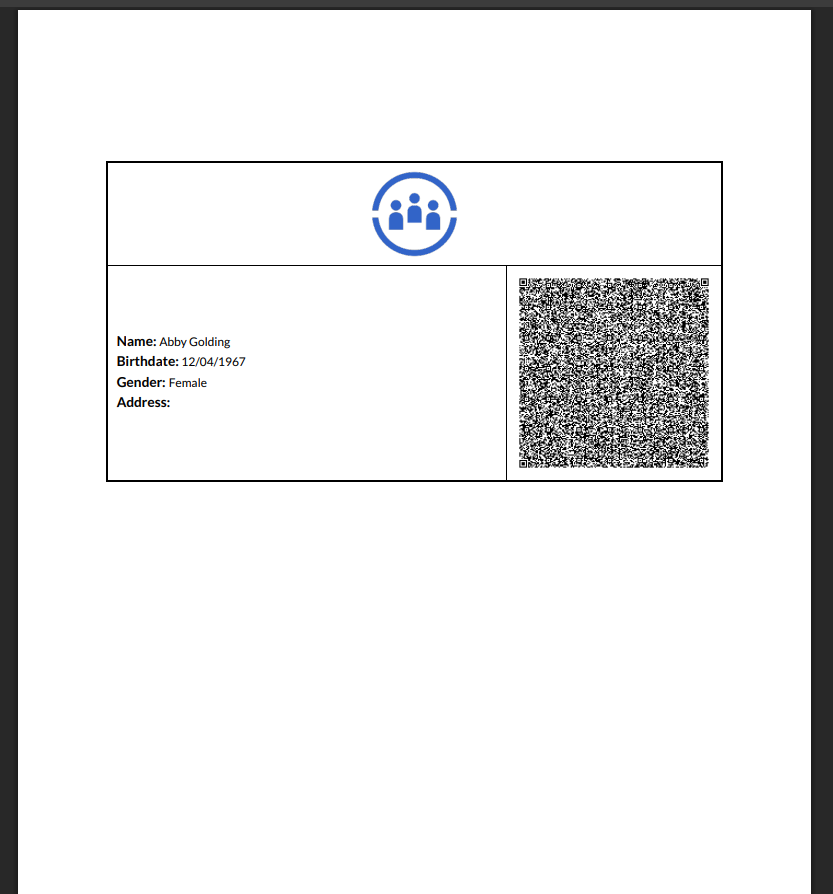
To preview a document, click on the eye button. A window should appear displaying a preview of the document.
Download document#
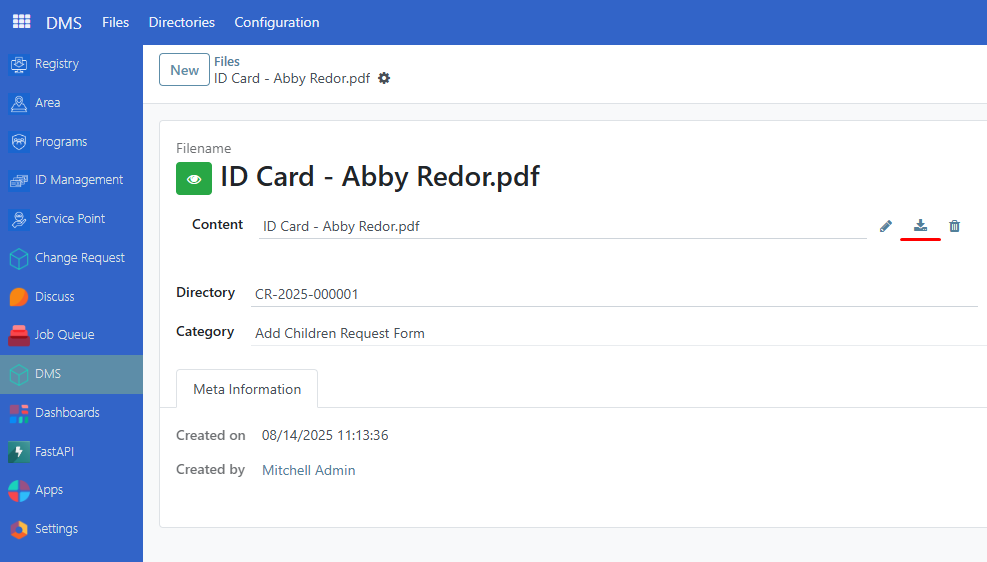
To download a document from a directory, click on a directory and it should display all documents associated with the directory.
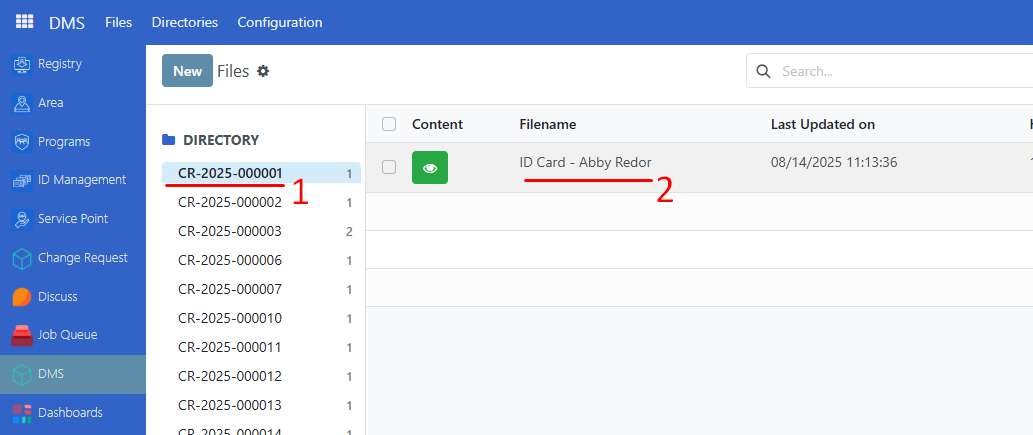
Click on the document you wish to download and click on the download icon.
Edit document attachment#
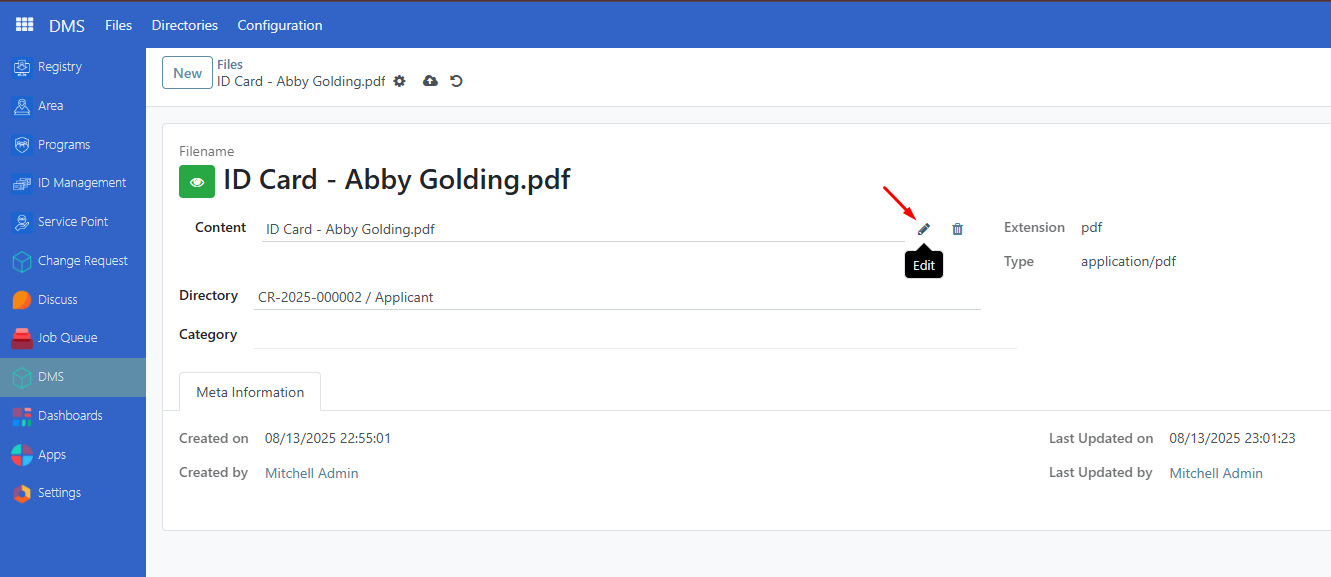
It is also possible to edit a document attachment in a change request. Click on the directory or change request you wish to update.
Select a file from that change request that you wish to modify, then click on the pencil icon to re-upload another document.
Navigating Directories#
An alternative view is available with the Directories feature. This feature displays a list of directories along with their subdirectories.
Create Directory#
It is also possible to create your own directory and name it accordingly. This can help in organizing important documents. Navigate to Directories → New. Define the name of the directory and check the box Is Root Directory.
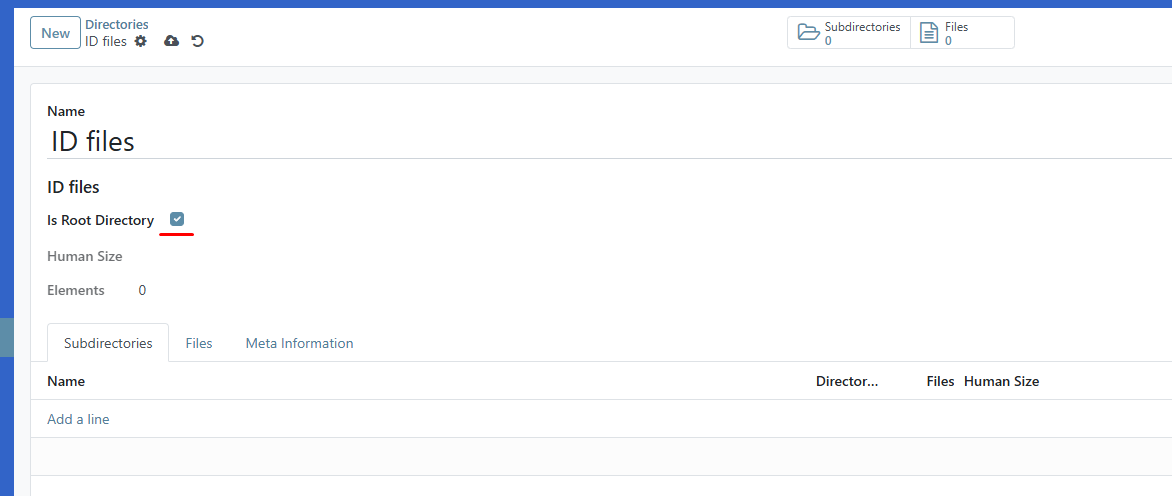
Click on the Subdirectory tab, then click on Add a line, then rename the subdirectory.
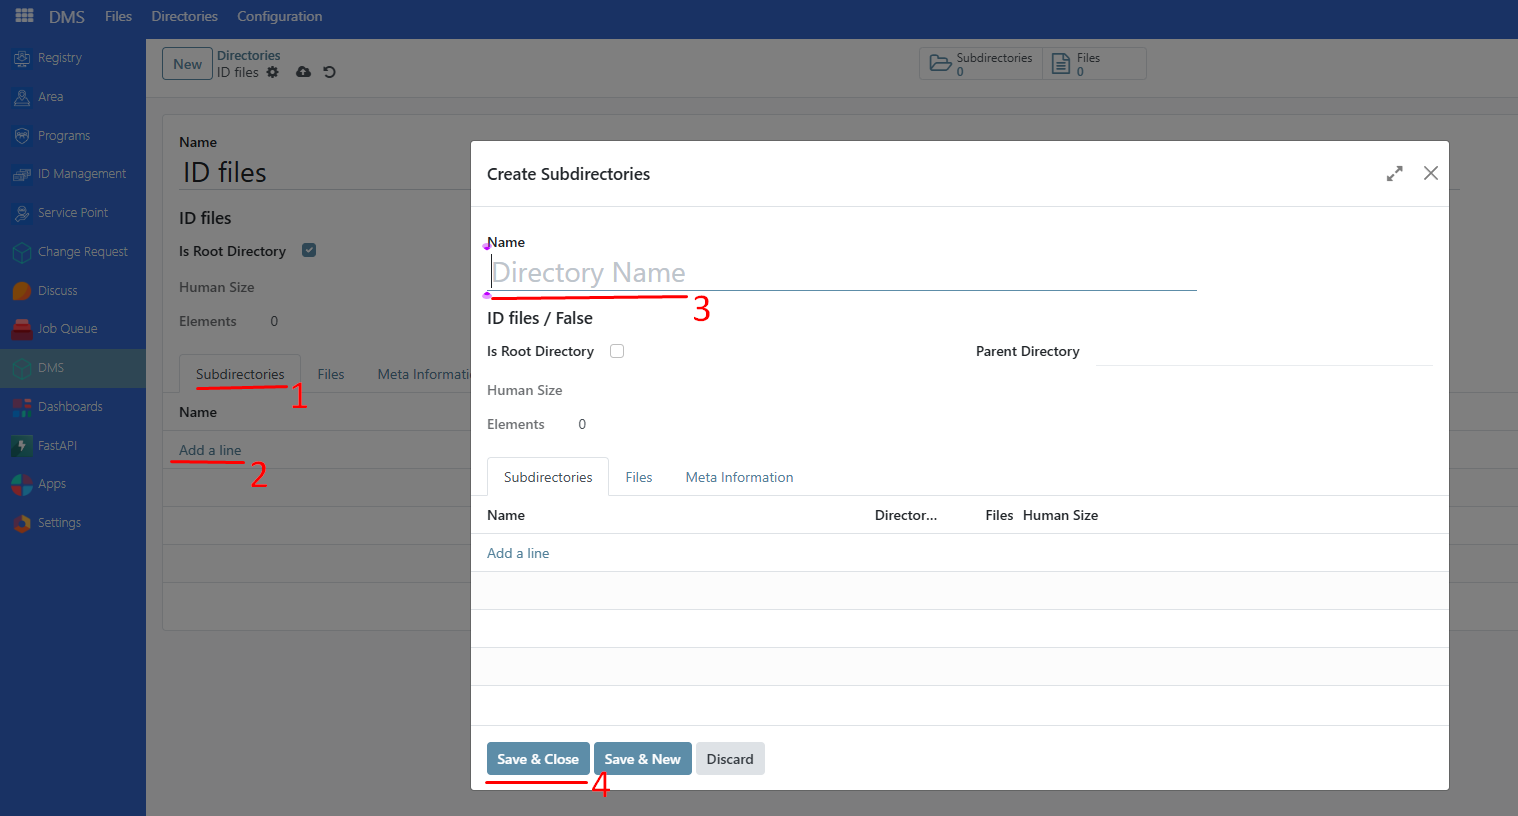
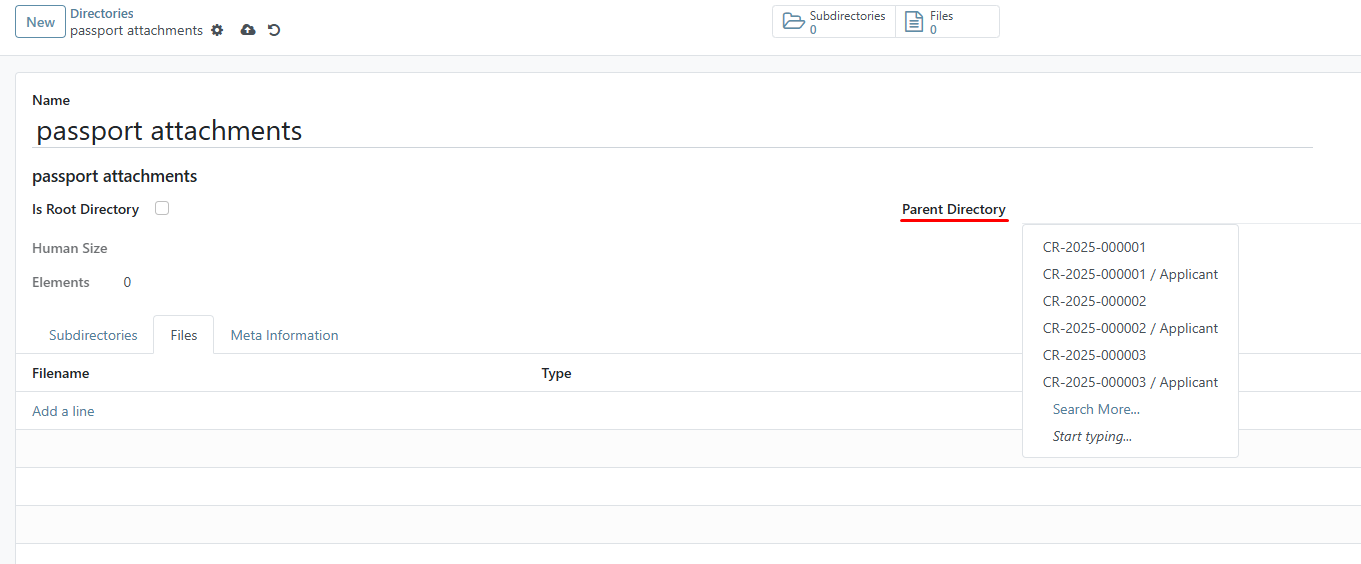
Click on Parent Directory to display the directory list. Click and select to make this a subdirectory of the selected parent directory.
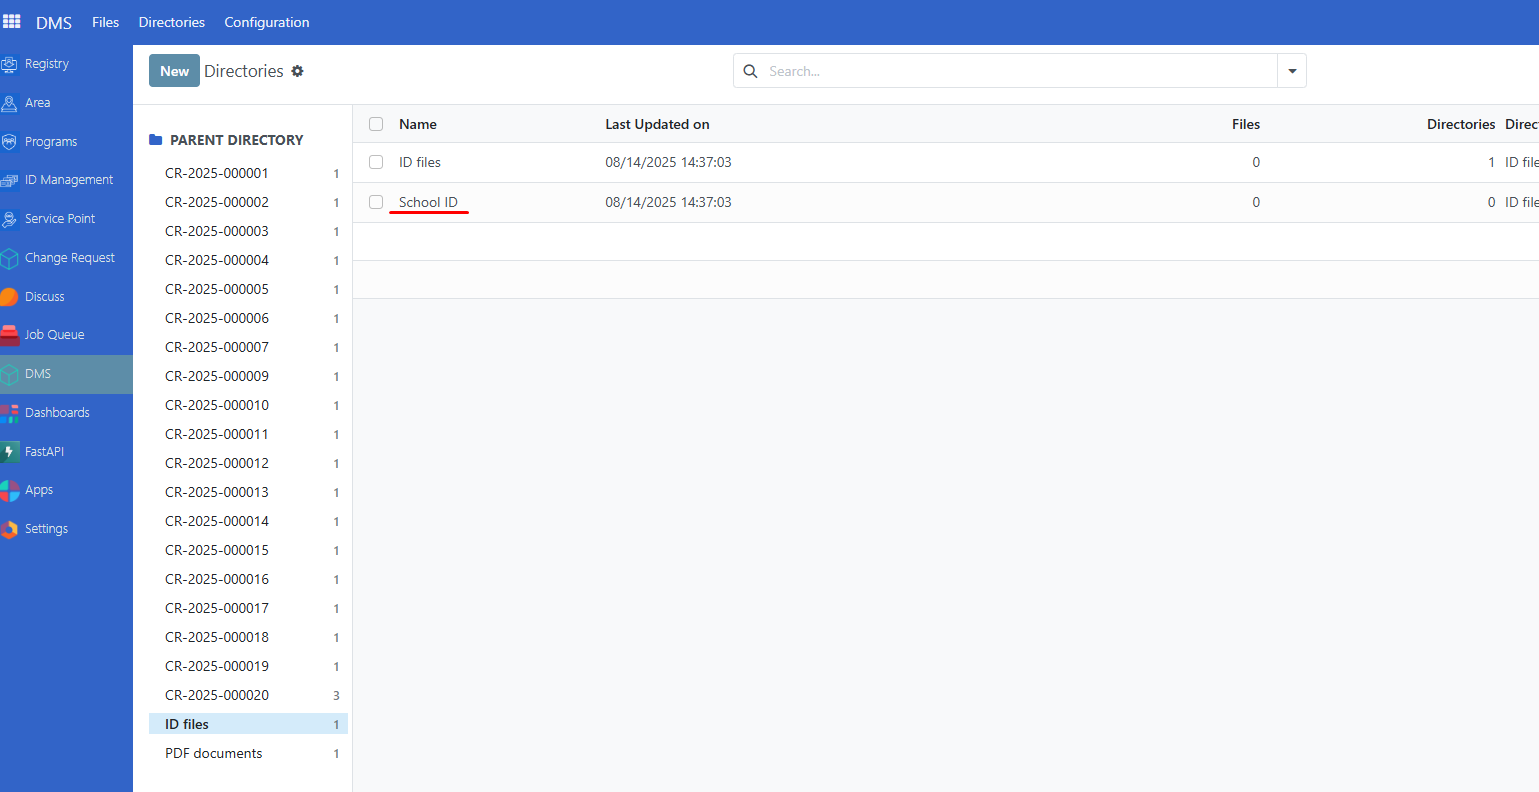
Note: It is important to create a subdirectory for each root directory, as file uploads will be done within their subdirectory.
Uploading files in subdirectory#
To upload a file, navigate to DMS → Directories. Click on a parent directory, then click on its subdirectory.
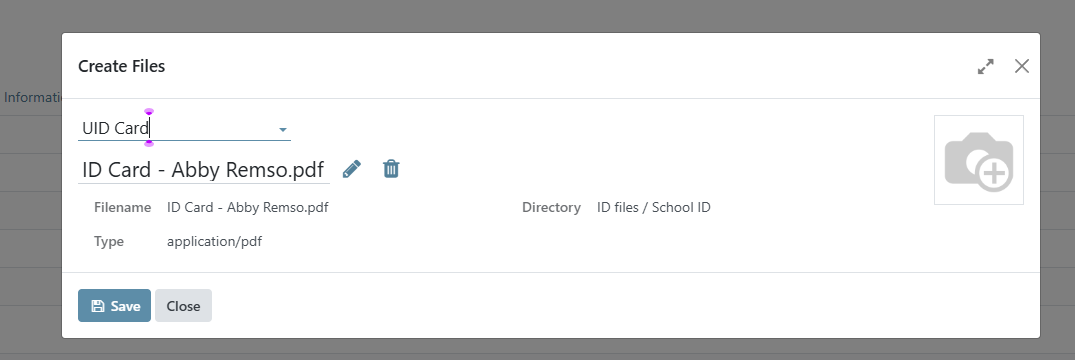
On the Files tab, click on Add a line, click on the input field to select the ID type, then click on Upload your file to select the document. Click on Save to complete the upload.
View all documents per directory#
Navigate to DMS → Directories to view all directories, subdirectories, and attachment counts on one page. When in the Directories page, the number beside the change request or directory indicates the count of subdirectories it has.