User access
Contents
User access#
User access management in OpenSPP lets administrators control who can access platform features and data. OpenSPP uses role-based access control, allowing assignment of specific permissions to users or groups. This ensures only authorized users can access sensitive data and perform necessary actions.
Access rights can be customized for both features and data subsets, such as limiting access by location. Proper configuration helps users work securely and efficiently, minimizing unauthorized access.
This guide covers creating user accounts, assigning roles and permissions, and customizing access rights to maintain the security and integrity of your social protection program data.
Prerequisites#
To grant access to other users, you must have a user account with the System Admin role. This role is assigned to your account by default after completing the installation guide, or provided by the OpenSPP team for pilot or demo instances of OpenSPP. Only users with the System Admin role can manage user accounts, roles, and permissions within OpenSPP.
Objective#
After completing this tutorial, you will gain an understanding of how to manage role-based access in OpenSPP and learn the necessary steps to assign, update, or revoke user permissions.
Process#
All user-related tasks, such as creating new users, modifying existing users, configuring their information, passwords, and user roles, are performed on the User page.
By default, you will have a user with System-Administator access rights already configured if you have completed the installation guide, Installing OpenSPP.
The Users page is accessed by clicking on the menu icon in the top-left corner and select Settings.
![]()
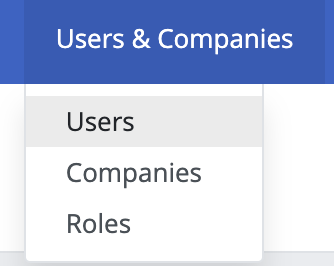
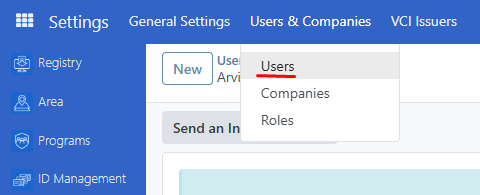
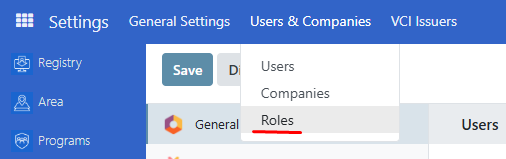
Click on Users & Companies and you will see the Users, Companies, and Roles options.
Creating user account#
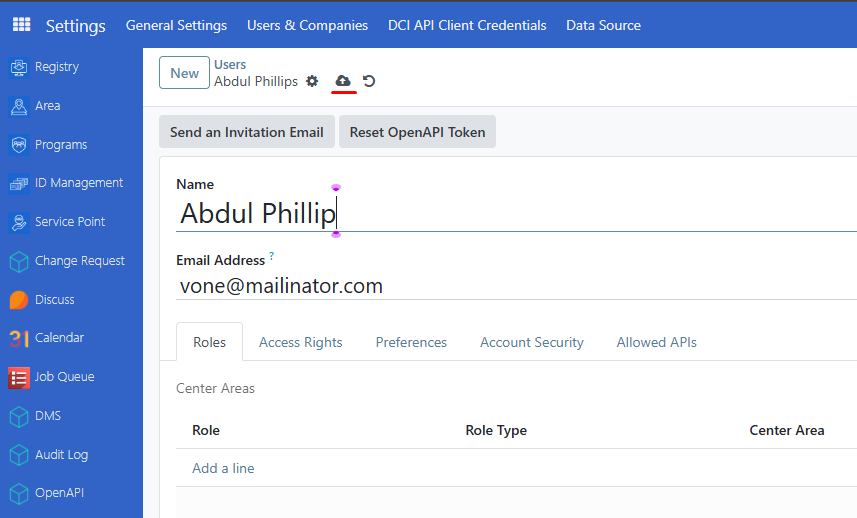
User roles can only be assigned to existing user accounts. To create user accounts, click on the menu icon in the top-left corner, then choose Settings. Click on Users & Companies and select Users. Click on the New button, fill in the user's name and email address, and then click Save. The password will need to be added or changed as described in the Change User Password section below.
Change user password#
Click on the menu icon in the top-left corner, then select Settings. Click Users & Companies then click Users from the dropdown list. Click on the user account that should be modified, and then click on the Gear button.
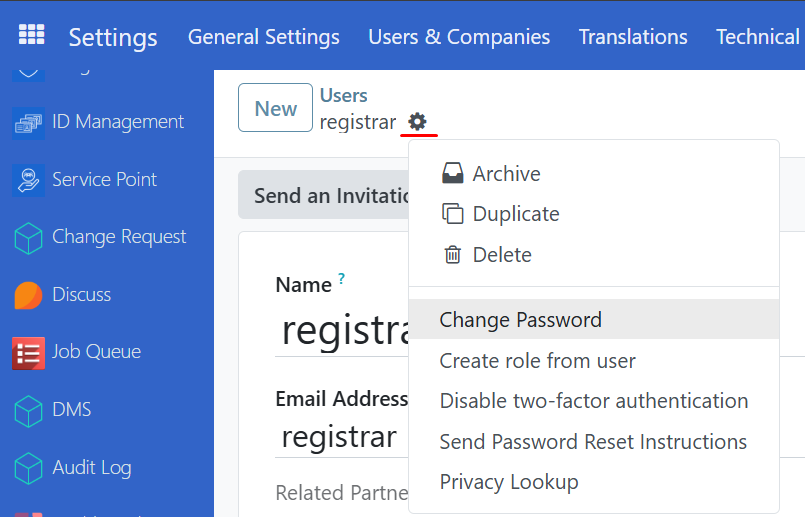
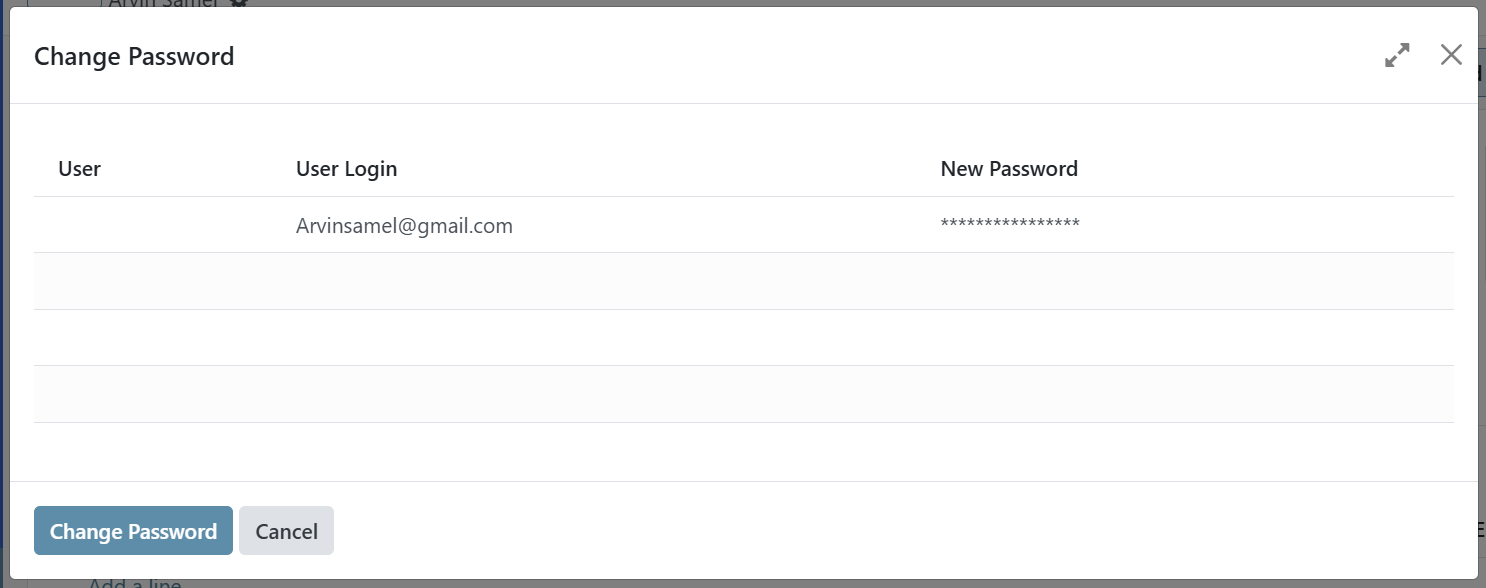
Click on Change Password in the dropdown list, enter the new password in the New Password field, and then click the Change Password button. The password is now successfully updated.
Enabling and disabling user account#
To maintain proper security, it is important to ensure that users who should no longer have access to the system are taken out of active use.
All such actions are taken from the Users section. Click on the menu icon in the top-left corner, then select Settings, click Users & Companies, and then click Users. Click on the name of the user you wish to manage, then click the Gear button, where you will find the different options listed below.
Delete#
To completely delete the user account from OpenSPP, click on Delete in the action list. A confirmation popup will appear. Click Ok to proceed. Note that this permanently deletes the user account and that this may also have an effect on traceability.
Archive#
To temporarily delete the user account from OpenSPP, click on Archive in the action list. A confirmation popup will appear. Click Ok to proceed. Note that this only removes the user's access to the system, but that the account still exists in the system.
Unarchive#
To restore a temporarily archived user account to OpenSPP, it is performed in a similar way as the archive. Since the user account will no longer be displayed among the active users, additional steps need to be performed to navigate to the user.
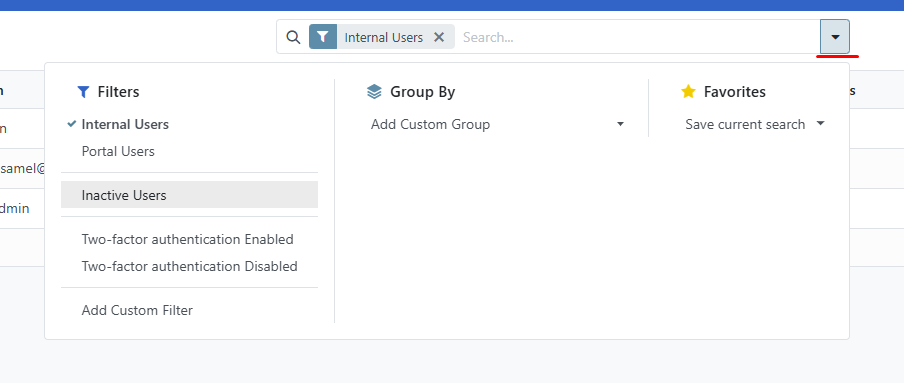
Navigate to the Users page, click on the down arrow from the searchbar, then click Filters, then click Inactive Users. This displays all user accounts that have been temporarily deleted or archived. Click on the name of the user account you wish to unarchive. Click on the Gear button, and then click Unarchive.
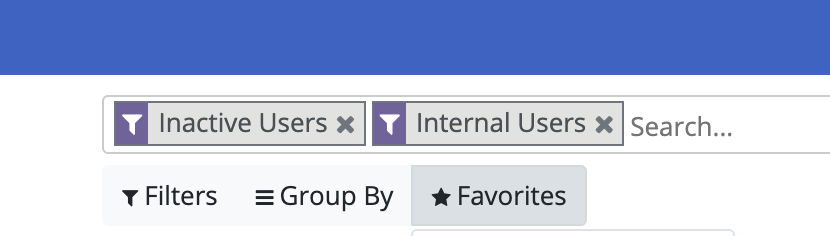
Navigate back to the Users page. Clear the Inactive Users filter by clicking the x icon. The unarchived user account should now be visible along with all active users accounts.
Editing user Information#
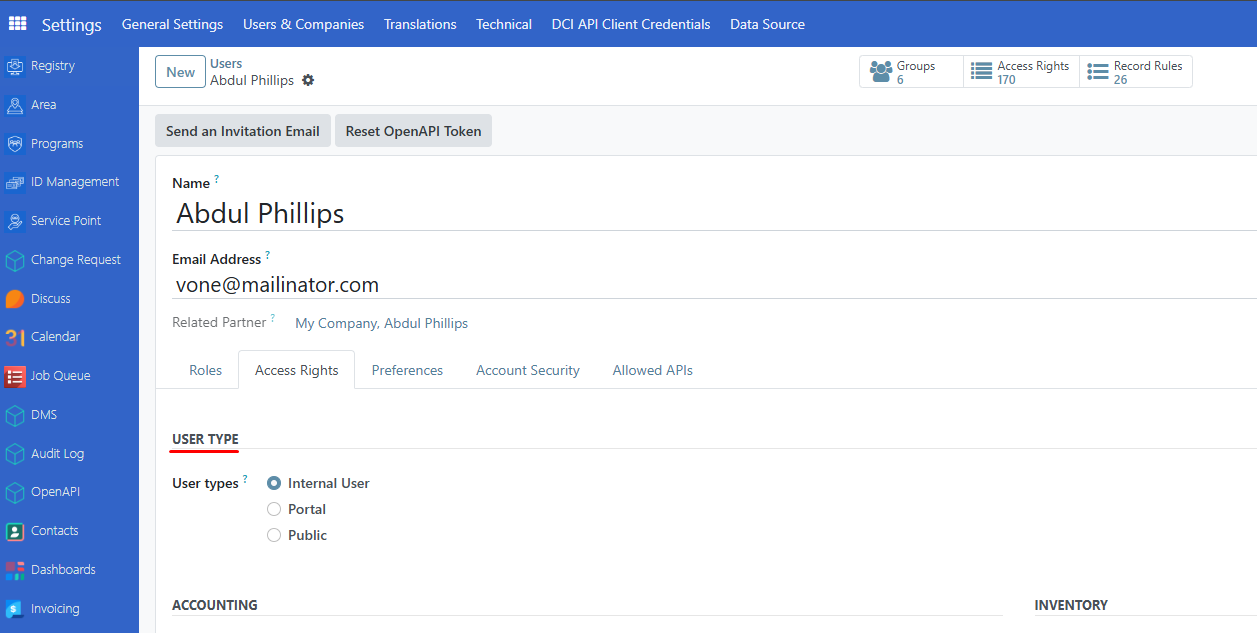
The editable user information is Name and Email Address. Click on the menu icon in the top-left corner, then click on Settings, navigate to Users & Companies and select Users.
Click on the name of the user you wish to edit. Click on the field to modify the name or email address fields. Click on Save icon to proceed with the changes.
Assigning roles to a user#
Assigning a role to a user account enables them to perform a specific set of actions in OpenSPP.
Click on the menu icon in the top-left corner then choose on Settings. Click Users & Companies and select Users.
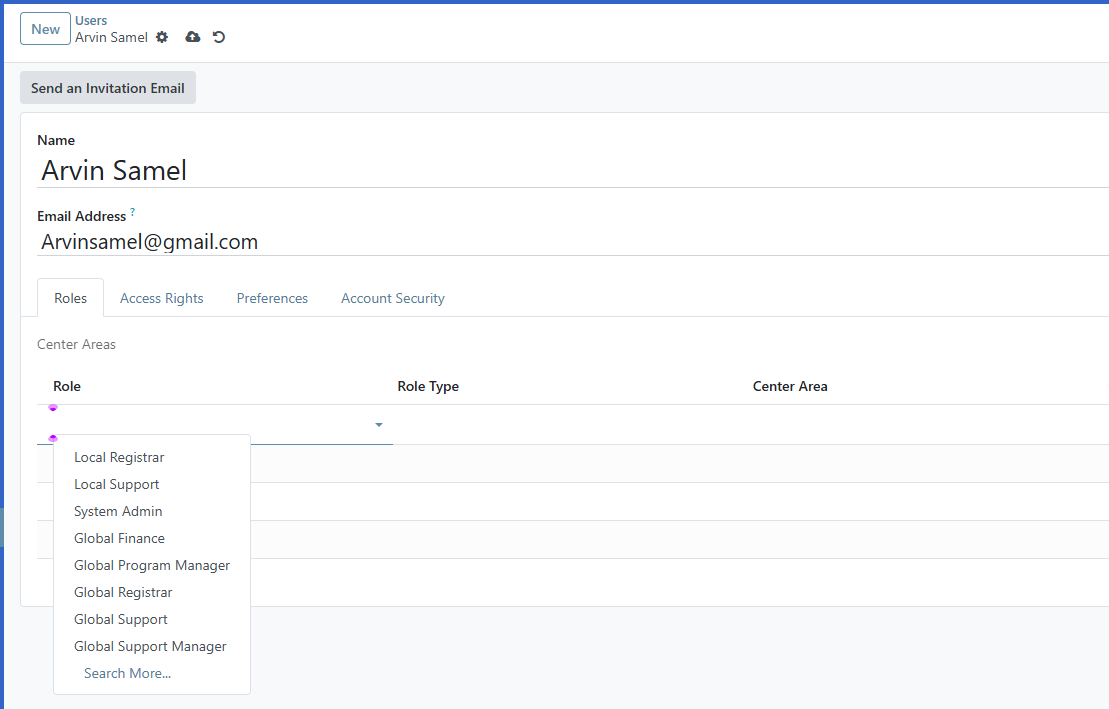
Click on the name of the user account you wish to assign roles to. In the Roles tab click Add a line. Use the dropdown menu to select the appropriate role for the user. Depending on the role selected, the behavior of the Center area tab will vary. Roles can be either Global or Local. A Global role grants access to all geographical areas, while a Local role allows the option to restrict which geographical areas the user can access. If the assigned role is Local the column Center Area will be enabled, allowing the selection of one center area. If left blank, the role will act as Global. It is possible to assign multiple roles to a user.
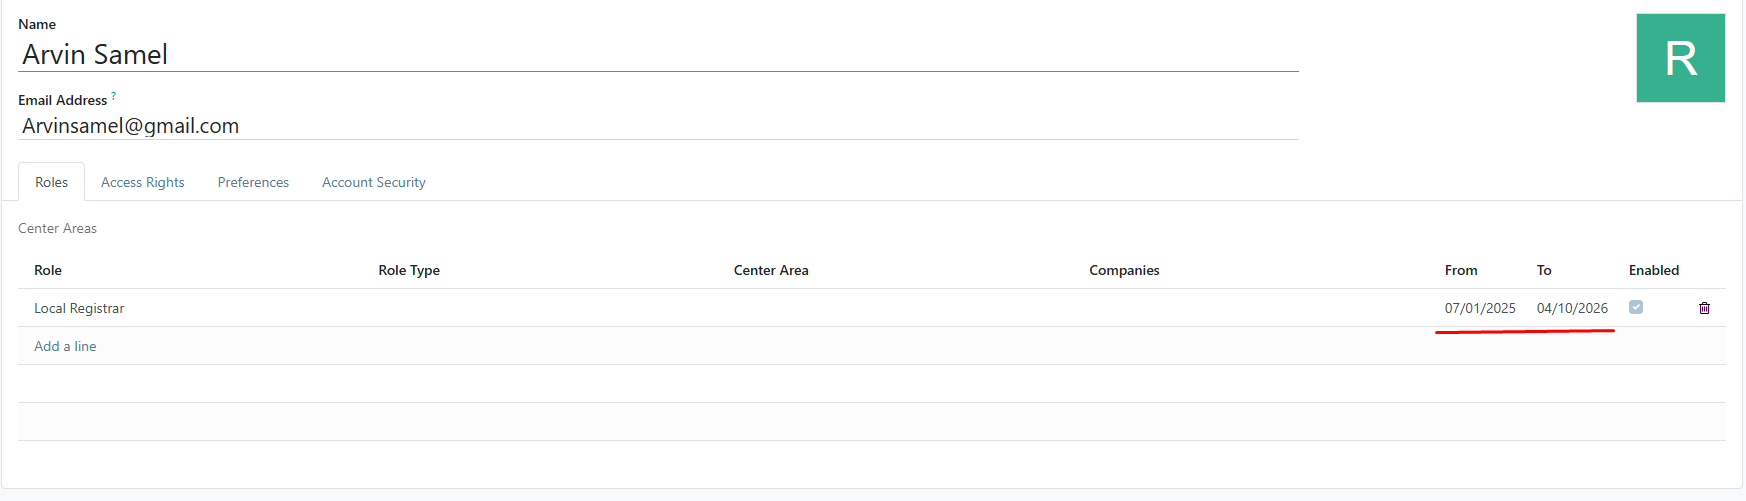
Configure the From and To columns. From defines when this user can start having the selected access role, while To defines when it will expire. To remove the role from the user, simply click on the trash icon. Click on the Save button once done.
Note that you can also assign System Admin role to existing users to grant it with system admin access rights automatically.
Configuring roles#
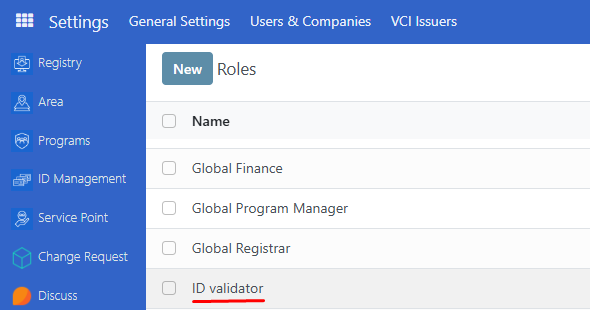
Roles are typically pre-configured and available for selection; however, you can also create and configure them yourself. To create a new role click on the menu icon in the top-left corner, click on Settings then select Roles under Users & Companies. A list of roles is displayed on the Roles page.
Click New, set a name for the role, and select a Role Type. Roles Types can be either Global or Local. A Global role grants access to all geographical areas, while a Local role allows the option to restrict which geographical areas the user can access.

Under the Groups tab, click Add a line and tick the checkbox beside the group(s) you wish to add for this role. Click Select to save the selection.
Navigate back to the Roles page by clicking Roles under Users & Companies. The new role is displayed in the list.
It is also possible to view all user accounts associated with a role. In the Roles page, click a role from the list and click on the Users tab.
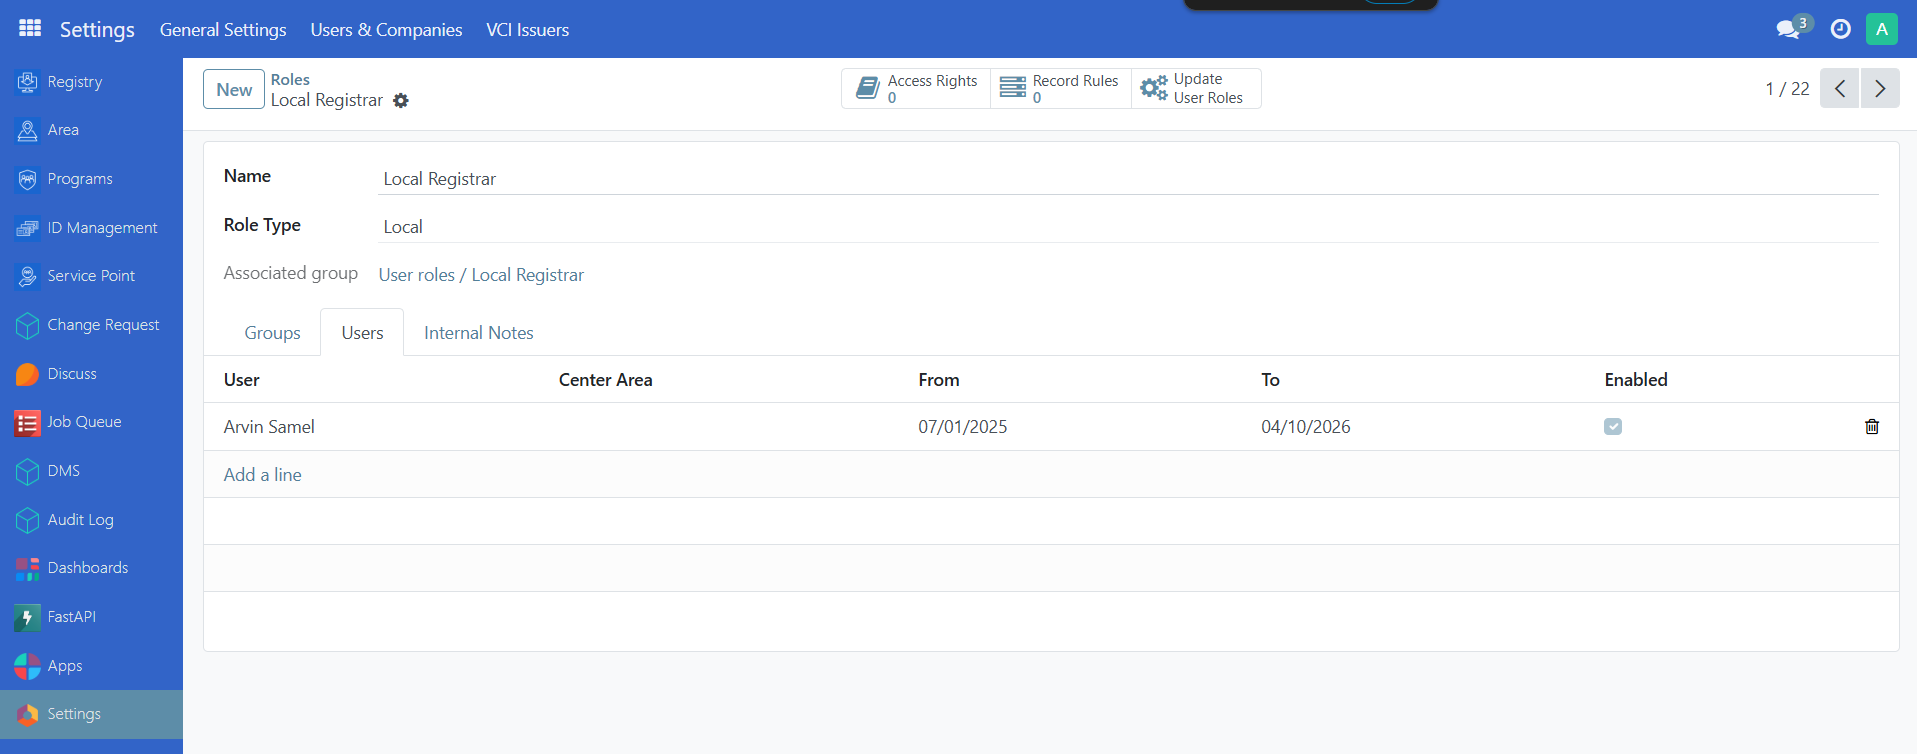
You can assign users to the selected role by clicking Add a line and selecting the user you wish to associate the role with. Click on the trash icon to unlink the user account from the role.
Configuring groups#
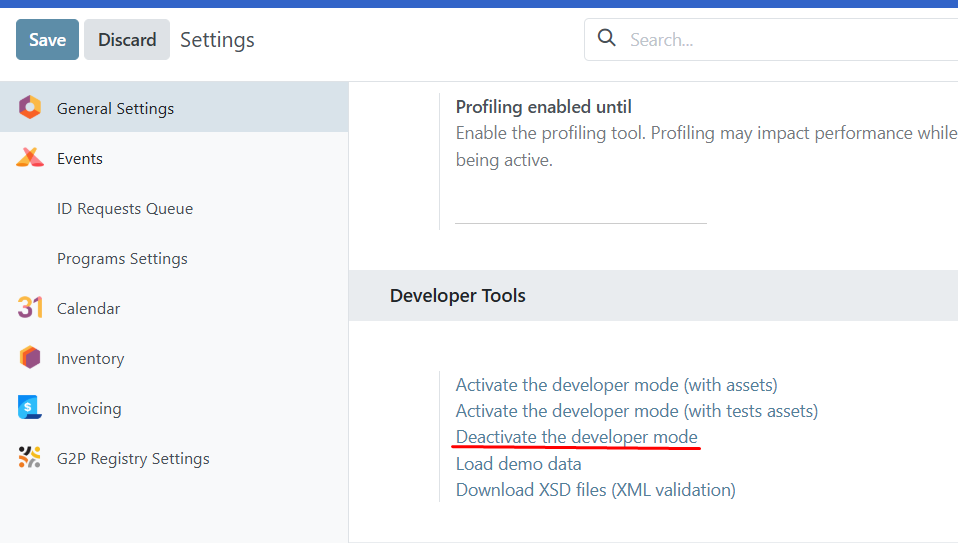
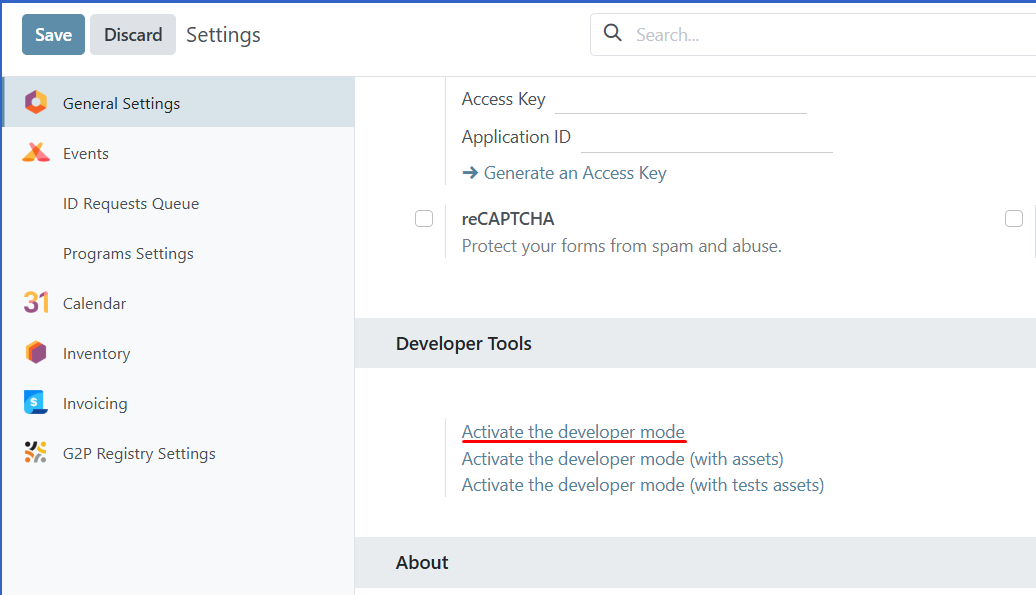
The list of access rights for a group is typically pre-configured; however, you may also modify the list of access rights associated with a group. To access the Groups page, the Developer mode must first be activated. This is done by navigating to Settings, scrolling down to the last part of the page, and clicking Activate the developer mode. You will then be automatically redirected back to the Registry page.
Note
Activating the Developer mode (debug mode) enables users to select User Types.
The Portal and Public options don't allow you to choose access rights. Members of these user types have specific ones (such as record rules and restricted menus) and usually don't belong to the usual OpenSPP groups.
Go back to Settings. Click on Users & Companies where the option Groups should now be displayed.
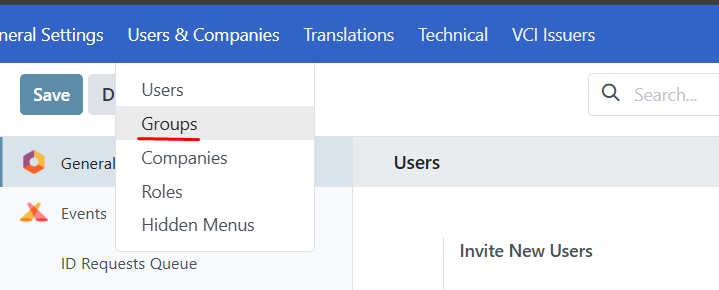
Click Groups to be redirected to the group's page. You may create new groups by clicking the New button, or you can manage existing groups by clicking the checkbox beside each group and then clicking the Actions button, or you can modify groups by clicking on a group's name.
Click a group from the list to manage its permissions.
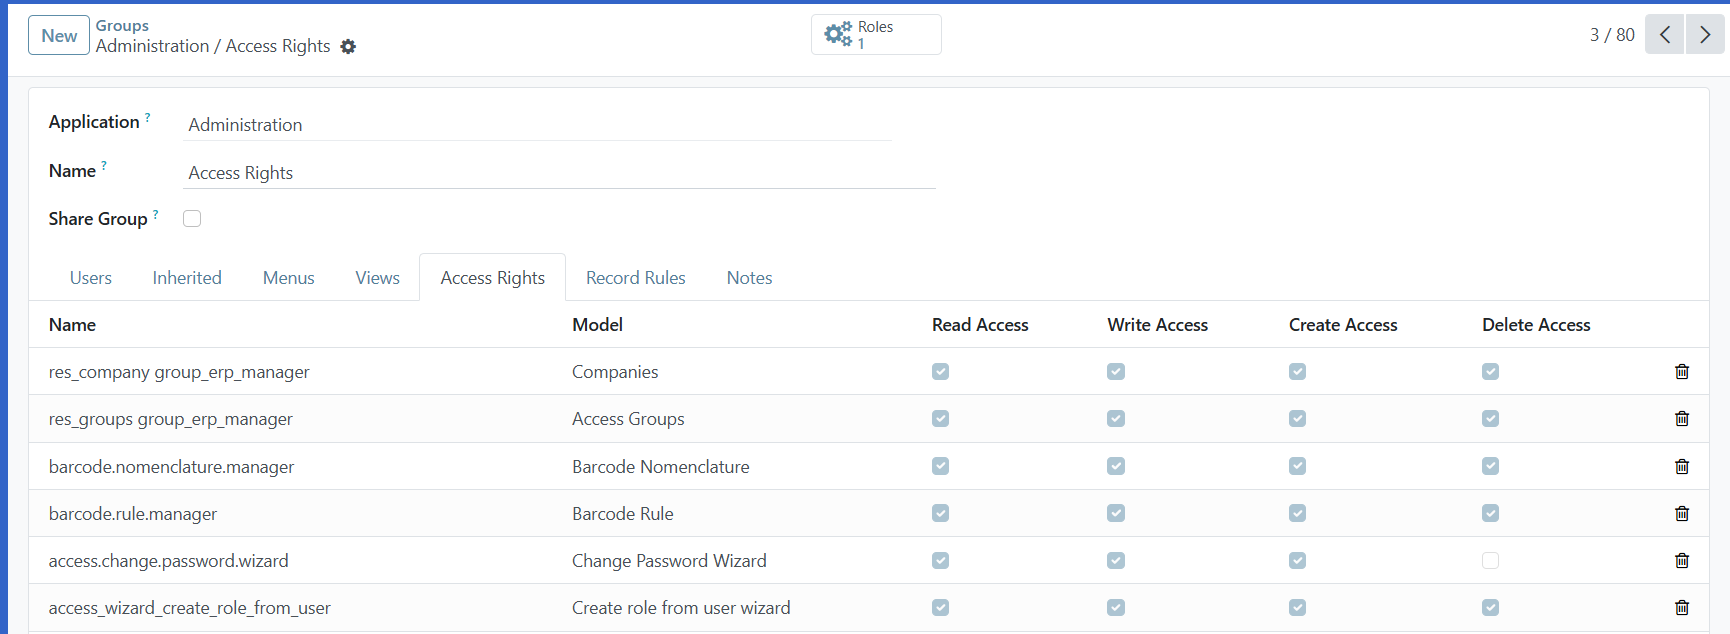
The first level of rights is under Access Rights tab. The Access Rights comprises of the object name, which is a technical name assigned to a model. Enable or disable the following checkbox for each model:
Read: The user can only view the values of that object.
Write: The user can edit the values of that object.
Create: The user can create values for that object.
Delete: The user can delete the values of that object.
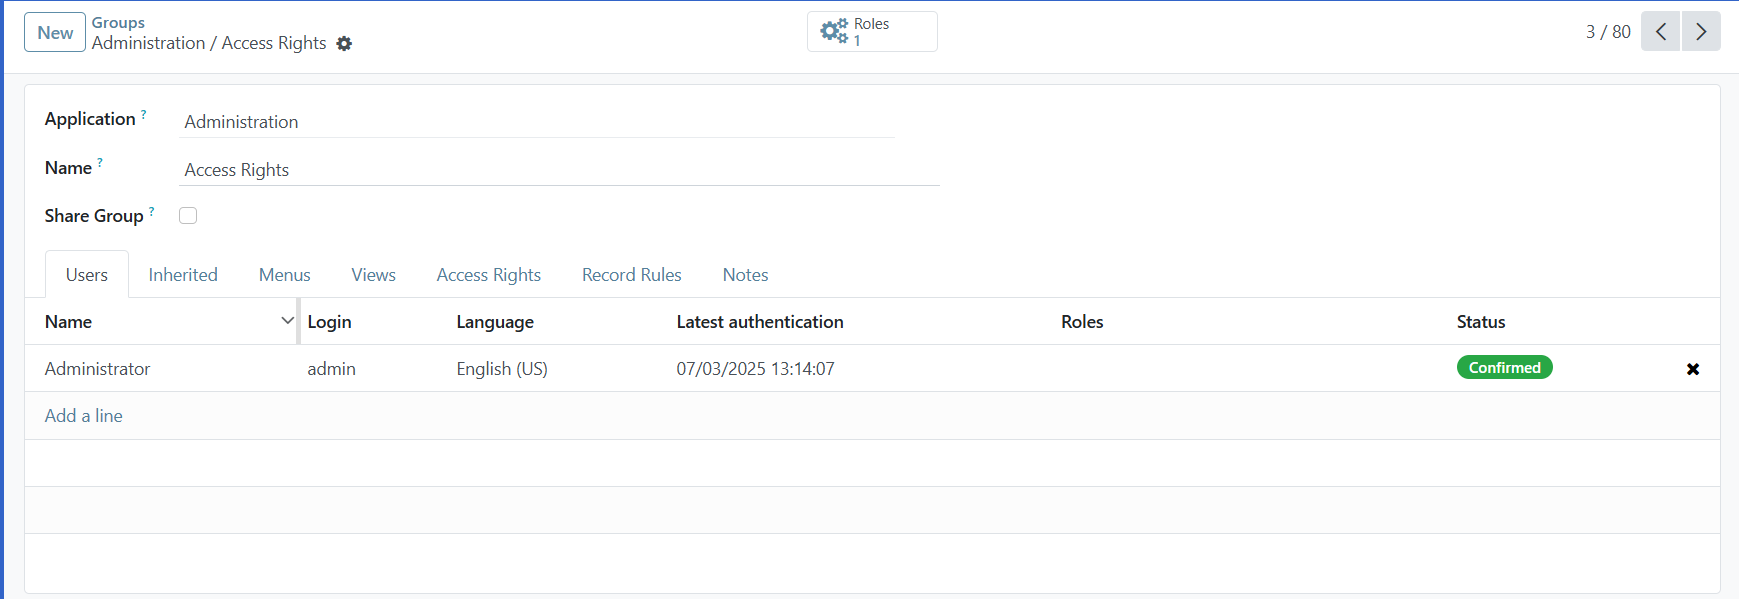
The Access Rights menu alone doesn't display details of the rules and inheritances of a group. This is where the Groups menu comes into play. Under Users tab, you will be able to add or remove users that belong to this group. The current users directly associated with this group are listed under Users.
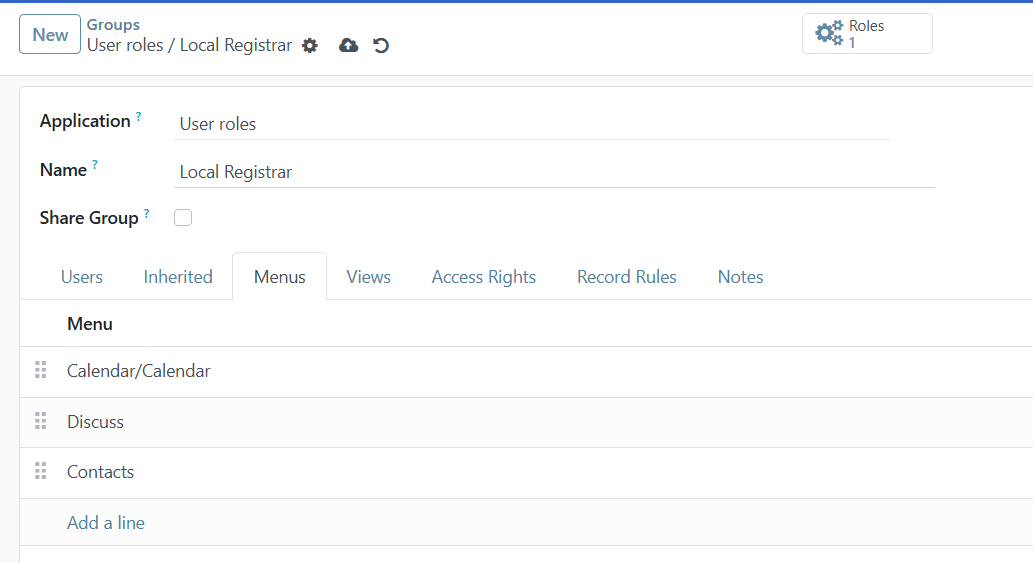
You can automatically associate users to app groups through Inherited tab. In the example below, users who have access to the group Local Registrar also have access to the group names listed below.

Note
Remember to always test the settings being changed in order to ensure that they are being applied to the needed and right users.
The Menus tab is where you define which menus (models) the user can have access to.
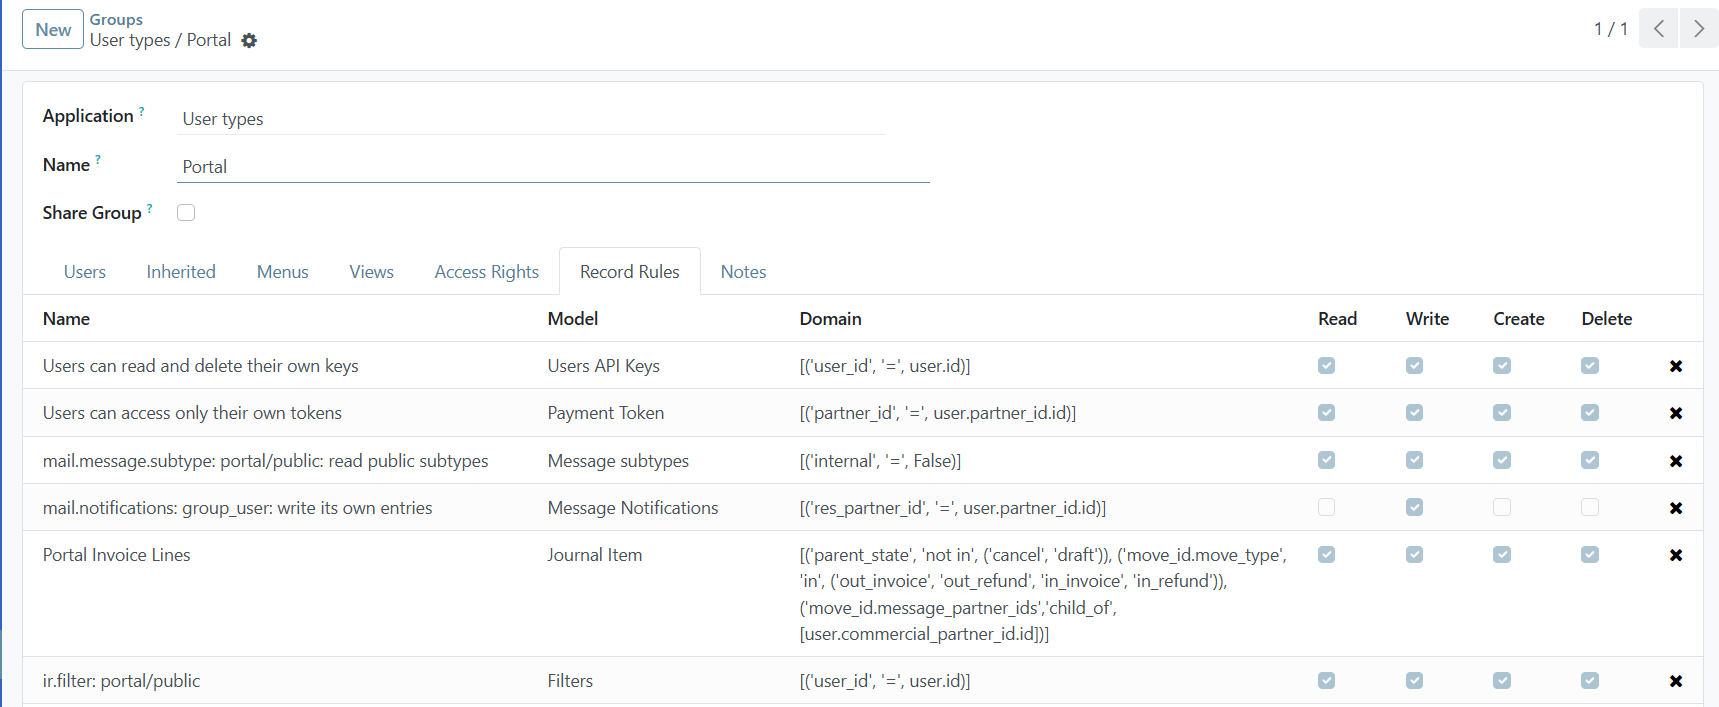
You can form Record Rules as a second layer of editing and visibility rules. They overwrite, or refine, the Access Rights. The user writes a record rule using a Domain. Domains are conditions used to filter or searching data. Therefore, a domain expression is a list of conditions. For each rule, choose among the following options: Read, Write, Create and Delete values.
Note
Making changes in access rights can have a big impact on the database. For this reason, we recommend you to contact your OpenSPP Business Analyst or our Support Team, unless you have knowledge about Domains in OpenSPP.
Deactivate developer mode by clicking on the menu icon and then click on Settings, scrolling down to the last part of the page, and clicking Deactivate the developer mode.