eSignet Integration
Contents
eSignet Integration#
The integration of OpenSPP with eSignet utilizes MOSIP eSignet as the identity server for login into the OpenSPP platform. This provides a seamless user experience and enhances security by leveraging the OAuth protocol and allowing OpenSPP users to access the platform without the need for additional login credentials.
Prerequisites#
To be able to start the integration, ensure the following:
The key exchange is completed as per the requirements of MOSIP.
Access to the eSignet account (Client ID) and Authorization URL, UserInfo URL, Token URL, and JWKS URL is received from MOSIP.
Administrative privileges within OpenSPP to install modules.
Developer mode is activated in OpenSPP.
Objective#
Upon completing this guide, the developer can successfully integrate eSignet with OpenSPP for login authentication.
Step-by-step#
Set up your development environment as per the given guide here.
Access the root folder of the OpenSPP project. Then, go to the
odoo/custom/srcdirectory.Modify the repos.yaml file in this directory and add the following configuration for the openg2p-auth to setup eSignet.
openg2p-auth:
  defaults:
    depth: $DEPTH_DEFAULT
  remotes:
    openg2p: https://github.com/OpenG2P/openg2p-auth.git
  target: openg2p 17.0-develop
  merges:
    - openg2p 17.0-develop
Make the following changes in the server-auth section of the
repos.yamlfile to support the eSignet module.
server-auth:
  defaults:
    depth: $DEPTH_DEFAULT
  remotes:
    openg2p: https://github.com/OpenG2P/server-auth.git
  target: openg2p 17.0
  merges:
    - openg2p
In the
addons.yamlfile, include the following two lines to add the openg2p-auth.
openg2p-auth:
  - "*"
Modify the server-auth also as below in the same file.
server-auth:
  - "*"
Now restart your development server to make the above changes effective.
Log in to OpenSPP with an account that has admin rights and ensure developer mode is activated.
Click the four-square icon on the top-left corner to bring up the menu, then select Apps.
Search for OIDC and install the G2P Auth: OIDC - Reg ID module. After the successful installation, it should appear below.

Next, from the OpenSPP main menu, select Settings, then navigate to Users & Companies, and finally, choose OAuth Providers to proceed with the configuration.
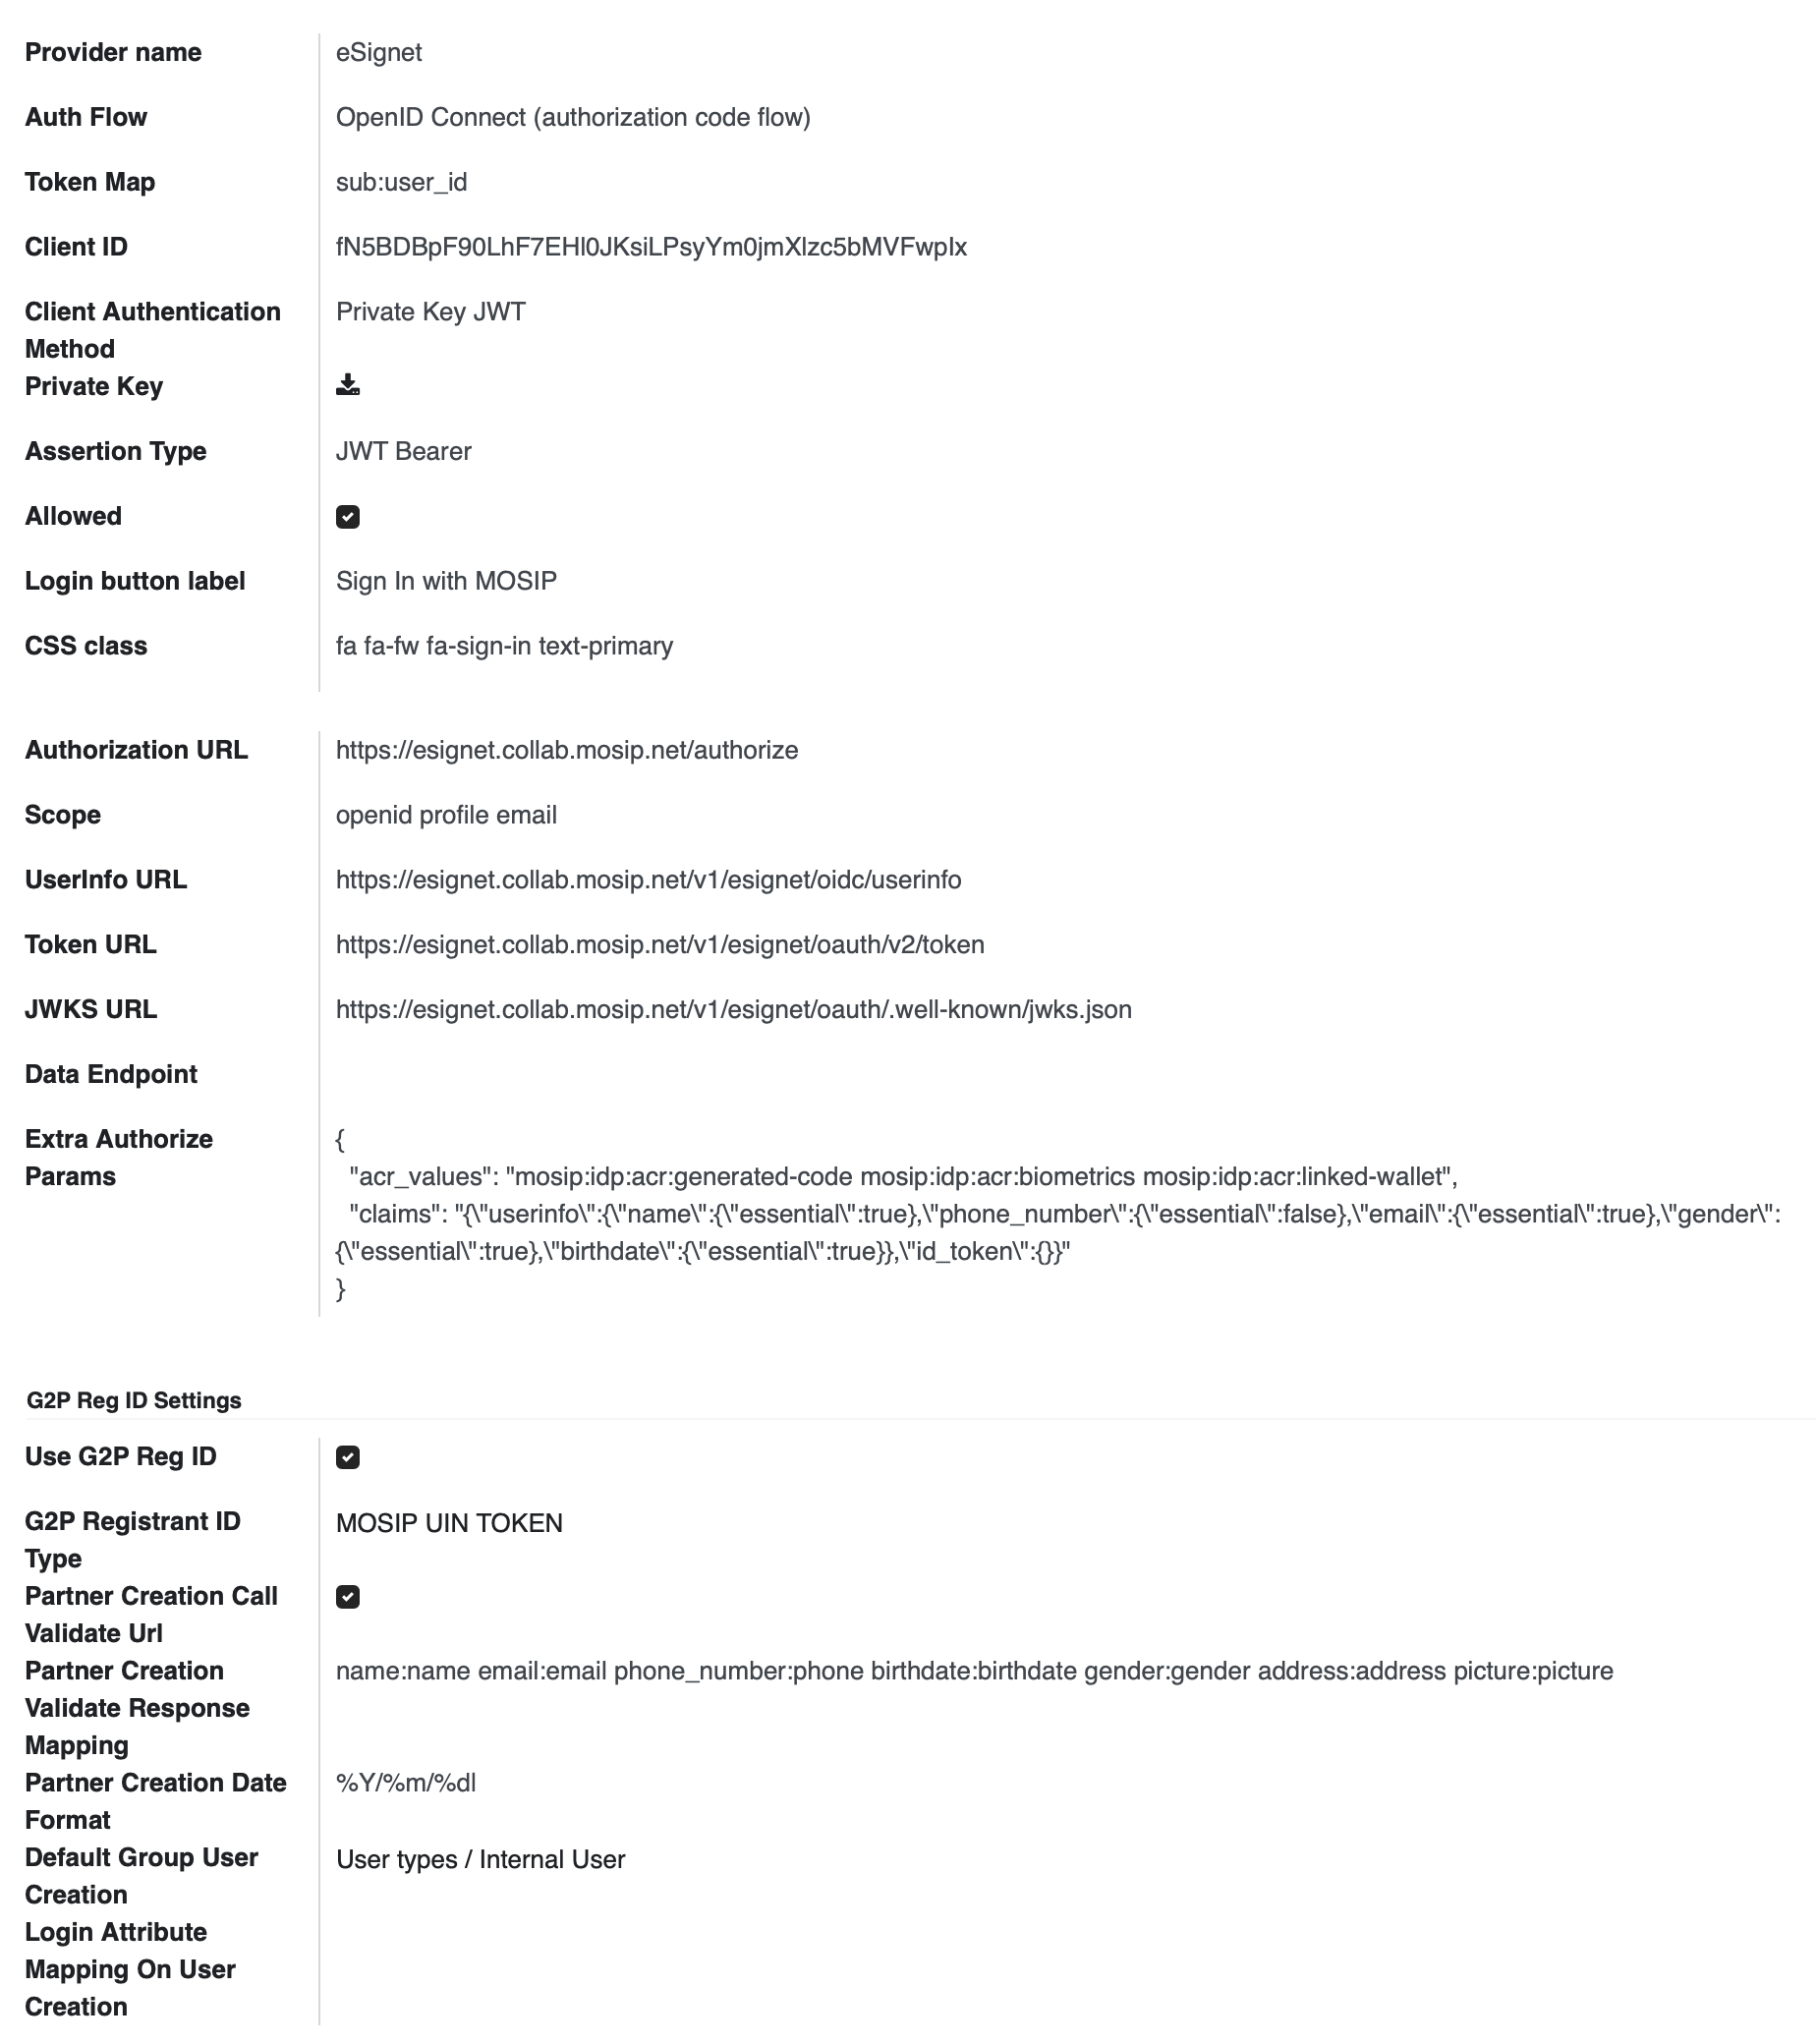
Click Create to set up a new OAuth client to be used in eSignet, fill out the configurations as below, and Save.
Provider name: eSignet
Auth Flow: OpenID Connect (authorization code flow)
Token Map: sub:user_id
Client ID: ID given by MOSIP
Client Authentication Method: Private Key JWT
Private Key: Upload the private key
Assertion Type: JWT Bearer
Allowed: Checked
Login button label: Sign in with MOSIP
Authorization URL:
https://esignet.collab.mosip.net/authorizeScope: openid profile email
UserInfo URL:
https://esignet.collab.mosip.net/v1/esignet/oidc/userinfoToken UR:
https://esignet.collab.mosip.net/v1/esignet/oauth/v2/tokenJWKS URL:
https://esignet.collab.mosip.net/v1/esignet/oauth/.well-known/jwks.jsonExtra Authorise Params:
{
  "acr_values": "mosip:idp:acr:generated-code mosip:idp:acr:biometrics mosip:idp:acr:linked-wallet",
  "claims": "{\"userinfo\":{\"name\":{\"essential\":true},\"phone_number\":{\"essential\":false},\"email\":{\"essential\":true},\"gender\":{\"essential\":true},\"birthdate\":{\"essential\":true}},\"id_token\":{}}"
}
Use G2P Reg ID: checked
Partner Creation Call Validation Url: checked
Default Group User Creation: User types / Internal User
After successful configuration, it should look like as below.
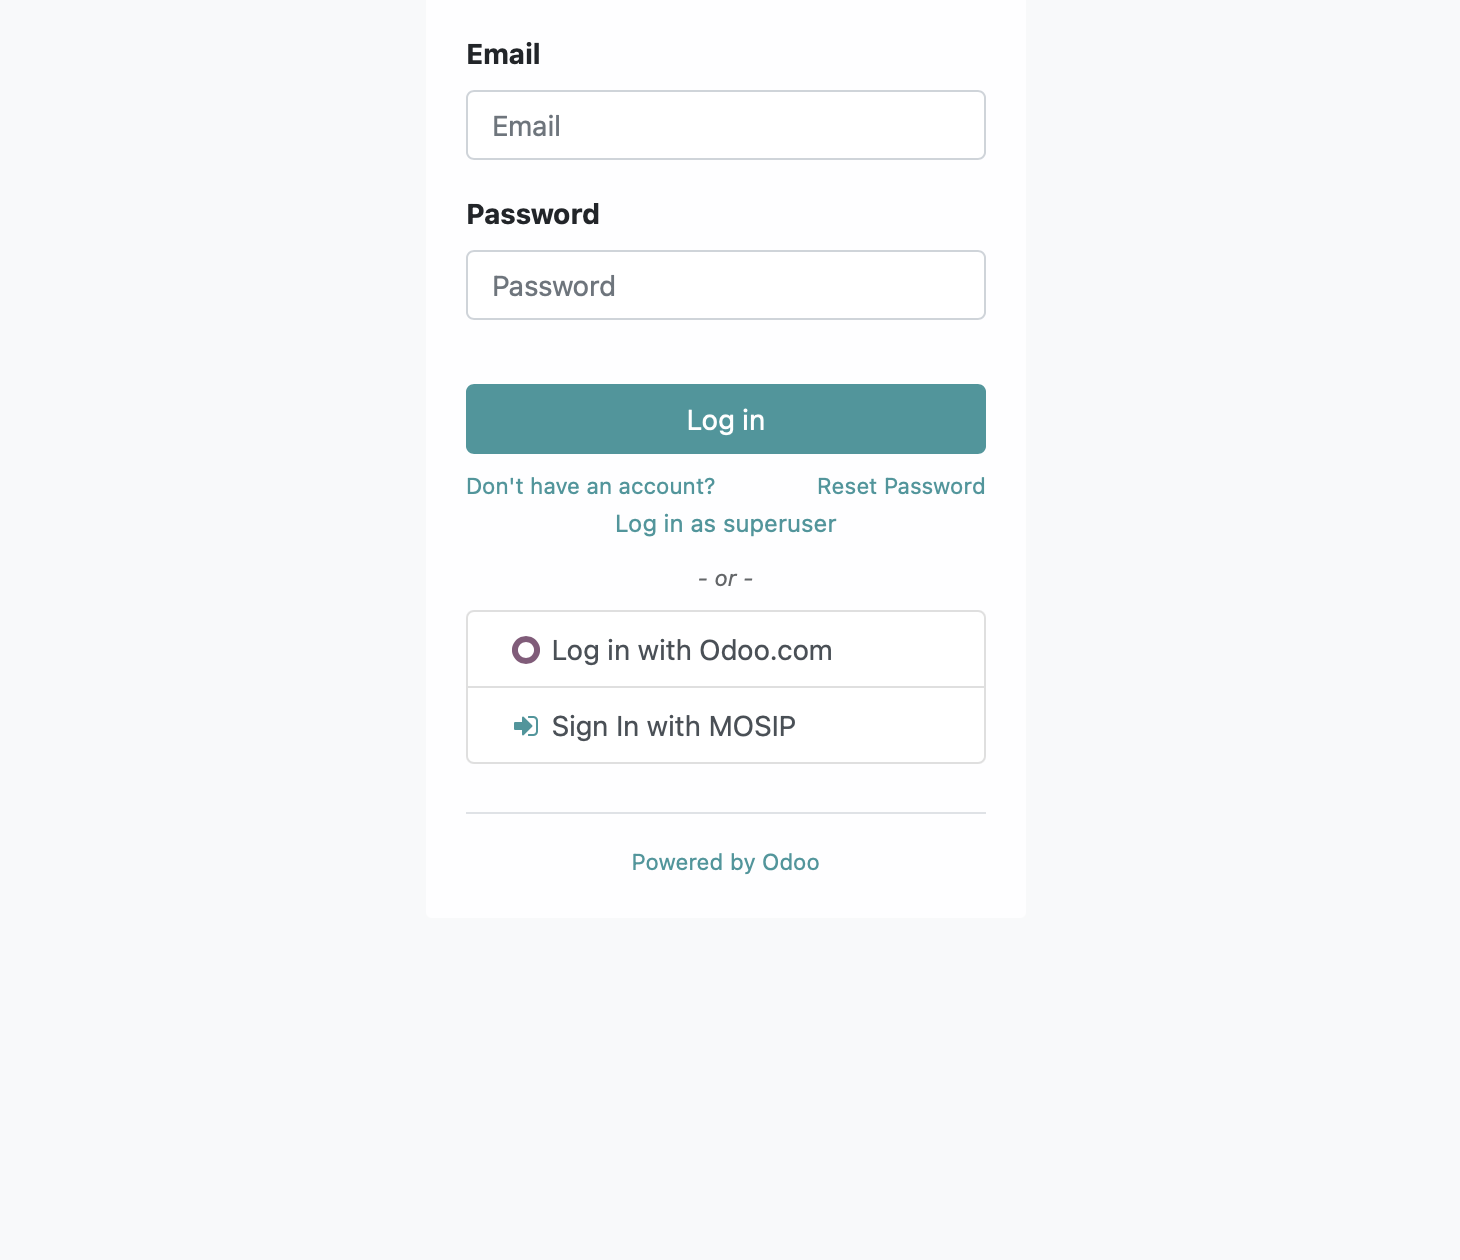
Once configured successfully, the eSignet login should appear on the login screen as below.