REST API
Contents
REST API#
This article explains how to understand and customize the REST API module in OpenSPP, using a practical scenario: adding a new GET endpoint to retrieve Area data.
Prerequisites#
Familiarity with Python, Odoo, XML, and XPath.
OpenSPP development environment set up (Developer Guide).
The spp_api module must be installed.
For our example we are going to need the spp_area_base module to be installed as well.
Module Structure#
A typical REST API customization module follows the standard Odoo structure. Here’s the structure for our example, spp_api_area_custom:
spp_api_area_custom/
├── __init__.py
├── __manifest__.py
├── data/
│   ├── spp_api_namespace_data.xml
│   └── spp_api_path_data.xml
└── README.md
Step-by-Step Guide#
In this scenario, you will expose Area data through a new GET endpoint under a custom namespace.
Create the Module Scaffold#
Create a new directory for your module (e.g., spp_api_area_custom) and populate it with the files and structure shown above.
Define Module Manifest#
Create __manifest__.py with the correct dependencies and data files:
{
    "name": "OpenSPP REST API Area Customization",
    "summary": "Adds custom Area endpoint to OpenSPP REST API",
    "category": "OpenSPP",
    "version": "17.0.1.0.0",
    "author": "Your Organization",
    "website": "https://your-website.com",
    "license": "LGPL-3",
    "depends": [
        "spp_api",
        "spp_area_base",
    ],
    "data": [
        "data/spp_api_namespace_data.xml",
        "data/spp_api_path_data.xml",
    ],
    "application": False,
    "installable": True,
    "auto_install": False,
}
Create a Custom API Namespace#
Create data/spp_api_namespace_data.xml to define your namespace:
<odoo>
    <record id="api_namespace_area" model="spp_api.namespace">
        <field name="name">area_api</field>
        <field name="version_name">1</field>
        <field name="description">Namespace for Area-related API endpoints</field>
        <field name="log_request">debug</field>
        <field name="log_response">debug</field>
        <field name="user_ids" eval="[(4, ref('base.user_admin'))]" />
    </record>
</odoo>
Add the API Endpoint#
Create data/spp_api_path_data.xml to define the new endpoint under your custom namespace:
<odoo>
    <record id="api_path_area_get" model="spp_api.path">
        <field name="name">Area</field>
        <field name="model_id" ref="spp_area_base.model_spp_area" />
        <field name="namespace_id" ref="api_namespace_area" />
        <field name="description">GET Area</field>
        <field name="method">get</field>
        <field name="field_ids" eval="[(
            6, 0, [
                ref('spp_area_base.field_spp_area__parent_id'),
                ref('spp_area_base.field_spp_area__name'),
                ref('spp_area_base.field_spp_area__draft_name'),
                ref('spp_area_base.field_spp_area__code'),
            ]
        )]" />
    </record>
</odoo>
Add or remove fields as needed for your use case.
Generate Public and Private Keys#
To secure your API endpoints, generate a 4096-bit RSA key pair using OpenSSL:
# Generate a 4096-bit private key
openssl genpkey -algorithm RSA -out private_key.pem -pkeyopt rsa_keygen_bits:4096

# Extract the public key
openssl rsa -pubout -in private_key.pem -out public_key.pub
Place
private_key.pemandpublic_key.pubinetc/secrets.Set permissions as needed.
Never share your private key. Only distribute the public key if required.
Install and Test#
Install your new module via the Apps menu.
Get your Bearer Token:
Go to Settings > Users & Companies > Users.
Open your user record.
In the Allowed APIs section, click View Bearer Token to create a new token.
Copy the generated token.
In Postman (or your REST client), set the Authorization header to
Bearer <your_token>.
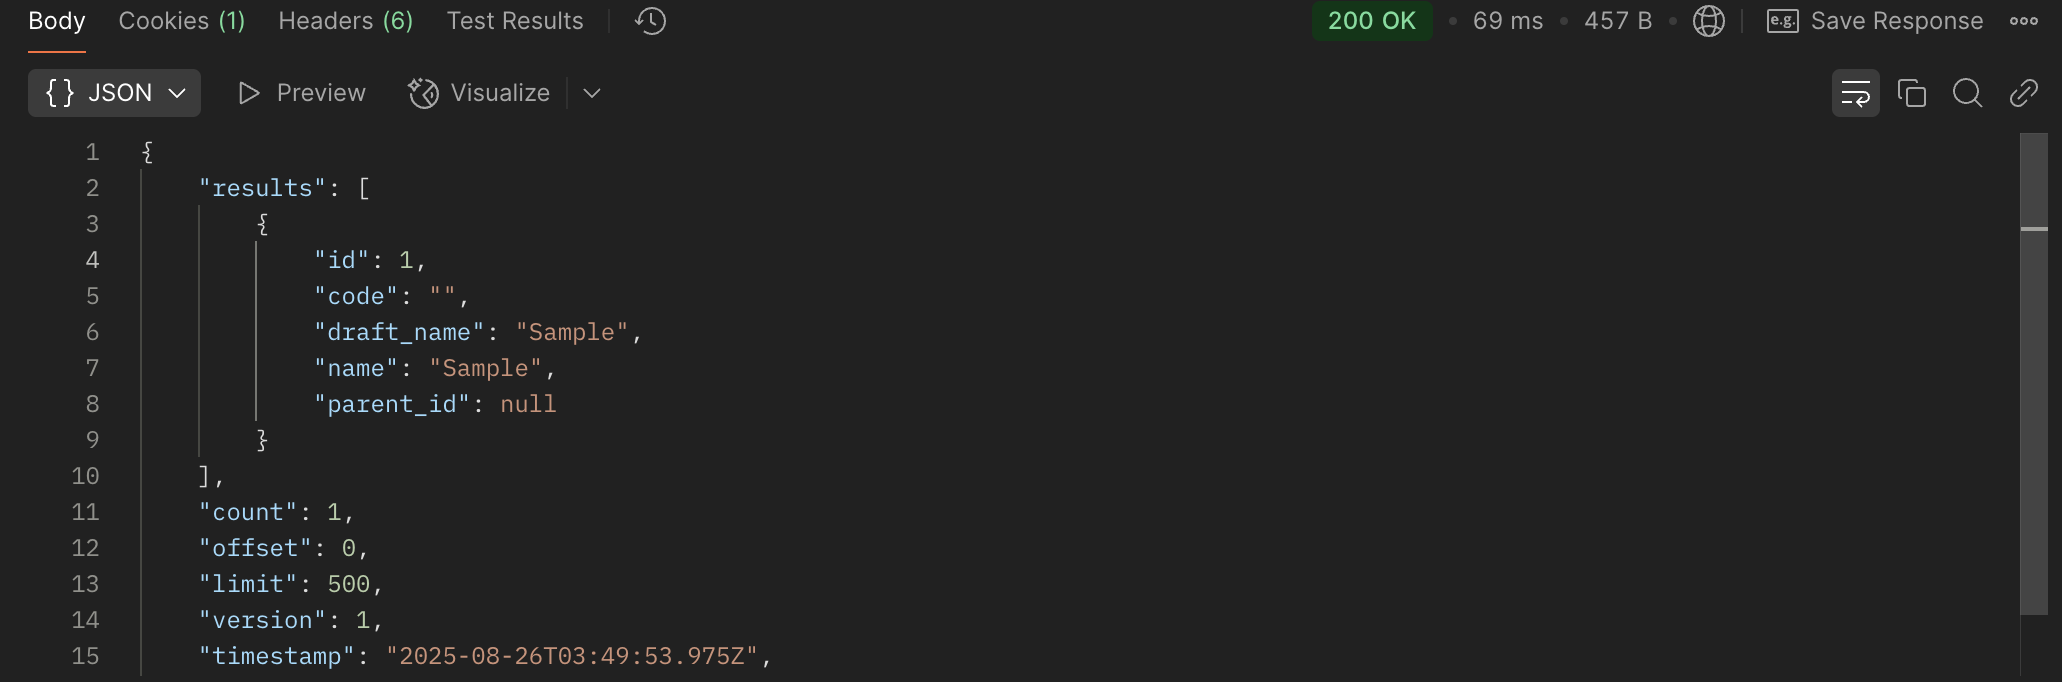
Use a REST client to test the endpoint. Example URL:
http://localhost:8069/api/area_api/1/Area?request_id={{$randomUUID}}The
request_idparameter is required and must be unique for each request (use a random 36-character UUID).
Example: Successful Response
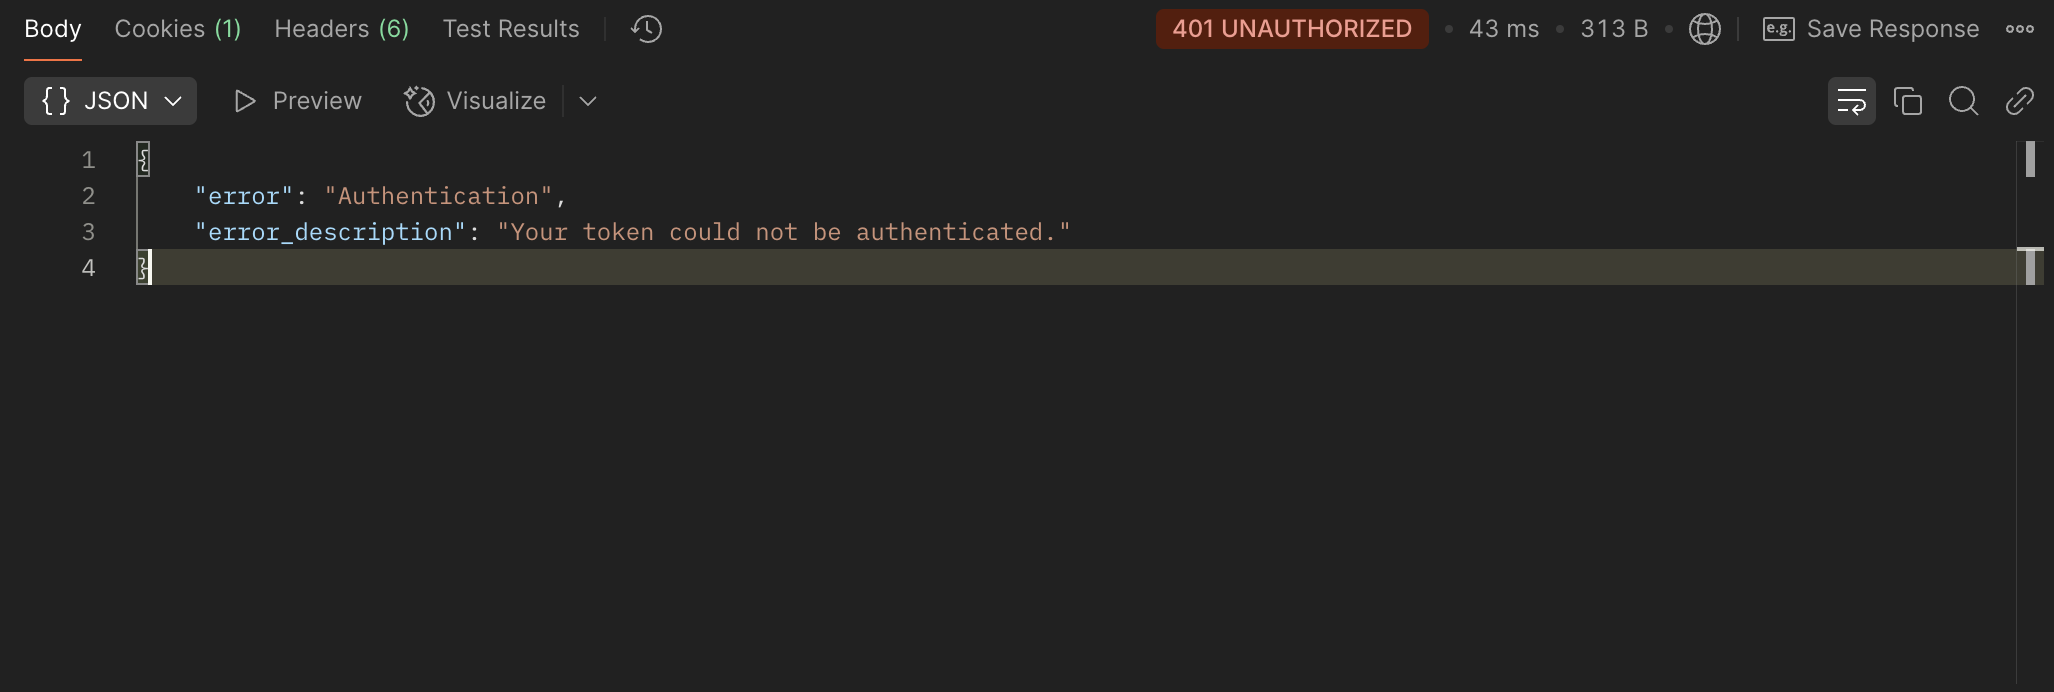
Example: Error Response
References#
For more information on extending OpenSPP modules, refer to: