Areas
Contents
Areas#
The following article guides the reader in understanding how the area module works in OpenSPP and how it can be customized by providing a sample scenario and a working example. The spp_area_base module provides the foundation for managing geographical areas in OpenSPP, which can be used in programs and other modules.
Core Models
The spp_area_base module also provides the core area management functionality with the following components:
spp.area: The main area model that manages geographical areas with hierarchical relationshipsspp.area.kind: Defines different types of areas (administrative regions, ecological zones, etc.)spp.area.import: Handles bulk import of area data from external sources
Key Features
Hierarchical area structure with parent-child relationships
Area codes for unique identification
Area types for categorization
Complete name computation showing full hierarchy path
Area level management (up to 10 levels)
Bulk import capabilities with queue job processing
Prerequisites#
Solid understanding of Odoo 17 module development, including Python, XML, and XPath.
OpenSPP Module "Area Management (Base)" or spp_area_base must be installed.
To set up OpenSPP for development, please refer to the Development Setup Guide.
Module Structure#
A typical Area module follows the standard Odoo module structure.
Here's the complete structure of the module we will build, spp_custom_area:
spp_custom_area/
├── __init__.py
├── __manifest__.py
├── models/
│   ├── __init__.py
│   └── area.py
├── views/
│   └── area_views.xml
├── security/
│   └── ir.model.access.csv
└── data/
    └── area_kind_data.xml
Step-by-Step Guide#
In a hypothetical scenario, customizing the areas module to include population data serves as a practical example. This could involve recording the population of an area such as province or district, providing valuable insights for reporting and dashboard analysis.
A working sample module for the described scenario can be accessed at the provided link.
The key steps in module development are as follows:
Create the Module Scaffold#
Start by creating a new directory for your module (e.g., spp_custom_area) and populate it
with the basic Odoo module files (__init__.py, __manifest__.py) and the directory structure shown above.
Define Module Manifest#
Create a manifest file that includes the proper dependencies and data files:
{
    "name": "OpenSPP Custom Area Extensions",
    "summary": "Custom extensions for OpenSPP Area Management",
    "category": "OpenSPP",
    "version": "17.0.1.0.0",
    "author": "Your Organization",
    "website": "https://your-website.com",
    "license": "LGPL-3",
    "depends": [
        "spp_area_base",
    ],
    "data": [
        "security/ir.model.access.csv", # Optional (Add if you need to add new models)
        "views/area_views.xml",
        "data/area_kind_data.xml", # Optional (Add if you need to add new area types)
    ],
    "application": False,
    "installable": True,
    "auto_install": False,
}
Extend the Area Model#
Create a Python file named area.py that extends the spp.area model and add it to models/__init__.py:
from odoo import fields, models

class SPPArea(models.Model):
    _inherit = "spp.area"

    # Population field following OpenSPP naming conventions
    area_population = fields.Integer(
        string="Population",
        help="Total population of this area"
    )

    # Additional custom fields
    area_population_year = fields.Integer(
        string="Population Year",
        help="Year when population data was collected"
    )

    area_population_source = fields.Selection([
        ("census", "Census"),
        ("survey", "Survey"),
        ("estimate", "Estimate"),
        ("other", "Other")
    ], string="Population Source", default="census")
Create View Extensions#
Create a new file called views/area_views.xml in the module and add it to the manifest file:
<odoo>
    <record id="view_spparea_form_custom" model="ir.ui.view">
        <field name="name">view_spparea_form_custom</field>
        <field name="model">spp.area</field>
        <field name="inherit_id" ref="spp_area_base.view_spparea_form" />
        <field name="arch" type="xml">
            <xpath expr="//div[@name='details']" position="inside">
                <div class="col-4 o_setting_box" name="population">
                    <div class="o_setting_left_pane">
                    </div>
                    <div class="o_setting_right_pane">
                        <label for="area_population" string="Population" />
                        <div>
                        </div>
                        <field name="area_population" />
                    </div>
                </div>
                <div class="col-4 o_setting_box" name="population_year">
                    <div class="o_setting_left_pane">
                    </div>
                    <div class="o_setting_right_pane">
                        <label for="area_population_year" string="Population Year" />
                        <div>
                        </div>
                        <field name="area_population_year" />
                    </div>
                </div>
                <div class="col-4 o_setting_box" name="population_source">
                    <div class="o_setting_left_pane">
                    </div>
                    <div class="o_setting_right_pane">
                        <label for="area_population_source" string="Population Source" />
                        <div>
                        </div>
                        <field name="area_population_source" />
                    </div>
                </div>
            </xpath>
        </field>
    </record>

    <!-- Extend tree view to show population -->
    <record id="view_spparea_tree_custom" model="ir.ui.view">
        <field name="name">view_spparea_tree_custom</field>
        <field name="model">spp.area</field>
        <field name="inherit_id" ref="spp_area_base.view_spparea_tree" />
        <field name="arch" type="xml">
            <xpath expr="//field[@name='kind']" position="after">
                <field name="area_population" string="Population" />
            </xpath>
        </field>
    </record>
</odoo>
Add Security Access (Optional)#
If you introduce new models, add access rights. For simple field additions, this is not required. Example:
id,name,model_id:id,group_id:id,perm_read,perm_write,perm_create,perm_unlink
access_spp_your_custom_model_registrar,spp.your.custom.model.registrar,spp_area_custom.model_your_custom_model,g2p_registry_base.group_g2p_registrar,1,1,1,0
access_spp_your_custom_model_admin,spp.your.custom.model.admin,spp_area_custom.model_your_custom_model,g2p_registry_base.group_g2p_admin,1,1,1,1
g2p_registry_base.group_g2p_registrarfor Registrar Accessg2p_registry_base.group_g2p_adminfor Admin Access.
Add Custom Area Types (Optional)#
Create data/area_kind_data.xml to add custom area types:
<odoo>
    <data noupdate="1">
        <record id="area_kind_population_zone" model="spp.area.kind">
            <field name="name">Population Zone</field>
        </record>
    </data>
</odoo>
Adding Computed Fields, Constrains, and Validations (Optional)#
On your models/area.py you can add computed fields, constrains, and validations:
First, add the necessary imports:
from odoo import api, fields, models
from odoo.exceptions import ValidationError
    area_population_density = fields.Float(
        string="Population Density",
        compute="_compute_population_density",
        store=True,
        help="Population per square kilometer"
    )

    @api.depends("area_population", "area_sqkm")
    def _compute_population_density(self):
        for record in self:
            if record.area_sqkm and record.area_sqkm > 0:
                record.area_population_density = record.area_population / record.area_sqkm
            else:
                record.area_population_density = 0.0

    @api.constrains("area_population")
    def _check_population_positive(self):
        for record in self:
            if record.area_population and record.area_population < 0:
                raise ValidationError("Population cannot be negative.")

    @api.constrains("area_population_year")
    def _check_population_year(self):
        current_year = fields.Date.today().year
        for record in self:
            if record.area_population_year:
                if record.area_population_year > current_year:
                    raise ValidationError("Population year cannot be in the future.")
Then add the custom computed field to the area_views.xml file
Install and Test#
Install or upgrade the module through the Apps menu.
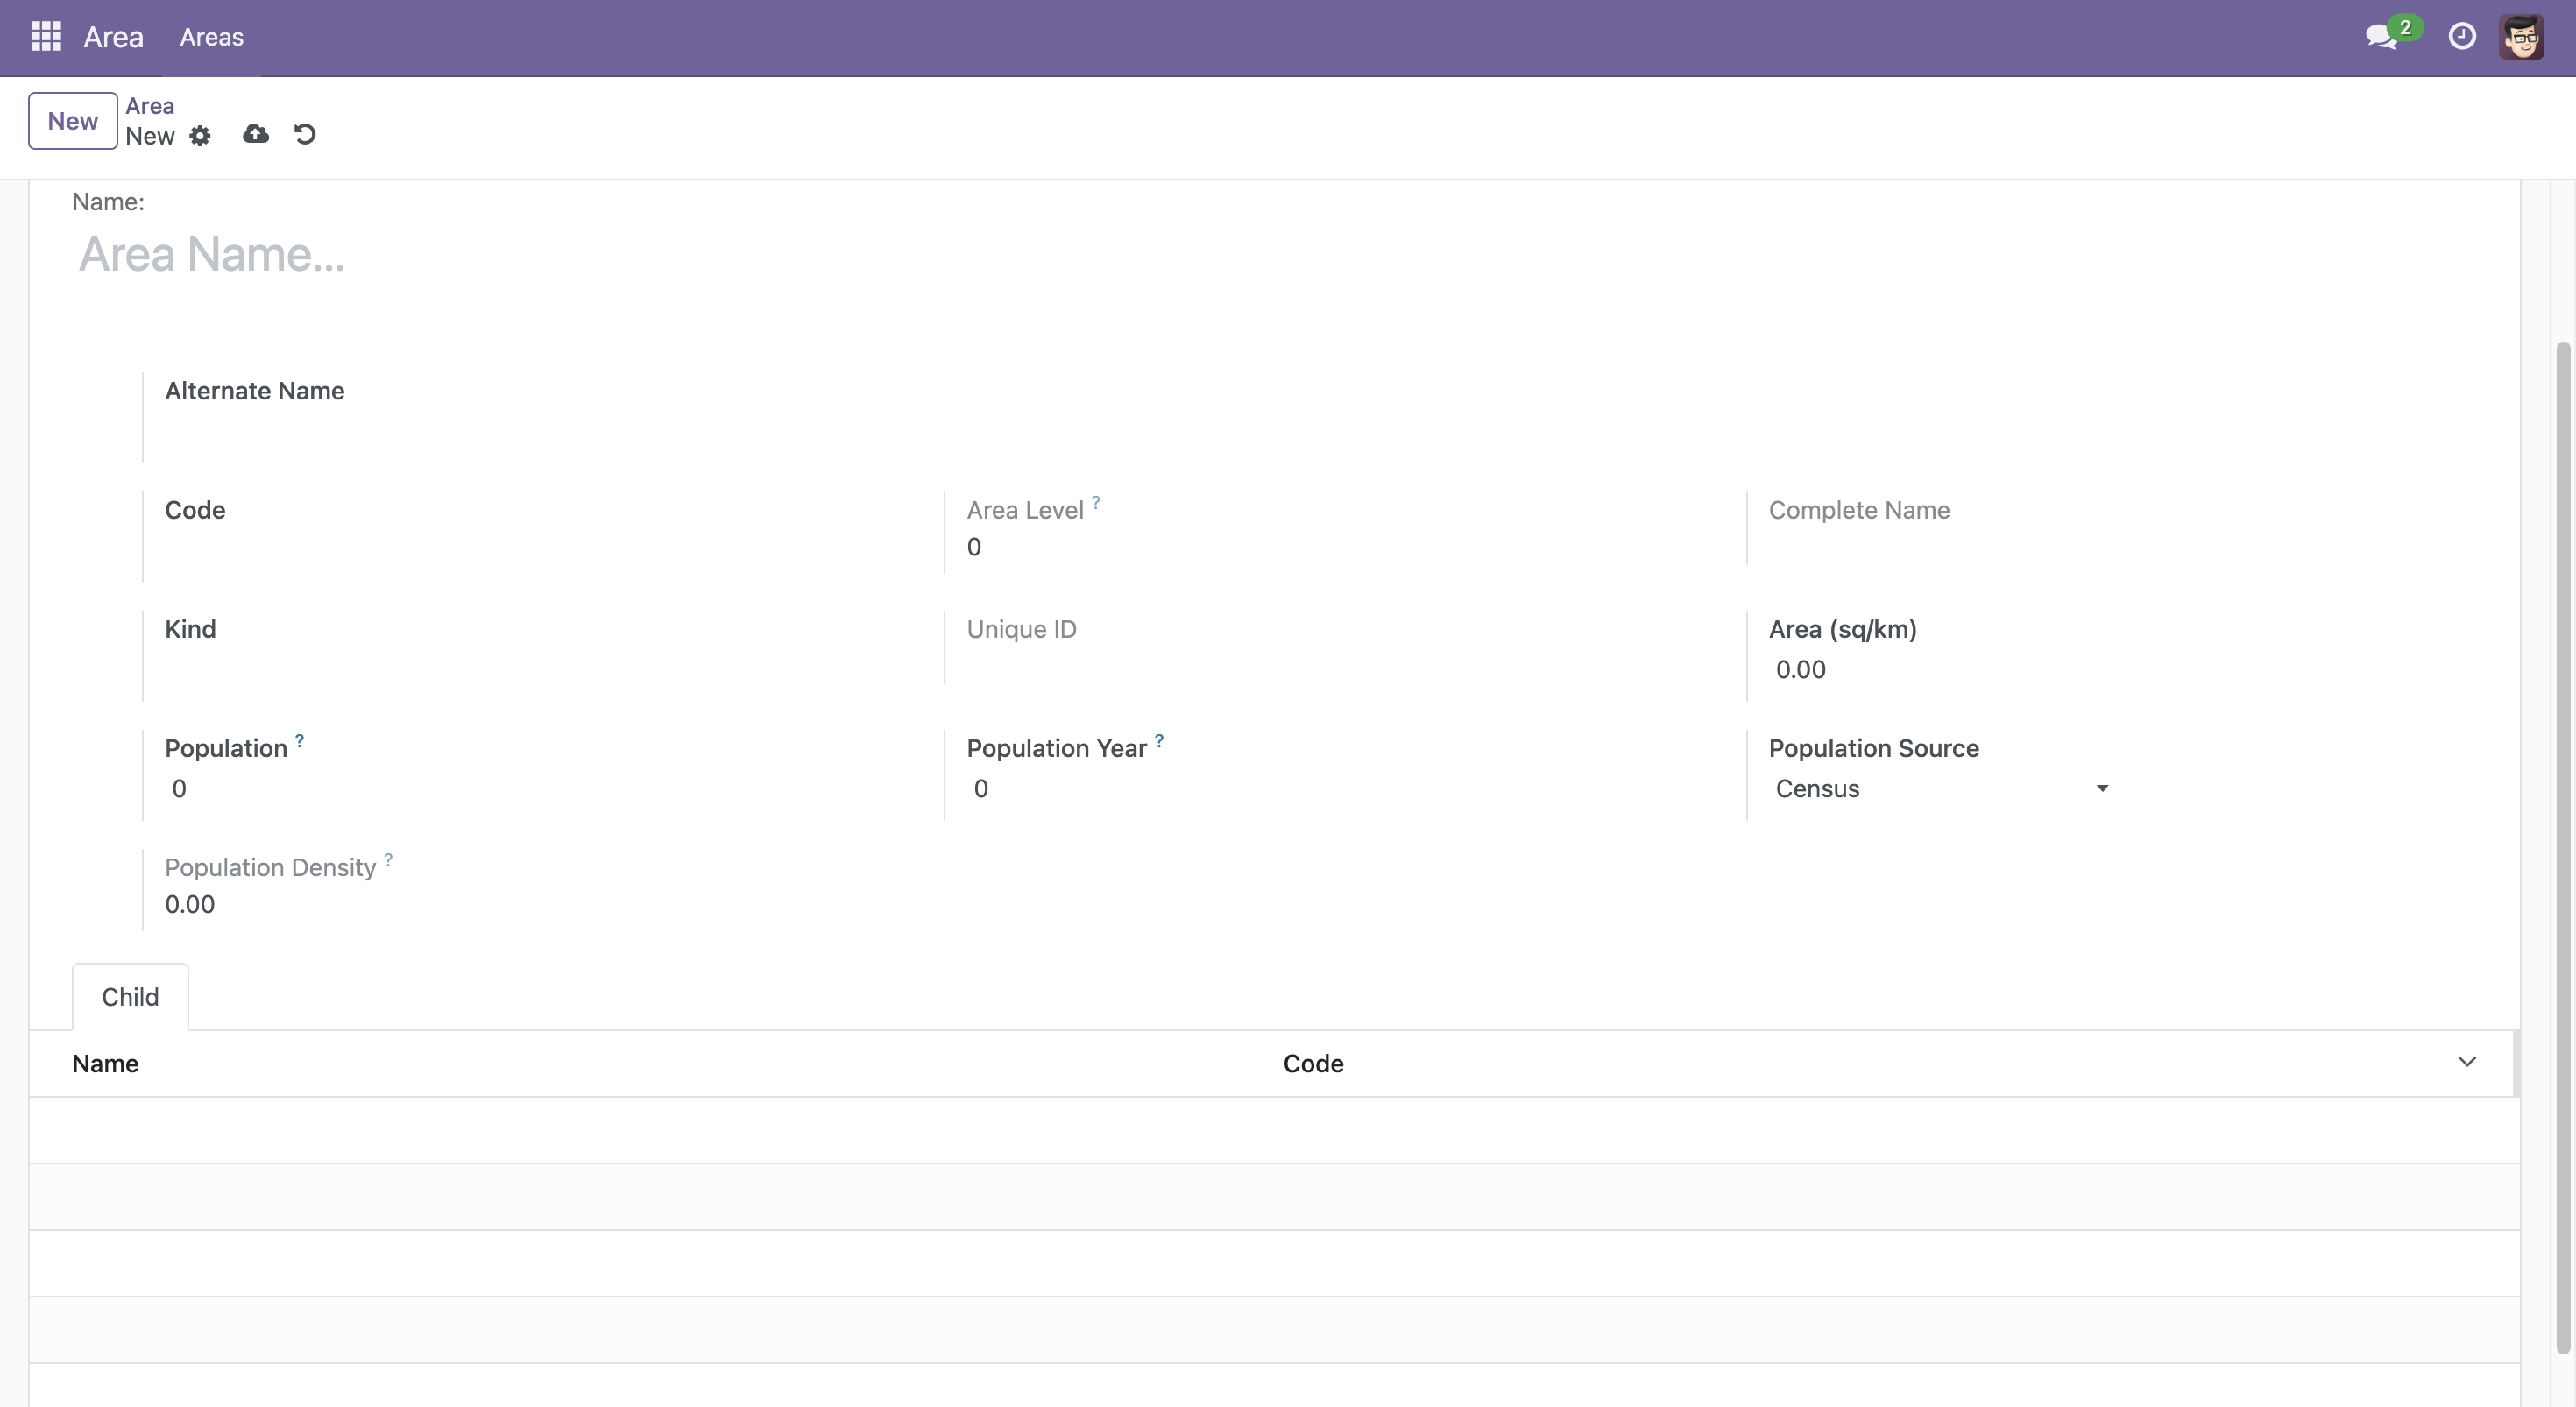
Test the new fields in the area forms and lists
The following screenshot shows the added population fields in the newly developed module.
References#
For more information on extending OpenSPP modules, refer to: