Allocate funds
Contents
Allocate funds#
This tutorial covers the step-by-step procedure on how to allocate funds for a project.
Prerequisites#
To allocate funds for a project, you need to:
Have a System Admin or the appropriate program user role that enables you to create programs and allocate funds. Learn more in this guide: User access.
Have existing individual records in your registry, either by creating records manually or importing records into OpenSPP. Learn more in this guide: Import and export registrant data or Register individual.
An existing Program. Learn more in this guide: Create program.
Objective#
After completing this guide, you will understand how to allocate funds to a program, including setting reference numbers, specifying amounts, and scheduling fund postings. You will be able to navigate the Program Funds page and ensure funds are allocated correctly for entitlements and program cycles.
Process#
Allocate funds to selected program#
Cash entitlements require allocated funds in order to be successfully approved and it is therefore a prerequisite to configure the fund allocation for a selected program before approving entitlements.
After clicking Programs, select Accounting from the toolbar, and select Program Funds from the drop-down list.
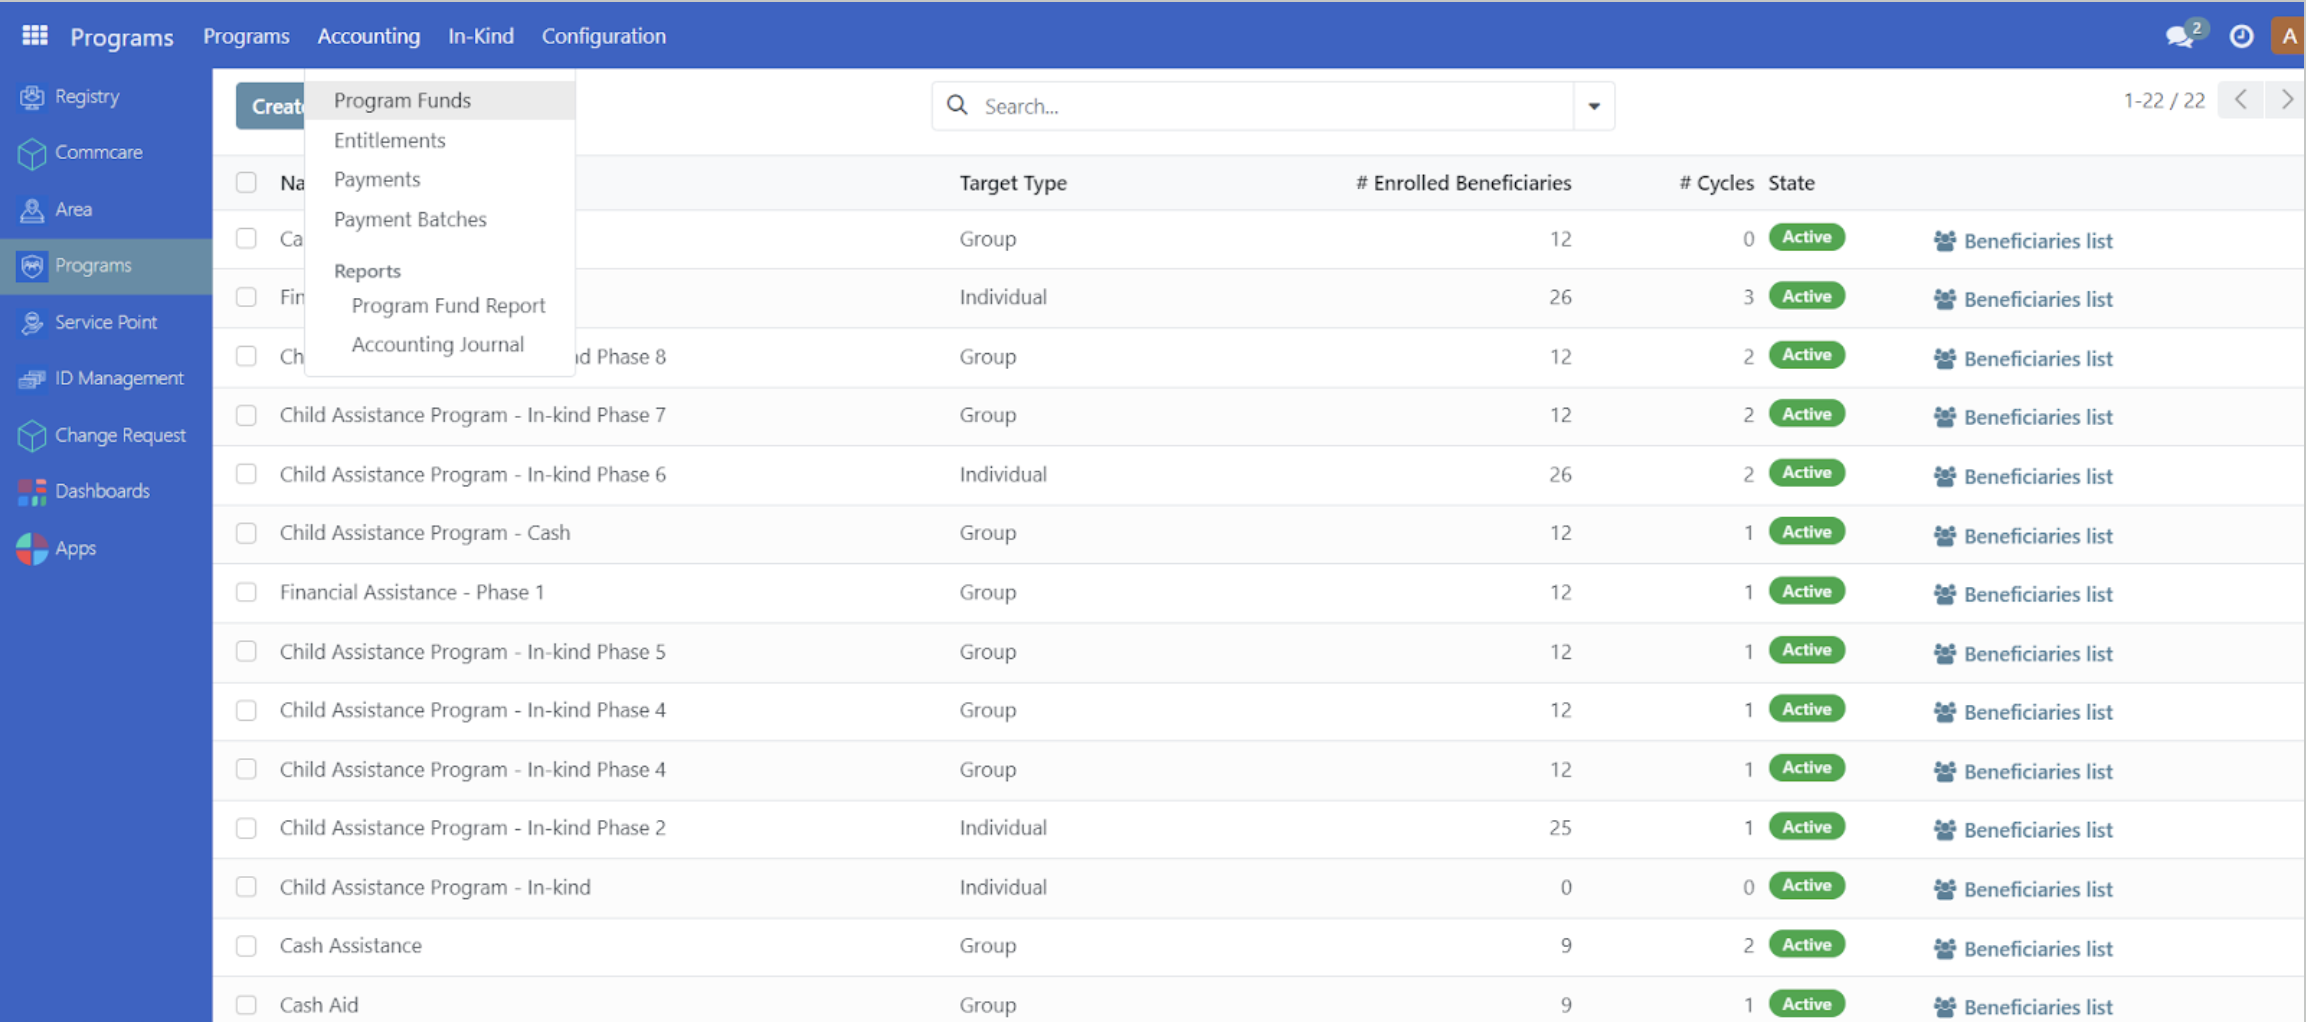
You will be directed to the Program Funds page to set up the program fund.
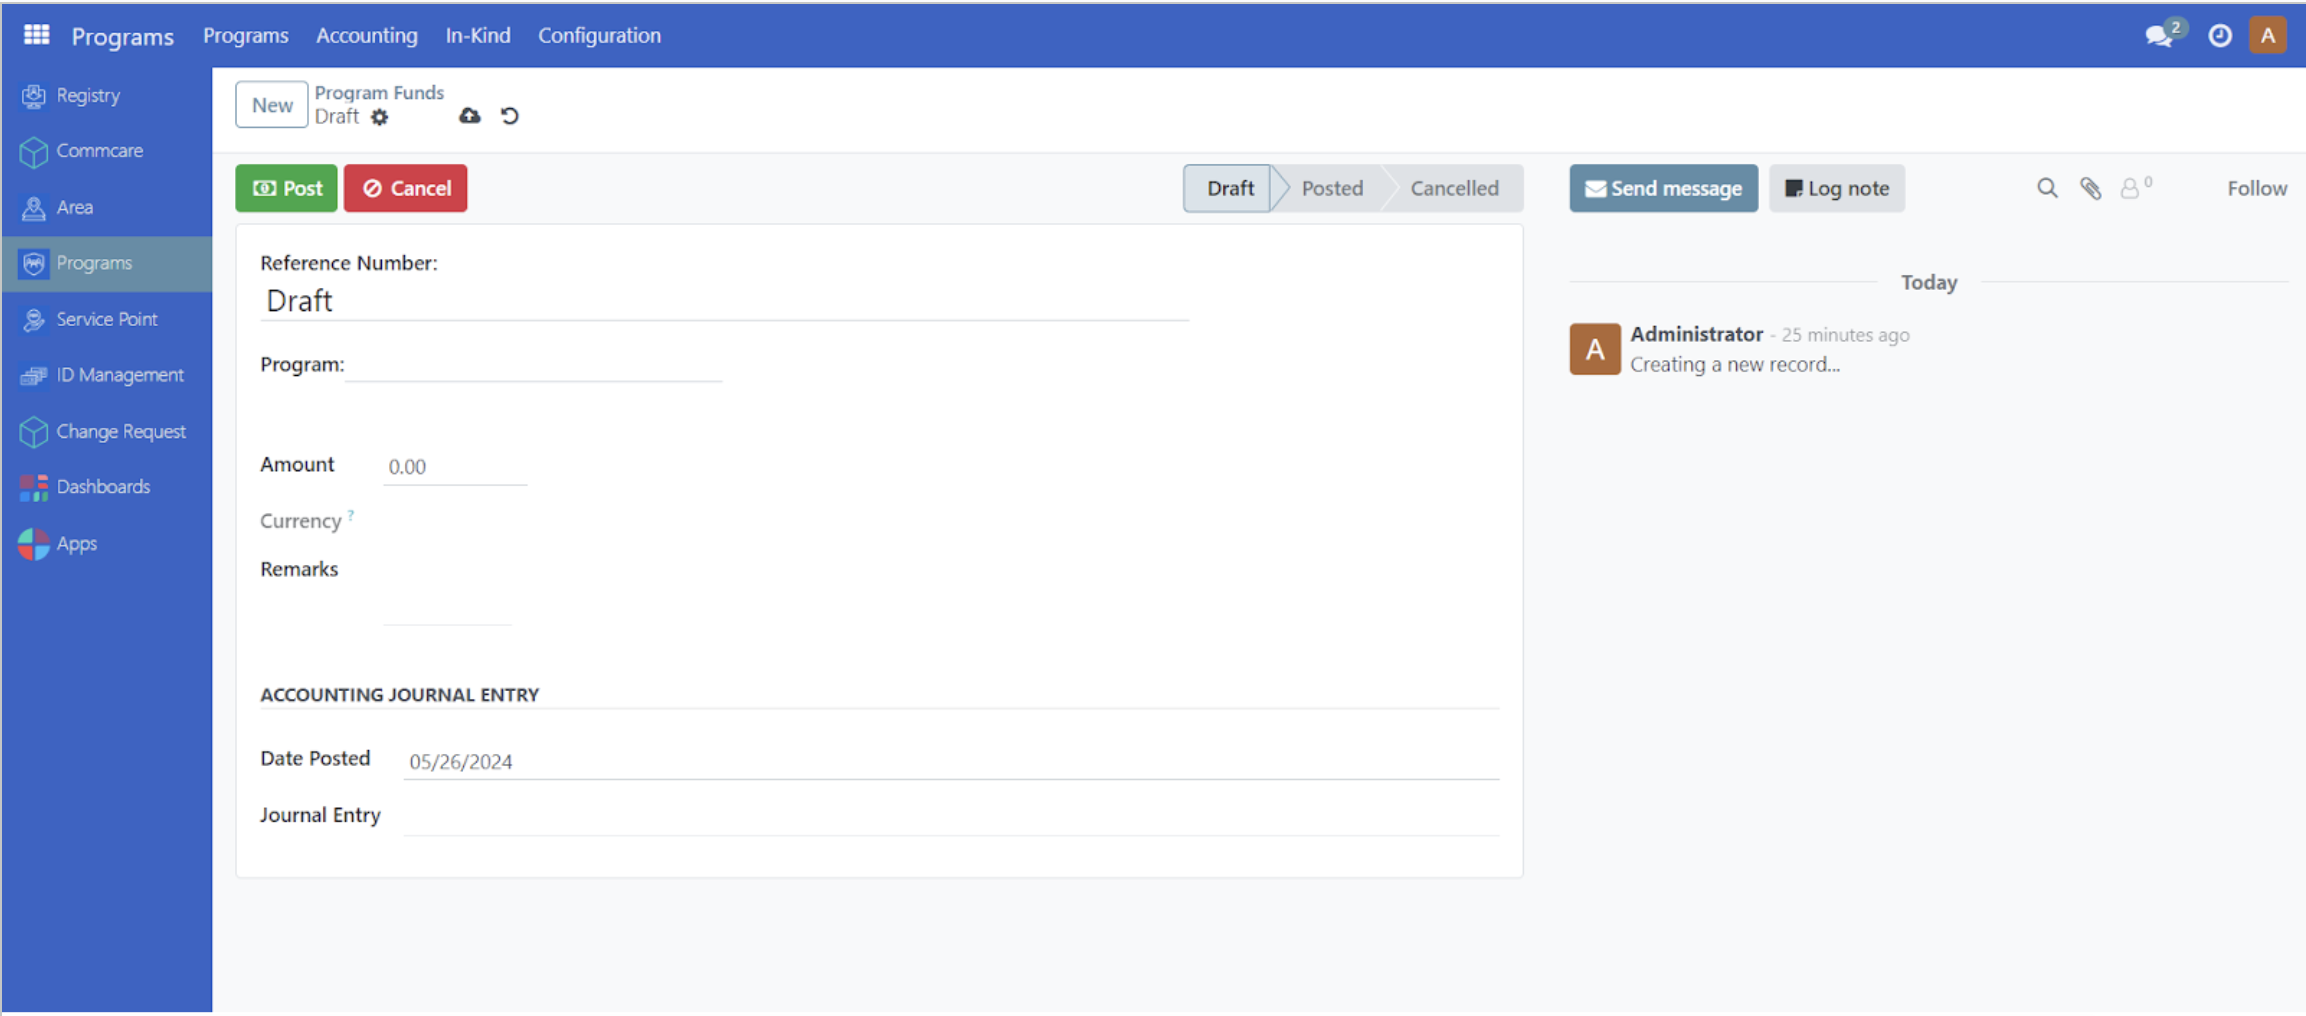
When available, a reference number may be inputted manually into the Reference Number field. Otherwise, leaving this field empty will automatically set a reference number upon fund posting. From the Program dropdown, you may select by clicking on an existing program. Input the budget amount in the Amount input field. Click Post to confirm the fund posting.
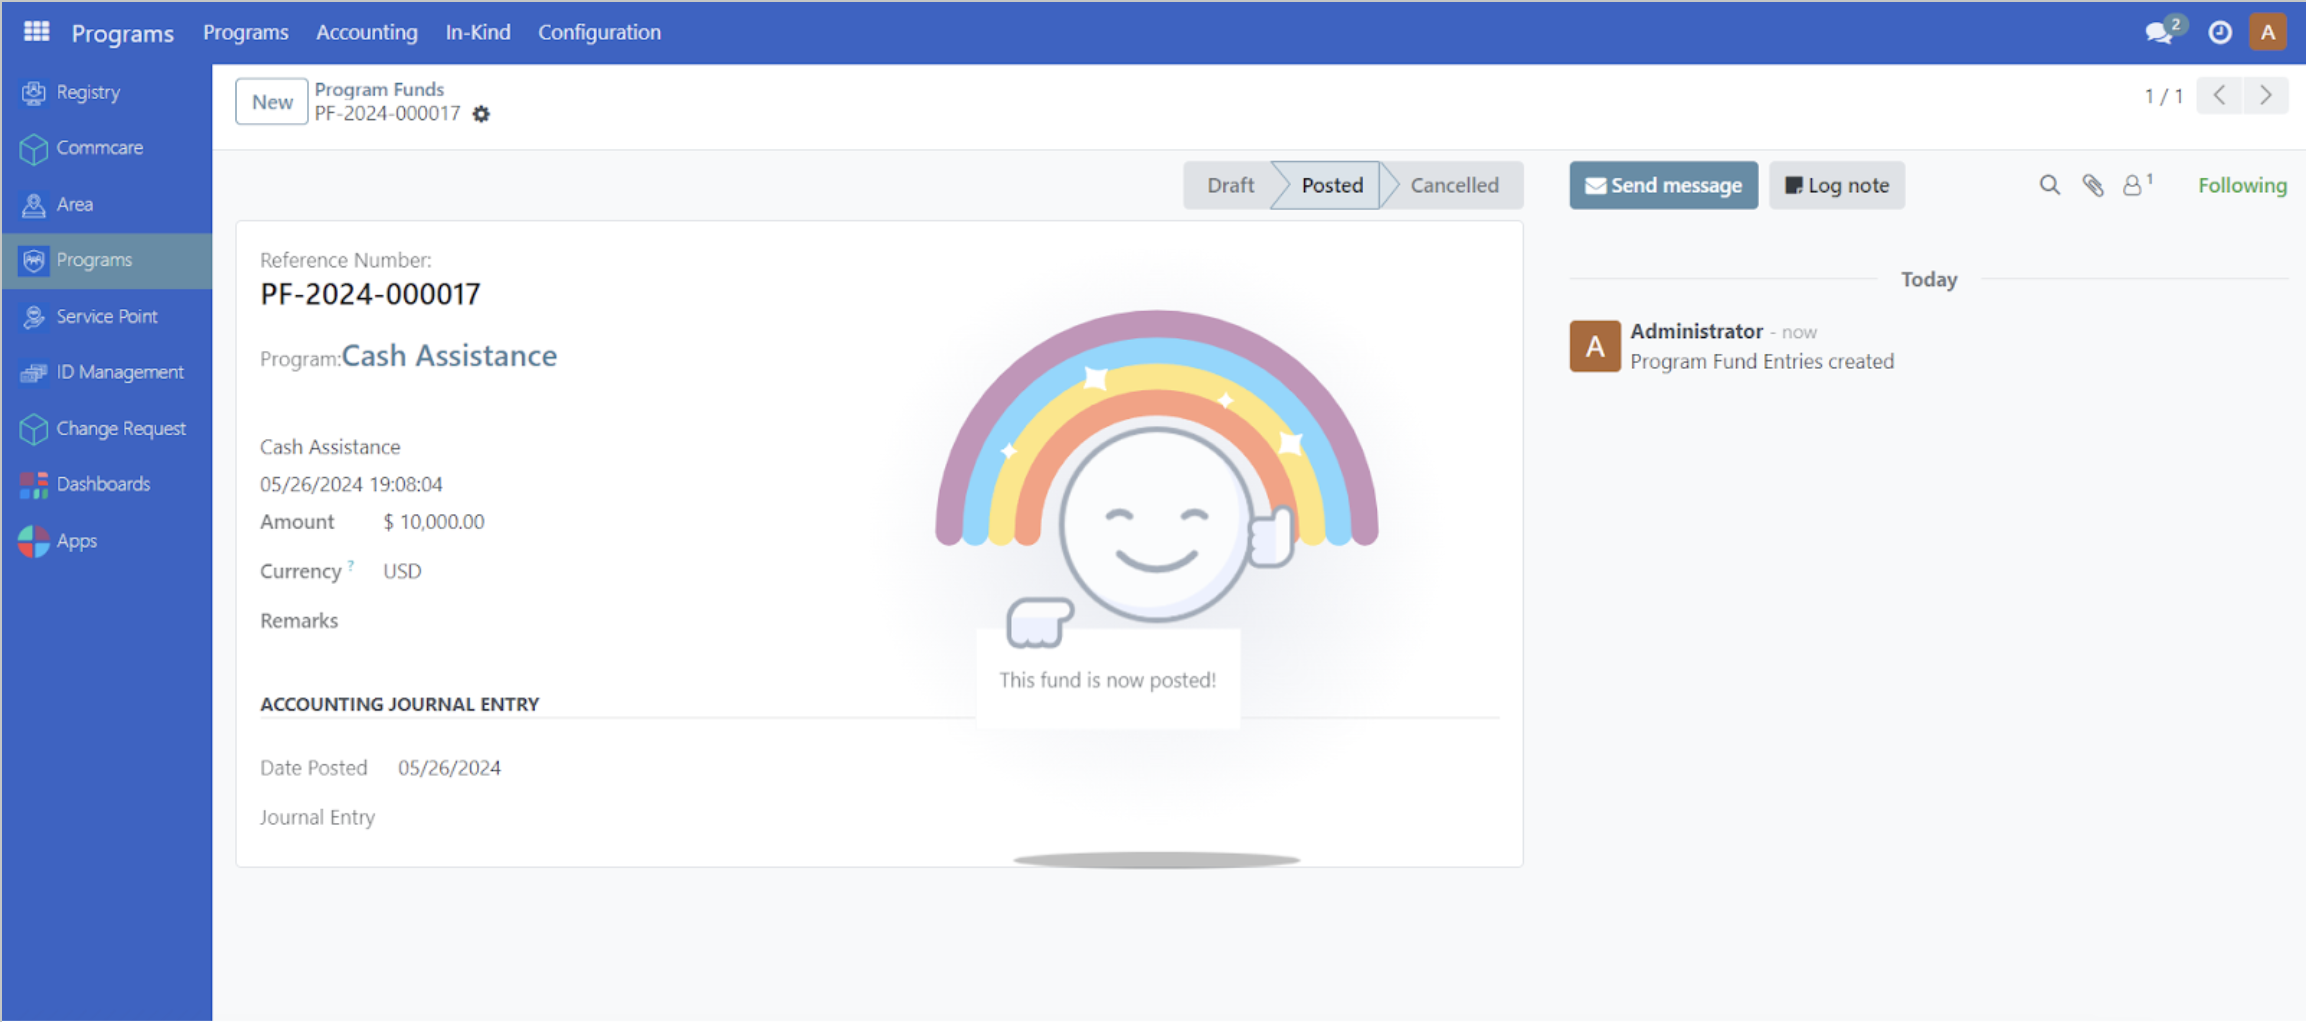
A pop-up message should appear, verifying that the funds have been posted.
You may also modify the Date Posted field to post the funding on a later date. Click on Date Posted and select a future date. Skip clicking on the Post button, then click on Save manually button. The funds will be posted on the desired date inputted. Please note, clicking on the Post button automatically sets the Date Posted field to the current date.